
Kniphofia, commonly known as red hot poker, is one of the most rewarding perennials you can put in a sunny border. Plant it in well-drained soil, full sun, and give it a full season to establish, and it will reward you with towering flame-colored spikes from late spring through autumn with almost no fuss. It handles USDA zones 5b through 9, tolerates drought once established, and largely looks after itself as long as the soil never sits waterlogged. This guide walks you through every step, from picking the right cultivar to keeping the clump healthy for years.
How to Grow Kniphofia: Complete Guide & Year-Round Care Calendar

Marcus Holloway
21 Jul 2026
What Kniphofia Actually Is (and Who This Guide Is For)
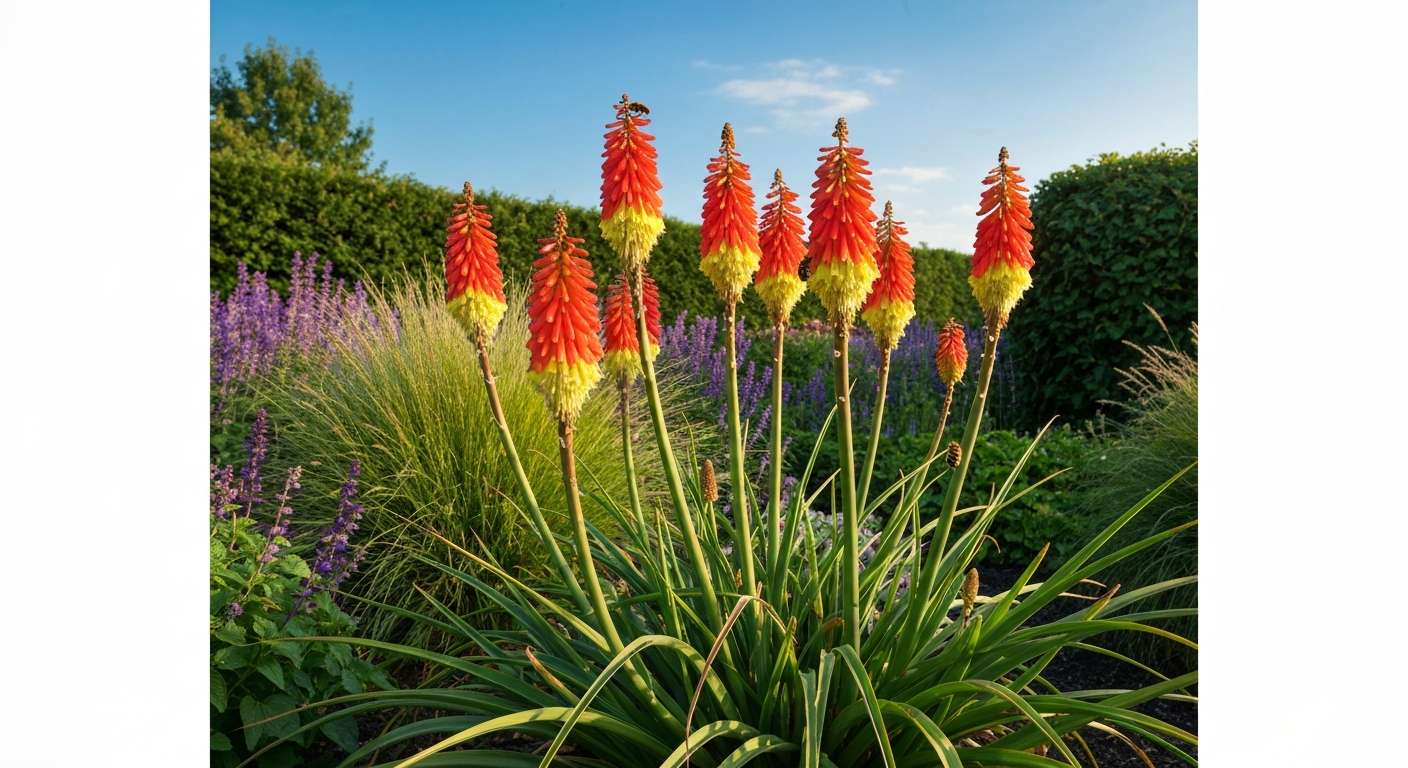
Kniphofia is a genus of about 70 species native to sub-Saharan Africa, mostly South Africa. The plants form grassy clumps of strap-like leaves and send up stiff, upright flower spikes topped with dense, tubular florets that open from the bottom upward. The classic color is a graduated flame of red at the top fading to yellow at the base, but modern cultivars span cream, pure yellow, orange, and coral. The common name 'red hot poker' describes this perfectly. Most of what you'll buy at a nursery is a hybrid cultivar rather than a straight species, which matters when you're checking hardiness and bloom times.
This guide is written for home gardeners at every level. If you've never grown Kniphofia before, you'll find the step-by-step planting checklist and care calendar easy to follow. If you're more experienced and wondering why your established clump has stopped flowering, or you want to try propagating by division, the later sections go into that detail. The genus sits comfortably alongside other architectural perennials like Hemerocallis (daylilies) and Heuchera in a sunny mixed border, and the same core principles of drainage, sun, and appropriate zone selection apply across all of them.
Species vs. Cultivars and How to Check Hardiness
The species you're most likely to encounter is Kniphofia uvaria, which is the parent of most garden hybrids. It's a tough, reliable plant, but many modern cultivars have been bred from crosses with other species and offer improvements in compactness, flower color, or cold tolerance. For practical purposes in a home garden, you're almost always choosing between named cultivars rather than straight species, and that's fine. What matters is checking that the cultivar you pick is rated for your climate zone.
Kniphofia as a group performs reliably in USDA zones 5b through 9, which covers the vast majority of the continental United States and much of coastal Europe. In the UK, the RHS uses its own H-rating system: most cultivars carry an H4 or H5 rating, meaning they'll survive temperatures down to around -10°C to -15°C (14°F to 5°F). When you're shopping online or at a nursery, always check the specific cultivar's listed hardiness rather than assuming that all Kniphofia are equally tough. Some of the more exotic coral and cream selections can be slightly less cold-hardy than the classic orange-red types.
If you're gardening in zone 5b, look for cultivars that have been trialed in cold climates. The Chicago Botanic Garden ran a multi-year trial from 2020 to 2024 evaluating 28 cultivars, and the results are genuinely useful for anyone in the upper Midwest or similar climates. Checking trial results from a botanical institution is far more reliable than relying on catalog descriptions alone. For warmer gardens in zones 8 and 9, you have more flexibility, but you'll want to prioritize cultivars with good heat tolerance and later bloom times to extend the season.
Recommended Varieties: What to Pick for Your Size, Color, and Climate
The range of available cultivars has expanded enormously over the past decade. Here's a practical selection drawn from the Chicago Botanic Garden trial results and widely available nursery stock, broken down by height and key characteristics to help you match a plant to your space.
| Cultivar | Height | Color | Best For |
|---|---|---|---|
| 'Backdraft' | ~24 in | Orange-red | Small borders, compact beds |
| 'Joker's Wild' | 36 in | Bicolor red-yellow | Mid-border, zones 5b-9 |
| 'Jackpot' | 45 in | Orange | Mid to back of border |
| 'Gold Rush' | 48 in | Golden yellow | Bold accent, zones 5b-9 |
| 'Lady Luck' | 52 in | Cream-yellow | Cottage or prairie style |
| 'Flamenco' | 62 in | Mixed red, orange, yellow | Back of border, dramatic effect |
| 'Bees' Sunset' | ~48 in | Warm orange | Long bloom season |
For containers or small gardens, reach for compact cultivars in the 18 to 24 inch range. 'Backdraft' works well here. For a classic cottage border or prairie-style planting, the taller selections like 'Flamenco' (62 in) and 'Lady Luck' (52 in) create genuine drama without needing staking. If you're in a colder zone and want a safe bet for hardiness, stick to the bicolor red-yellow types, as these tend to be the most reliably cold-tolerant based on trial data. The RHS cultivar 'Jonathan' is a good mid-height option at 1 to 1.5 meters with solid hardiness credentials. RHS Plant Profile for Kniphofia 'Jonathan' lists height 1–1.5 m, prefers moist but well‑drained soil, and gives it an H5 hardiness rating.
Picking the Right Spot: Light, Exposure, and Placement
Kniphofia wants full sun. That means a minimum of six hours of direct sunlight per day, and more is better. RHS guidance is clear that most cultivars need full sun and free-draining soil, though a handful of the lighter-colored, later-blooming types will tolerate light shade for part of the day. In practice, if you put a red hot poker in too much shade, you'll get lush foliage and almost no flowers. I've seen this happen in gardens where enthusiastic planting has placed Kniphofia behind a fast-growing shrub that gradually cast shade. Don't let it happen to you.
Exposure matters as well. Kniphofia comes from open grasslands and cliff edges in southern Africa, so it's naturally comfortable in exposed, windswept spots. That said, very tall cultivars like 'Flamenco' can have their spikes battered in extremely exposed coastal sites. In colder zones, a south or southwest-facing wall or fence provides a useful microclimate that raises effective hardiness by half a zone or more. If you're in zone 5b or 6, placing plants against a warm wall is a sensible precaution, especially with any cultivars that sit at the edge of your hardiness range.
In terms of landscape placement, Kniphofia works best in the middle to back of a mixed border, depending on height. The upright, architectural form pairs beautifully with ornamental grasses, salvias, achillea, and echinops. It's also a great companion for other South African plants like crocosmia and agapanthus, which share similar drainage and sun requirements. For tips on caring for a popular vining houseplant, see how to grow Hoyas. If you grow Hemerocallis (daylilies) in your garden, Kniphofia makes an excellent neighbor, overlapping in bloom season and complementing each other's color palette.
Soil Requirements and Preparation
The single most important thing you can do for Kniphofia is get the drainage right. These plants will tolerate quite poor soil as long as water doesn't sit around the roots. Waterlogged winter conditions are the number one killer, particularly in clay-heavy soils in zones 5 and 6. The RHS and Clemson Extension both emphasize the same point: fertile, moist but well-drained soil is ideal, and heavy soils must be improved before planting.
For soil pH, Kniphofia is fairly tolerant but performs best in a slightly acid to neutral range of about 6.0 to 7.0. This is achievable in most garden soils without amendment. If your soil tests below 6.0, a light application of garden lime worked into the top 20 to 30 cm (8 to 12 in) will bring it into range. If it's above 7.5, work in some composted organic matter to lower it gradually.
For clay soils, the preparation step is worth taking seriously. Dig the planting area to about 30 to 40 cm (12 to 16 in) depth and incorporate a generous amount of horticultural grit, roughly one part grit to two parts existing soil by volume, along with some well-rotted compost or organic matter for fertility. This improves both drainage and soil structure. On sandy or loamy soils, add compost alone to boost fertility and moisture retention, but you won't need grit. If your garden has genuinely impermeable clay with no realistic prospect of improving drainage, consider a raised bed instead. Even raising the planting level by 20 to 30 cm can be transformative.
When and How to Plant: Timing, Spacing, and a Step-by-Step Checklist
Spring is the standard planting time, and for good reason. Getting Kniphofia in the ground as the soil warms in mid-spring gives plants a full growing season to establish their root systems before their first winter. RHS guidance explicitly recommends spring planting, with the caveat that early autumn planting is possible in mild climates (zones 7 and above) where the ground stays workable and warm enough for root establishment before hard frost. In zones 5 and 6, stick to spring. I've tried autumn planting at the edge of hardiness range and lost plants; spring is simply safer.
Spacing should be based on the mature spread of the cultivar you're planting, using the spread as your minimum gap between plants. The Chicago Botanic trial lists cultivar widths ranging from around 22 inches ('Backdraft') to 38 inches ('Bees' Sunset'). As a rule of thumb, space plants roughly one mature spread apart, center to center. This gives adequate air circulation and room for the clump to expand over two to three seasons without crowding. It looks sparse at first. Resist the urge to plant closer together.
Step-by-Step Planting Checklist
- Choose your site and confirm it receives at least 6 hours of direct sun daily.
- Test or assess soil drainage: pour a bucket of water into the planting hole and check it drains within 30 minutes. If not, improve drainage with grit or consider a raised bed.
- Dig the planting area to 30 to 40 cm (12 to 16 in) depth and incorporate grit and compost as needed for your soil type.
- Dig individual planting holes slightly wider than the root ball and at the same depth the plant was growing in its pot.
- For pot-grown plants, set the crown at the same depth as in the container. For bare-root or side-shoot types, place the top shoot just proud of the soil surface.
- Backfill with improved soil, firming gently to eliminate air pockets but avoiding heavy compaction.
- Water in thoroughly after planting to settle the roots, even if rain is forecast.
- Apply a light mulch (2 to 5 cm / 1 to 2 in) around the plant, keeping it clear of the crown by at least 10 cm (4 in).
- Mark the planting spot clearly, as the early foliage can be unremarkable and easy to accidentally disturb.
Light, Watering, Mulching, and Fertilizing: The Routine
Light
Full sun remains the priority throughout the plant's life. If neighboring plants are encroaching and reducing light exposure, prune or relocate the competition. Kniphofia will tell you when it's not getting enough light: foliage becomes floppy, growth is lush but sparse on flowering spikes, and bloom numbers drop significantly.
Watering
Once established, Kniphofia is genuinely drought-tolerant and needs watering only during prolonged dry spells. In the first season after planting, water thoroughly every one to two weeks if rain is absent, aiming to wet the soil to a depth of at least 20 to 30 cm (8 to 12 in) rather than giving frequent shallow sprinkles. Deep, infrequent watering encourages the roots to grow downward, which is exactly what you want for long-term drought resilience. In containers, you'll need to water more regularly, checking soil moisture every two to three days in warm weather.
Mulching
Mulching around Kniphofia serves two purposes: it conserves soil moisture during summer and it provides some insulation for the crown in colder zones. The important rule is always to blank" rel="noopener noreferrer">mulch around the plant, not over it. A 5 to 8 cm (2 to 3 in) layer of composted bark or garden compost placed in a ring around the crown, kept at least 10 to 15 cm (4 to 6 in) clear of the central growing point, is ideal. Avoid mulches that hold excessive moisture, like fresh wood chips piled directly against the crown, as this can cause crown rot, especially over winter.
Fertilizing
Kniphofia doesn't need heavy feeding. In fertile garden soil, a single application of a balanced granular fertilizer (something like a 10-10-10 or similar) worked into the soil around the plant in early spring is usually sufficient for the whole season. If you're growing in containers or particularly poor soil, a liquid feed high in potassium every two to three weeks during the growing season will support flowering without promoting excessive leafy growth. Don't reach for high-nitrogen feeds expecting more blooms; all you'll get is bigger leaves.
Seasonal Maintenance: Deadheading, Pruning, and Dividing
Deadheading spent flower spikes is optional but tidies the plant and can encourage additional flowering in cultivars with a long bloom season. Cut the spent spike at the base with clean, sharp secateurs. Don't leave stumps, as these can trap moisture and invite disease.
Leave the foliage standing through winter. The leaves help protect the crown from frost, and in colder zones (5 and 6), tying the leaves loosely together toward the center of the crown in late autumn is a practical technique recommended by both the Chicago Botanic trial and the RHS. The idea is that the tied leaves form a kind of thatch over the growing point, shedding rain and reducing the risk of water sitting in the crown and freezing. Cut the old foliage back to the base in early spring when new growth is just starting to emerge.
Division is not something Kniphofia demands routinely. With good drainage, a clump can go many years without needing intervention. If the center of the clump starts to look congested, woody, or is producing fewer flowers than before, that's the time to divide. Do it in spring, lifting the entire clump and using a sharp spade or back-to-back forks to split it into sections, each with several healthy shoots and a good root system. Replant the divisions at the same depth and water well. Avoid dividing in autumn in cold zones; the plants need a full growing season to re-establish before winter.
Winter Protection in Cold Zones
In zones 5b and 6, winter protection is worth the effort. Beyond tying the leaves as described above, you can add a loose mulch of straw or dry bracken around (not over) the crown after the first hard frost, removing it in early spring before new growth emerges. The goal is to moderate the freeze-thaw cycle around the crown, not to keep it warm overall. In zone 7 and above, most established cultivars will overwinter without any special treatment. Container plants should be moved to a sheltered, frost-free position (an unheated greenhouse or cold garage is fine) in zones 5 and 6, or at minimum have the pot wrapped in horticultural fleece.
Propagation: Division, Seed, and Containers
Division is the fastest and most reliable propagation method, and it's what you should default to unless you specifically want to experiment with seed. Spring divisions from established clumps will typically flower in their first or second season. Seed propagation is possible: sow fresh seed in a free-draining seed compost, keep at around 20°C (68°F), and expect germination in two to four weeks. The honest caveat is that hybrid cultivars won't breed true from seed, so the seedlings may look quite different from the parent, and you'll be waiting approximately three years for the first flowers. If you're growing a straight species and want to raise a batch of plants from seed cheaply, go for it. Otherwise, divide.
For containers, choose a compact or dwarf cultivar and a pot at least 20 to 23 cm (8 to 9 in) in diameter. The RHS recommends using a peat-free, loam-based multipurpose compost with about 30 percent added horticultural grit for improved drainage. Position the container in the warmest, sunniest spot available, water more frequently than you would in-ground plants, and feed with a potassium-rich liquid fertilizer every two to three weeks through the growing season. Repot every two to three years as the clump expands, or divide and refresh the compost at the same time.
Pests, Diseases, and Troubleshooting
Kniphofia is generally tough, but a few problems do come up, and it's worth knowing what to look for so you can respond early rather than wonder what went wrong.
Common Problems and What Causes Them
| Problem | Likely Cause | What to Do |
|---|---|---|
| Crown or root rot | Waterlogged soil, especially in winter | Improve drainage immediately; remove and discard affected material; replant in gritty, raised soil |
| Leaf spot (Alternaria) | High humidity, poor air circulation | Remove affected leaves; avoid overhead watering; ensure plants aren't overcrowded |
| No flowers despite healthy foliage | Too much shade, or excess nitrogen fertilizer | Move to full sun; switch to a lower-nitrogen, higher-potassium feed |
| Slug and snail damage on emerging shoots | Moist conditions in spring | Use grit mulch around crown; apply iron phosphate pellets if needed; check under foliage at night |
| Aphids on flower spikes | Common in warm weather | Knock off with a strong water jet; encourage natural predators; use insecticidal soap if severe |
| Thrips damage (silvery scarring on flowers) | Dry, warm conditions | Keep plants well-watered in dry periods; remove heavily infested spikes |
| Leggy, floppy growth | Insufficient sun or very high nitrogen soil | Relocate plant or remove shade source; don't over-fertilize |
The most common failure I see with Kniphofia isn't pest damage; it's planting in poorly drained soil and then wondering why the plant dies over winter. Phytophthora and Fusarium root rots are identified in trial and extension data as significant threats in wet soils, and there's no real chemical fix once they take hold. The answer is prevention: drainage at planting, no overwatering, and no heavy mulch sitting against the crown. Get those three things right and Kniphofia is genuinely one of the most trouble-free perennials you can grow.
Design Ideas and Companion Plants
Kniphofia works best when you lean into its naturally bold, architectural character rather than trying to soften it. The upright spikes act as vertical accents and combine beautifully with the horizontal or mounded forms of plants like echinops, achillea, Salvia nemorosa, and ornamental grasses such as Stipa gigantea or Pennisetum. For related companion planting ideas, see our guide on what to grow with hellebores. For guidance on pairing Kniphofia with shrubs that share similar soil and light needs, see how to grow hortensia for tips on matching bloom time and soil preferences. For a warm-toned summer border, pair orange and red cultivars with crocosmia, helenium, and rudbeckia. For gardeners interested in tropical contrasts and tall architectural foliage, see our guide on how to grow heliconia for tips on pairing bold-leaved tropicals with Kniphofia. For a cooler, more elegant look, use the cream and yellow types like 'Lady Luck' alongside agapanthus, nepeta, and white achillea. For shade-tolerant companions and early spring interest, see how do you grow hellebores.
Kniphofia is a magnet for hummingbirds in North American gardens and for long-tongued bumblebees in the UK, which makes it an excellent choice for pollinator-friendly planting schemes. If you already grow other architectural perennials in a similar vein, such as Heuchera for foliage contrast at the front of the border or Heliconia in a tropical-style garden in warmer zones, Kniphofia fits naturally into that palette. It also pairs well with late-season perennials to extend interest through the border after midsummer.
Year-Round Care Calendar
| Season / Month | Key Tasks |
|---|---|
| Early spring (March–April) | Cut back old foliage to base as new growth emerges. Untie leaves if you tied them for winter. Apply balanced granular fertilizer. Plant new divisions or pot-grown plants once soil warms. |
| Late spring (May) | Water new plantings thoroughly if dry. Watch for slugs on emerging shoots. Mulch around (not over) crowns. |
| Early summer (June) | Begin watering containers regularly. Start liquid feeding containers with potassium-rich fertilizer every 2–3 weeks. First flower spikes appear on early-blooming cultivars. |
| Midsummer (July–August) | Deadhead spent spikes at the base. Water established plants only in prolonged dry spells. Check for aphids and thrips on flower spikes. |
| Late summer (September) | Continue deadheading. Assess clumps: if congested, plan spring division. Autumn planting possible in zones 7 and above. |
| Autumn (October–November) | Leave foliage standing for crown protection. In zones 5–6, tie leaves loosely over crown after first hard frost. Move containers under cover in cold zones. |
| Winter (December–February) | Minimal action needed. Avoid walking on frozen crowns. Do not cut back foliage until spring. Check container plants occasionally for moisture. |
The calendar above keeps things simple because Kniphofia rewards a light-touch approach. The most effort comes at the bookends of the season: planting and feeding in spring, and protecting in autumn. Everything in between is mostly observation and occasional watering. If you follow this routine, a well-chosen cultivar in the right spot will flower reliably for many years with very little intervention from you.
FAQ
What climates and hardiness zones are best for growing Kniphofia (red hot poker)?
Kniphofia perform reliably in climates similar to USDA zones about 5b through 9. Most taxa from trials and extension guidance tolerate cold winters to zone 5b if planted in well‑drained sites; some are less hardy and do better in warmer zones. Check the cultivar hardiness rating (RHS and trial reports) before selecting for colder gardens.
How do I choose the right Kniphofia variety for my garden or container?
Choose based on mature height, flower color and hardiness. For massive garden displays pick taller winners from trials (e.g., ‘Flamenco’, ‘Lady Luck’, ‘Gold Rush’). For smaller borders and containers pick dwarf/compact cultivars (look for ones trialed as small or labeled container‑suitable). Check trial tables or RHS cultivar pages for height, spread, bloom time and hardiness before buying.
Where should I plant Kniphofia and what site conditions do they need?
Plant in full sun for best flowering; a few cultivars tolerate light shade but bloom is reduced. Select a site with fertile, moist but free‑draining soil—avoid waterlogged winter sites. Improve drainage in heavy clay by adding grit or planting in raised beds.
How should I prepare the soil before planting?
Work the bed to loosen soil to at least 12–18 in deep. Incorporate organic matter (well‑rotted compost) and, for heavy soils, add horticultural grit or coarse sand (10–30%) to improve drainage. Aim for a loam to sandy‑loam texture and neutral to slightly acidic pH; avoid creating a moisture‑holding mulch directly over the crown.
When is the best time to plant Kniphofia?
Spring planting is recommended so new plants have a full growing season to establish before winter. In mild climates early autumn planting is possible if soil is warm and well‑drained. Pot‑grown plants can be planted any time soil is workable.
What are the planting depth, spacing and a step‑by‑step planting checklist?
Planting checklist: 1) Dig a hole about the same depth as the container and 1.5x the container width. 2) Amend backfill with compost and grit if needed. 3) Set the crown at the same depth as in the pot (shoots just proud of the soil for ‘crown’ types). 4) Backfill and firm gently; water in thoroughly. 5) Space plants about one mature spread apart (use the cultivar’s trial width). Avoid planting crowns too deep. Mulch lightly but keep mulch away from the crown.