Photinia is one of the most rewarding shrubs you can grow for year-round color and structure. Encore azaleas are another rewarding shrub option, and their care is a bit different from photinia. Plant it in full sun with good airflow, give it well-drained soil, prune it two or three times a year to keep that brilliant red new growth coming, and stay on top of Entomosporium leaf spot before it gets a foothold. Do those four things and your photinia will thrive. Ignore any one of them and you'll spend the next season wondering why it looks so rough.
How to Grow Photinia: Step-by-Step Care and Troubleshooting

Marcus Holloway
25 Jun 2026
Picking the right photinia for your garden
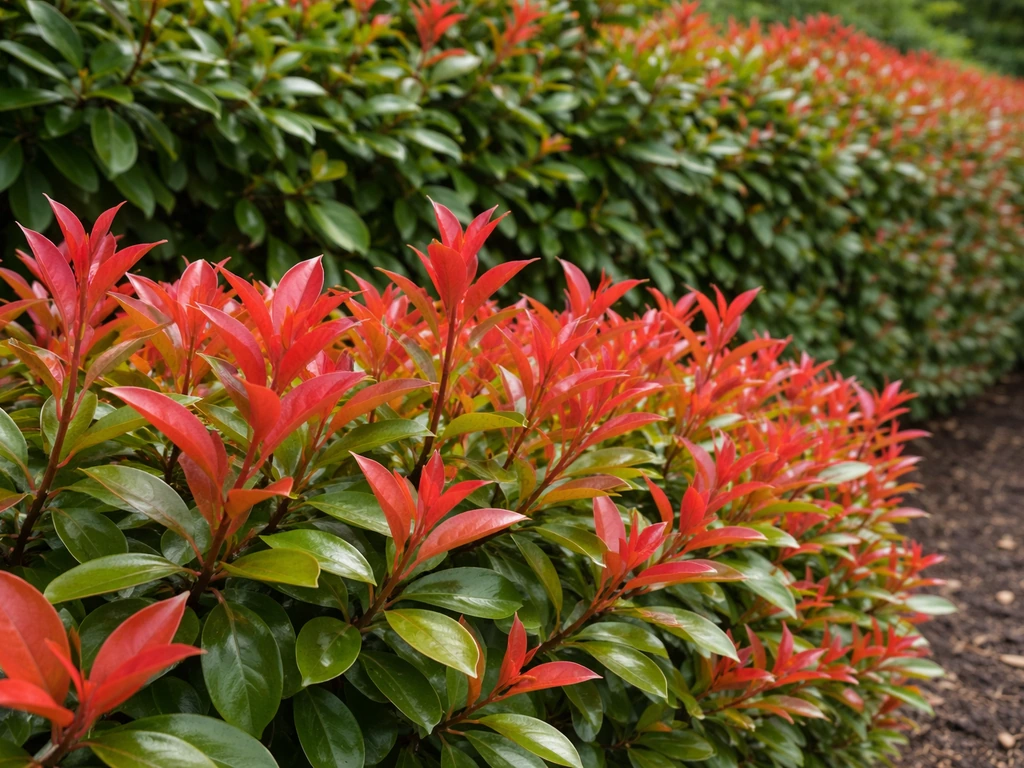
The variety you choose matters more than most people realize. Azaleas also need a sunny, well-drained outdoor site, with attention to consistent moisture and protection from hot, drying conditions how to grow azaleas outdoors. Red Tip Photinia (Photinia x fraseri) is by far the most popular, and for good reason: it grows fast, produces vivid scarlet new growth after each prune, and makes an excellent hedge or screen. It can hit 10 to 15 feet tall and wide if left alone, so it is not a small-space plant. Hardy in USDA zones 7 to 9, it handles heat well but struggles with persistent wet winters.
If you are in a cooler zone or want something a little different, Photinia villosa (Oriental photinia) is more cold-tolerant, reaching into zone 4, and puts on a decent fall foliage show with red berries to follow. It is a smaller, more tree-like plant than Fraser photinia. There is also Photinia serratifolia (Chinese photinia), which can become a large tree-sized shrub and is sometimes used as a street planting in warm climates. For most home gardeners in zones 7 to 9, Fraser photinia is the one to reach for.
One honest caveat about Red Tip photinia: it is notoriously susceptible to Entomosporium leaf spot. Some newer selections like 'Red Robin' and 'Little Red Robin' show slightly better disease tolerance, and if you are in a consistently humid region like the Gulf Coast or the Southeast, it is worth seeking those out rather than the generic Fraser photinia from a big-box store. Better variety selection upfront saves you a lot of fungicide spraying later.
Sun, spacing, and picking the right spot
Photinia wants full sun. At least 6 hours of direct sun daily is the minimum, and 8 or more is better. Less than that and you get weak, leggy growth, less of that famous red color, and a plant that is far more vulnerable to disease. I have seen people try to use photinia as a shade-side hedge and it never ends well.
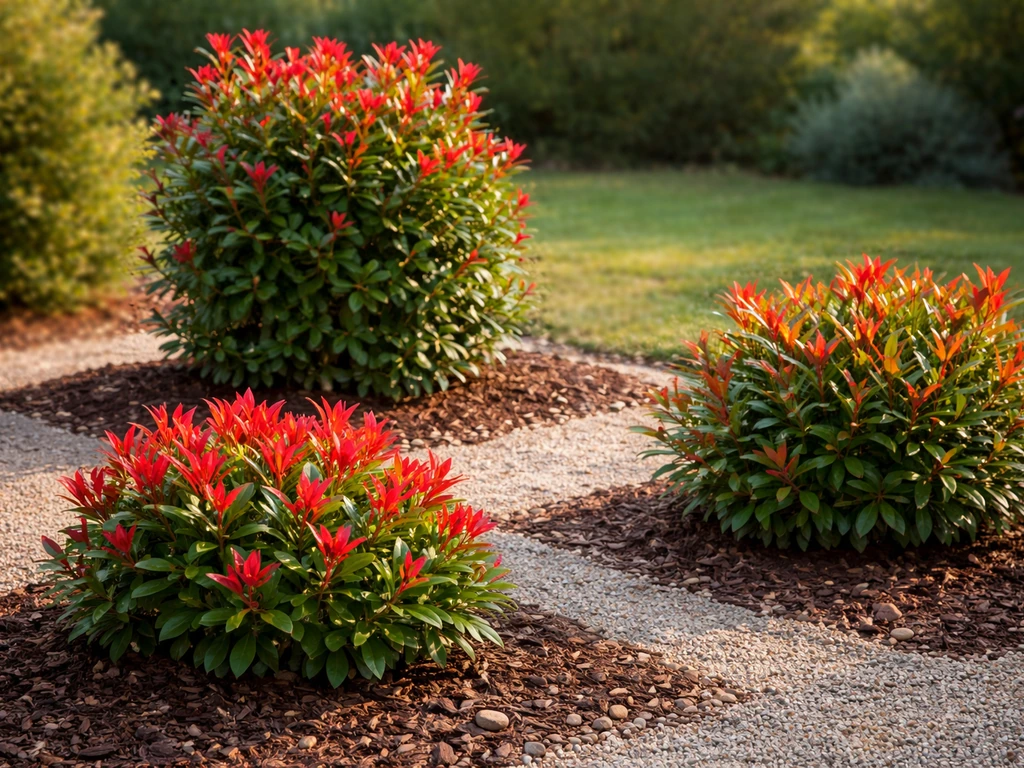
Airflow is the other factor most people overlook until they are staring at a hedge full of leaf spot. Planting photinia too close together or right against a wall traps humidity and creates the perfect environment for fungal disease. For a hedge, space plants 4 to 6 feet apart, center to center. That feels wide when you first put them in, but they will fill the gap within two to three seasons. For a standalone specimen, give it at least 8 to 10 feet of clearance from other plants and structures.
Avoid low spots or areas where water pools after rain. Photinia is not a bog plant. Good drainage is non-negotiable, and planting in a natural high point or slightly raised bed will pay dividends in long-term health.
Soil prep and how to plant it properly
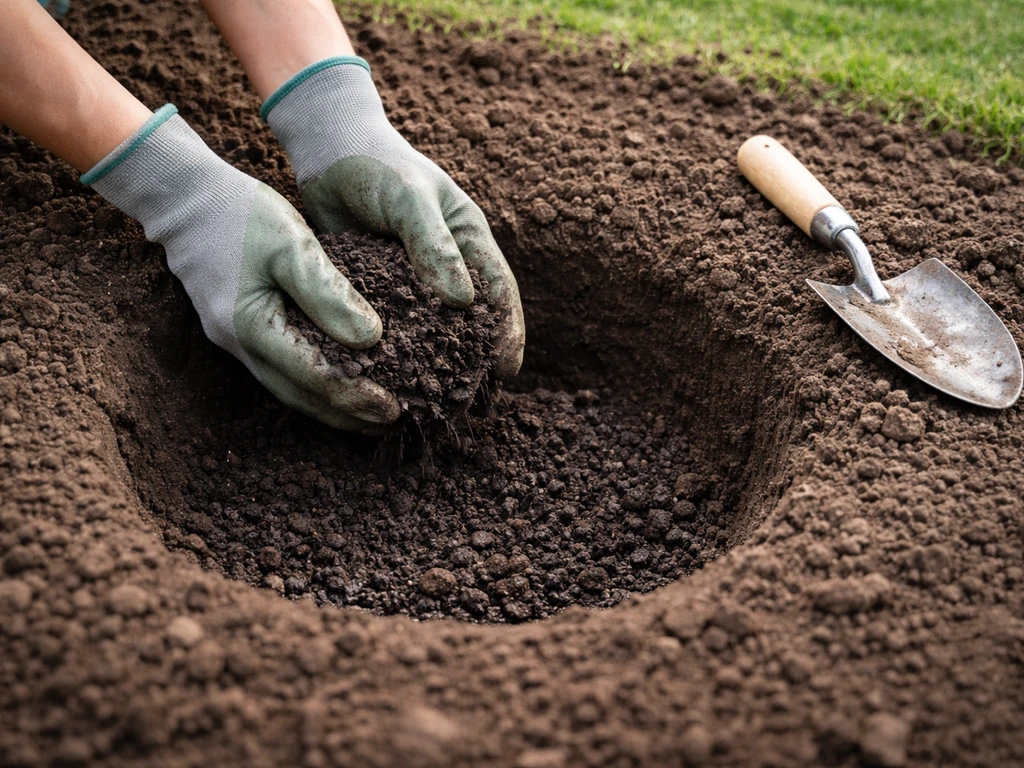
Photinia tolerates a fairly wide soil pH range, roughly 5.5 to 7.0, though it performs best closer to 6.0 to 6.5. If you are starting from scratch, do a soil test before you plant. It takes 15 minutes and takes the guesswork out of amendments. You can find inexpensive kits at most garden centers or send a sample to your local cooperative extension service.
Work the planting area to a depth of 12 to 18 inches and mix in a generous amount of compost, about 25 to 30 percent by volume. This improves drainage in clay-heavy soils and water retention in sandy ones. Do not bother with synthetic fertilizer at planting time. The roots need to establish first, and a heavy dose of nitrogen on a newly planted shrub does more harm than good.
- Dig your hole two to three times the width of the root ball and roughly the same depth.
- Set the plant so the top of the root ball is level with or just slightly above the surrounding soil. Planting too deep is one of the most common beginner mistakes and causes long-term decline.
- Backfill with the native soil and compost mix, firming it in gently to eliminate air pockets.
- Water thoroughly immediately after planting, soaking the entire root zone.
- Mulch with 2 to 3 inches of shredded bark or wood chips, keeping mulch a few inches away from the main stem to prevent rot.
The best time to plant is fall in zones 7 to 9, which lets the roots establish before summer heat arrives. Spring planting works too, but you will need to water more consistently through the first summer.
Watering, fertilizing, and feeding through the seasons
Watering
For the first season, water a newly planted photinia deeply once or twice a week in the absence of rain. If you are wondering how to grow forsythia too, the key is similar planning: choose the right sun, use well-drained soil, and keep consistent watering while plants establish For the first season, water a newly planted photinia deeply once or twice a week in the absence of rain. .
Deep and infrequent is the goal, encouraging roots to chase moisture downward rather than staying shallow. Once established (usually after the first full year), photinia is reasonably drought tolerant and only needs supplemental watering during extended dry spells in summer. In practice, a good rule of thumb is to water when the top 2 to 3 inches of soil are dry. Overhead watering in the evening is worth avoiding since wet foliage overnight is a direct invitation to leaf spot.
Water at the base when you can.
Fertilizing
Photinia is not a heavy feeder. One application of a balanced slow-release shrub fertilizer in early spring (something like a 10-10-10 or a dedicated shrub and tree formula) is usually enough for the year. Apply it just as new growth begins to emerge, following package rates. You can add a light second feeding in early summer if growth looks sluggish. Do not fertilize after mid-summer, especially in zones with cold winters. Late-season feeding pushes soft new growth that is vulnerable to frost damage and disease. I skip the Miracle-Gro approach entirely with photinia. A quick nitrogen hit gives you a flush of tender new leaves that leaf spot loves.
How to prune for the best color and shape
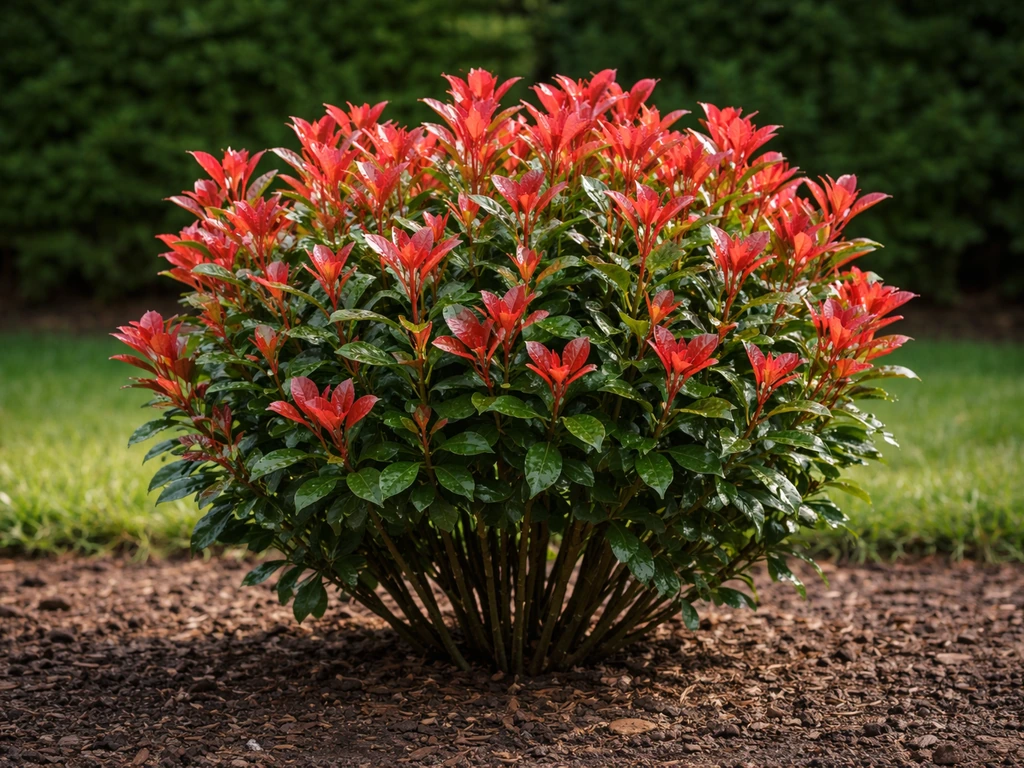
Pruning is what makes photinia spectacular. Every time you cut it back, it responds with that flush of bright red new growth that makes the plant so popular. The trick is knowing when and how much to prune so you get multiple flushes of color without stressing the plant.
The main pruning window is late winter to early spring, just before new growth starts. This is your heaviest prune of the year, where you can take the plant back by up to a third and reshape it. A second lighter trim in early summer after the spring flush has matured extends the color show. In some climates you can fit a third light prune in early fall, though skip this if you are in zone 7 and early frosts are possible since you do not want to push fresh growth that will get hit.
Always use clean, sharp pruning shears and wipe them down with rubbing alcohol between cuts if you suspect any disease is present. This one habit stops you from spreading Entomosporium between plants. For hedges, aim for a shape that is slightly wider at the base than the top. This lets light reach the lower branches and keeps the base from dying out, which is a common complaint with older photinia hedges.
Avoid excessive pruning in late summer and into fall. You want the plant heading into winter with mature, hardened-off growth, not tender new shoots.
Leaf spot, pests, and what to do when things go wrong
Entomosporium leaf spot is the number one problem with photinia, and if you grow Red Tip photinia in the Southeast, Gulf Coast, or Pacific Coast states, you will almost certainly encounter it at some point. Understanding what you are looking at and when to act makes the difference between a manageable problem and a plant that slowly defoliates over several seasons.
Recognizing Entomosporium leaf spot
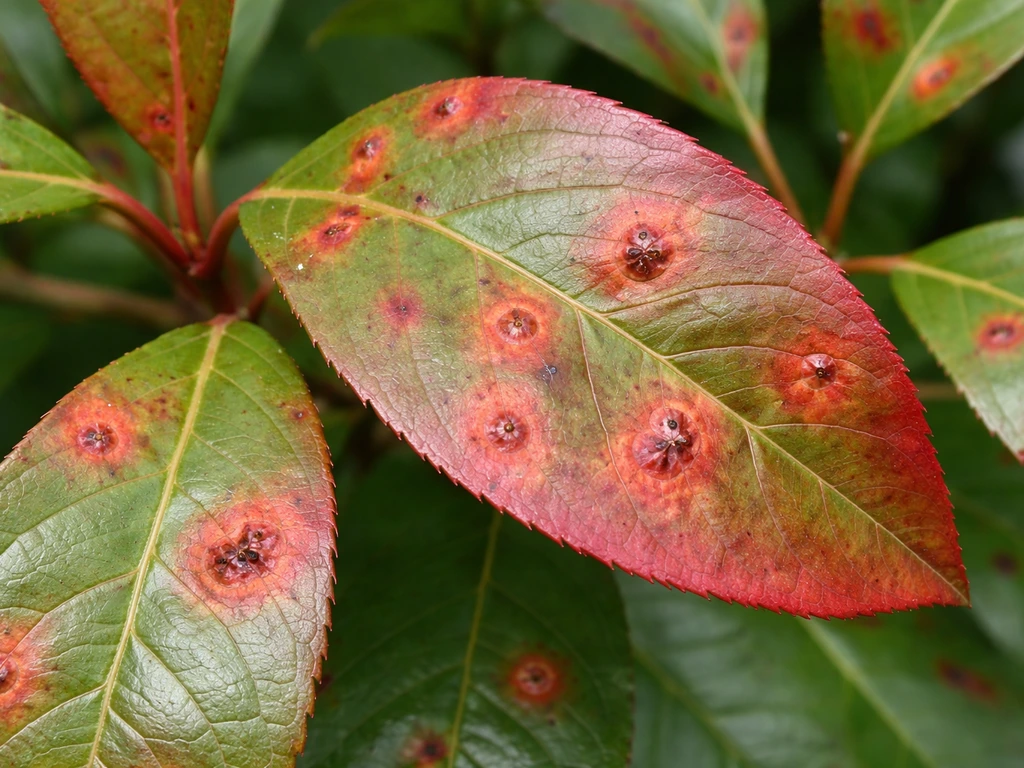
The first sign is blank" rel="noopener noreferrer">small, circular reddish spots on the leaves. These often have a slightly darker or lighter halo around them. As the spots mature, blank" rel="noopener noreferrer">tiny black specks develop in the center of each spot. Those black specks are the fruiting bodies of the fungus, the structures it uses to produce spores and spread. On heavily infected plants, spots merge, leaves yellow, and the plant drops foliage heavily. Young, actively growing red-colored leaves are the most vulnerable, which is why the disease is so damaging right after pruning or during flush periods when there is lots of new growth.
What causes it and how to stop the spread
The fungus thrives in wet, humid conditions and spreads via spores carried by water splash. This is exactly why overhead irrigation, poor airflow, and crowded planting are so problematic. The best long-term fix is cultural: space plants correctly from the start, improve airflow through pruning, water at the base, and clean up fallen leaves immediately since those infected leaves on the ground are a direct spore source for reinfection. Raking and disposing of fallen leaves (do not compost them) is one of the most effective things you can do to reduce the disease load in your garden.
When to use fungicide
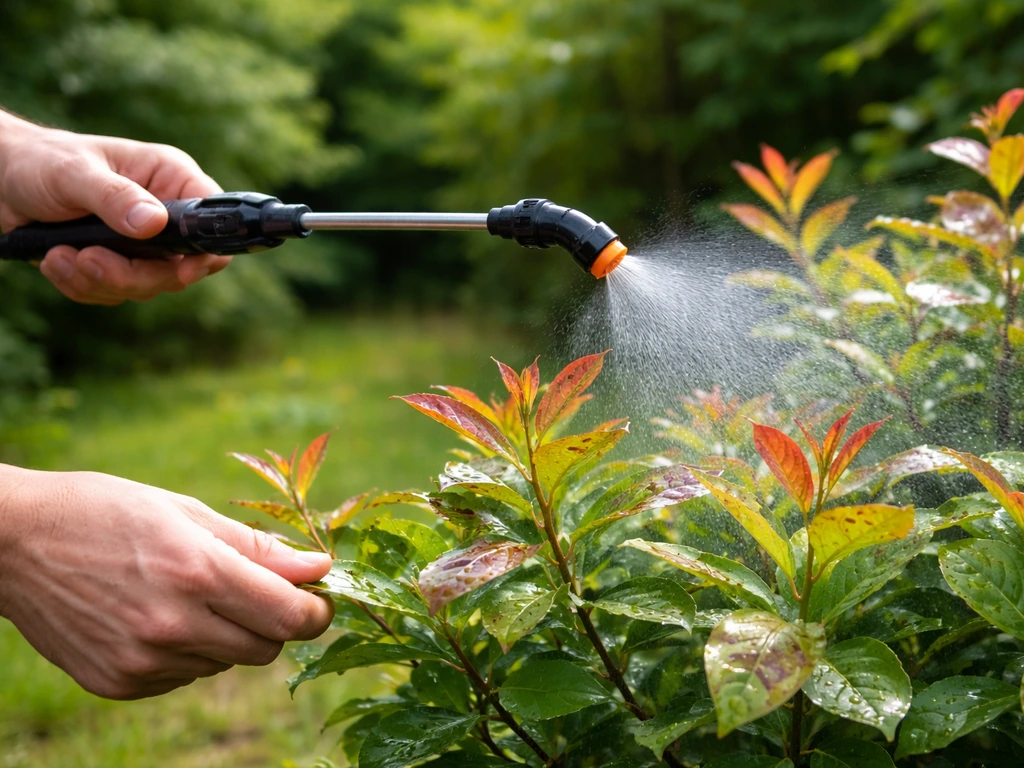
Fungicides are protective, not curative. Once a leaf is spotted, the damage to that leaf is done. The goal is to protect healthy new growth from getting infected. During wet or humid weather, spray at 7 to 10 day intervals with a labeled fungicide. Copper-based fungicides and chlorothalonil are both effective when the plants are thoroughly coated before symptoms appear or in the very early stages of an outbreak. Start spraying at bud break in spring when new growth begins to emerge, since that is when the plant is most vulnerable. Timing matters more than the product. A late spray after the plant is already heavily infected will not rescue the season.
Other pests to watch for
Beyond leaf spot, photinia is fairly low-maintenance pest-wise. Scale insects can appear on stems, looking like small brown or tan bumps. A horticultural oil spray in late winter or early spring, before new growth breaks, handles most scale infestations. Aphids occasionally attack new growth and respond quickly to a strong jet of water or an insecticidal soap spray. Fire blight can be an issue in some regions, causing blackened, scorched-looking shoot tips. Prune out affected branches 8 to 12 inches below the damage and sterilize your pruners between every cut.
A simple seasonal care calendar
| Season | Key Tasks |
|---|---|
| Early Spring | Apply slow-release balanced fertilizer as new growth emerges. Begin main pruning and shaping. Start fungicide program if Entomosporium has been a problem. Begin watering schedule for newly planted shrubs. |
| Late Spring / Early Summer | Light follow-up prune after spring flush hardens off. Monitor for leaf spot and aphids. Water deeply during dry spells. Remove and dispose of any infected fallen leaves. |
| Summer | Water at the base during heat and drought. Avoid overhead watering. Watch for scale and aphids. Do not fertilize after mid-summer. Continue leaf cleanup. |
| Fall | Optional light prune in early fall only in warmer zones (8 to 9). Stop fertilizing. Rake and remove fallen leaves to reduce overwintering fungal inoculum. Check mulch depth. |
| Winter | In zones 7 and below, protect newly planted shrubs with a layer of mulch over the root zone. Avoid heavy pruning. Plan any major changes for early spring. Apply horticultural oil for scale when plants are fully dormant. |
Winter hardiness is not usually a concern for established photinia in zones 7 to 9, but newly planted shrubs in zone 7 can suffer in their first winter if a hard freeze arrives early. A 3 to 4 inch layer of mulch over the root zone provides meaningful insulation and is easy insurance for the first season or two.
How photinia compares to similar shrubs
If you are weighing photinia against other colorful landscape shrubs, it helps to know where it sits. Forsythia gives you a spectacular early spring flower show but its foliage is unremarkable the rest of the year and it has no real hedge-forming density. Azaleas offer incredible bloom color and are a better pick for shadier spots with acid soil, but they do not give you that architectural hedge structure that photinia builds.
Azaleas prefer acidic soil and consistent moisture, so dialing in those basics is key when you learn how to grow an azalea azaleas offer incredible bloom color. If leaf spot disease feels like a dealbreaker for your climate, it is worth exploring some of the newer disease-resistant options or considering alternatives before you commit to a full photinia hedge.
Ultimately, when photinia is grown in the right conditions, it is hard to beat for a fast-growing, four-season privacy screen with genuine ornamental appeal. Get the site right, prune regularly, manage moisture and airflow, and deal with leaf spot early and proactively. Once you have the spacing and sun dialed in, you can use these same pruning tips to learn how to grow forsythia hedge-style in a dense, uniform row prune regularly. Those are the pillars of growing photinia well, and none of them are complicated once you know what you are doing.
FAQ
Can I grow photinia in a container or small patio pot?
Yes, but keep it realistic. In containers, photinia dries out faster and airflow is worse, so leaf spot risk increases. Use a large pot with drainage holes, a loose potting mix, and plan on more frequent deep watering, checking that the top few inches dry before watering again. Avoid crowding multiple plants in one pot, and do not let the foliage stay wet overnight.
Should I compost fallen photinia leaves that have leaf spot?
Usually you should not. Entomosporium leaf spot spreads via spores and infected leaves are a major reinfection source, so do not compost the fallen leaves. Bag them for trash or municipal green-waste disposal only if your area explicitly allows diseased plant material.
How should I adjust pruning schedule if my photinia gets leaf spot every year?
For best results, prune after you can see the spring flush has matured, then lightly again as growth hardens, rather than cutting repeatedly back to very soft new shoots. After any prune, expect fresh red foliage to be the most disease-prone stage, so combine pruning with strict airflow, base watering, and (if your area is humid) protective fungicide timing.
What’s the difference between Entomosporium leaf spot and drought stress on photinia?
If you see curled, reddened, or spotted leaves, first confirm it is leaf spot rather than drought stress or nutrient imbalance. Leaf spot typically shows small circular spots that may develop tiny black specks, and it worsens with humidity and wetting. If you have mostly uniform browning without spots, check irrigation and soil drainage before increasing feeding or pruning.
Can I “rescue” a photinia hedge that already has heavy leaf spot?
Yes. If plants are already crowded or positioned too close to walls, the most effective fix is corrective spacing plus pruning for airflow. Reduce the hedge width and lightly open the interior if possible, then focus on consistent base watering and leaf cleanup. In severe cases, replacing with a more tolerant cultivar can be faster than trying to reverse years of reinfection.
When should I cut back frost-damaged photinia, and how aggressively?
Dead branches should be removed as soon as you notice them, but avoid heavy pruning once late summer is underway. For damaged winter growth, wait until late winter to early spring when you can clearly see what survived, then make your main cut with sterilized tools.
Will adding more fertilizer help a struggling photinia that keeps getting disease?
Not necessarily, and more fertilizer is a common mistake. Photinia does best with light feeding in early spring, then stop after mid-summer so you do not push tender growth that is easy prey for leaf spot and frost damage. If growth is already lush but spots are worse, you likely need less nitrogen, not more.
How strict is the rule about avoiding overhead watering on photinia?
If overhead watering is unavoidable, use it only early in the day so foliage dries quickly, and avoid watering during extended cloudy periods. Evening overhead watering is especially risky because leaves remain wet overnight. In most gardens, base watering (drip or soaker hose) is the simplest way to lower leaf spot pressure.
What’s the best approach for scale and aphids on photinia, and when should I spray?
Scale is usually treated when plants are dormant or just before new growth breaks, using horticultural oil. For aphids, a strong rinse or insecticidal soap often works, but treat only when temperatures are mild and you can re-check in a few days. Always test on a small area first if you have never used a product on that shrub.
Does mulch help photinia, and how far should it be from the stem?
Yes for some people, but it is a tradeoff. Mulch helps protect roots and moderates moisture, but keep it away from the stems and do not pile it against the plant base. A 2 to 4 inch layer over the root zone is typically enough, and in very wet climates you may want slightly less mulch to avoid staying soggy.