
Hollyhocks grow well in most parts of Australia when you sow them in late summer or autumn, give them full sun, well-drained soil, and a sheltered spot away from strong winds. They are biennial by nature, which means the plant spends its first year building a rosette of leaves and its second year throwing up those tall, flower-packed spires. Once you understand that rhythm and match your sowing window to your climate zone, hollyhocks are surprisingly straightforward to grow, even if you've never tried them before.
How to Grow Hollyhocks in Australia: Complete Guide for Gardens
Marcus Holloway
26 Jul 2026
Why hollyhocks deserve a spot in your Australian garden
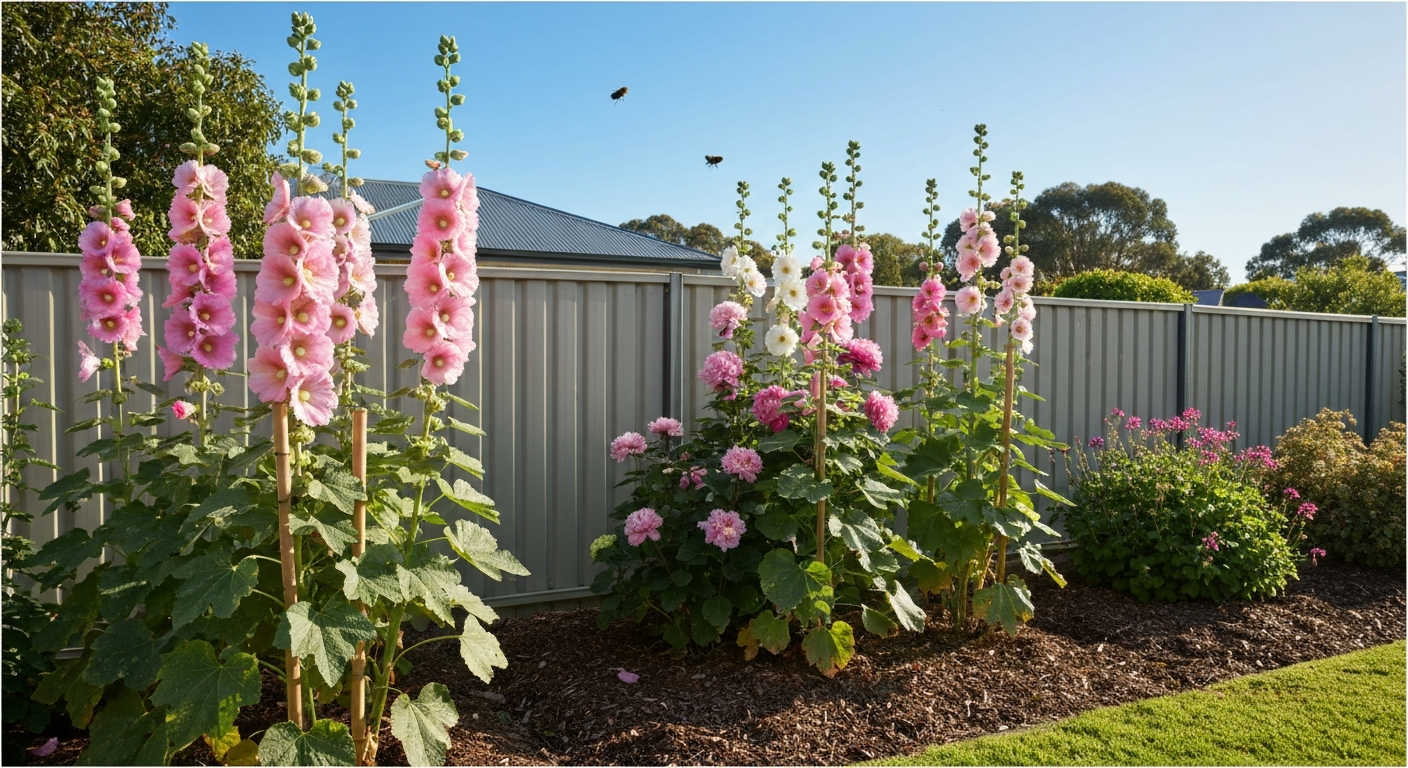
Few flowers make the same dramatic statement as a hollyhock in full bloom. A well-grown plant of a tall Alcea rosea cultivar can push 2 metres or more into the sky, with flowers stacked up the stem from late spring right through summer. That vertical impact is genuinely hard to replicate with other summer-blooming perennials, and it's one reason cottage gardeners in particular keep coming back to them.
They also adapt to a surprisingly broad range of Australian climates. I've seen them thriving in cool-temperate Tasmanian gardens, performing reliably in Adelaide's dry summers, and popping up happily in southeast Queensland when planted in the right season. The main things that trip growers up are poor drainage, sowing at the wrong time, and hollyhock rust, all of which are very manageable once you know what to watch for. This guide walks you through everything: variety choice, site prep, sowing and transplanting by region, propagation from seed or root division, planting and spacing, ongoing care, and how to deal with pests and diseases. For step-by-step instructions on how to grow hollyhock plants, refer to our detailed guide.
Picking the right hollyhock variety for where you garden
The genus Alcea gives you a useful range of heights and flower types, and choosing correctly makes a real difference to how well your plants perform in your specific space. Tall classic types suit back-of-border positions or against fences; compact doubles work in pots or smaller beds. Here's how the main types available through Australian suppliers compare.
| Variety | Height | Flower type | Best use | Notes for Australian gardens |
|---|---|---|---|---|
| Chater's Double Mix | 180–250 cm | Full double, peony-like | Back of border, wall backing | Classic cottage look; stake in exposed spots |
| Summer Carnival Mix | 150–200 cm | Double and semi-double mix | Mixed borders, cut flowers | Can bloom in first year from early sowing |
| Majorette Double Mix | 50–120 cm | Compact double | Pots, small beds, front of border | Good choice for courtyard gardens or windy balconies |
| Single Black (Alcea rosea 'Nigra') | 150–200 cm | Single, deep burgundy-black | Statement plant, cottage or modern borders | Striking contrast plant; very popular with pollinators |
| Alcea rosea (single mix) | 150–200 cm | Single, open-faced | Relaxed cottage plantings | Easiest to grow; often naturalises and self-sows |
If you're new to hollyhocks, start with a single-flowered mix or Majorette doubles. Singles are tougher, more likely to self-seed and naturalise in your garden, and they attract bees and butterflies more effectively than fully double types. Once you're comfortable with the basics, the tall Chater's doubles are spectacular but do need staking and more rust vigilance.
Choosing your site and preparing the soil
Hollyhocks are non-negotiable about two things: full sun and drainage. Aim for at least 6 hours of direct sun per day. A position against a north or northwest-facing wall or fence is ideal in most Australian climates because it provides warmth, reflects light, and gives the tall stems something to lean towards for support. Avoid low-lying spots where water pools after rain.
Soil pH should sit between about 6.0 and 7.5, which is neutral to very slightly alkaline. Hollyhocks prefer neutral to slightly alkaline soils (about pH 6.0–7.5) and do not tolerate waterlogged soil, Hollyhocks, RHS (Royal Horticultural Society plant guide) Hollyhocks prefer neutral to slightly alkaline soils (about pH 6.0–7.5) and do not tolerate waterlogged soil.. Most Australian garden soils fall within this range naturally, but if you're on acidic sandy soils common in parts of coastal WA or the east coast, it's worth adding a handful of garden lime per square metre before planting and forking it in well. Get a cheap soil pH test kit from any hardware store or nursery and check before you plant.
Hollyhocks develop a long, deep taproot, which is why they're so resilient once established but also why they don't like being moved. Before planting, dig the bed to at least 30–40 cm depth and work in a generous amount of aged compost or well-rotted manure to improve structure and water retention. If your soil is heavy clay, add coarse grit or perlite to improve drainage. Raised beds work excellently if your native soil is problematic.
- Full sun position, minimum 6 hours direct sunlight daily
- Sheltered from prevailing strong winds to prevent stem damage
- Well-drained, humus-rich soil at pH 6.0–7.5
- Dig bed to 30–40 cm and incorporate compost or aged manure
- Improve drainage with grit in heavy clay soils
- Avoid low-lying frost pockets in cool-temperate regions
When to sow and transplant across Australia
Getting the timing right is probably the most important variable in Australian hollyhock growing, and it varies considerably depending on where you live. The general principle is to sow in the cooler months so plants can establish a strong rosette before their first winter and then flower the following spring and summer. For a quick regional guide on exactly when to grow hollyhock seeds, see our detailed timing recommendations for each Australian climate zone. In frost-free subtropical and tropical areas, this means aiming for the cooler dry season. In temperate zones it means late summer through autumn. In cool-temperate areas, you can sow in spring for flowers the following year. For a contrasting temperate example with specific timing and frost-handling tips, see our guide on how to grow hollyhocks in Colorado (5b651f26-99d4-4cb3-b703-ff24ec03b6a8).
| Climate zone / Region | Best sowing window | Transplant out | Expected flowering |
|---|---|---|---|
| Cool temperate (Tas, ACT, alpine Vic/NSW) | Late summer to early autumn (Feb–Mar) OR spring (Sep–Oct) | 4–6 weeks after sowing indoors | Spring–summer of following year |
| Temperate (Melbourne, Adelaide, coastal NSW) | Late summer–autumn (Feb–Apr) | Autumn or early spring after overwintering rosette | Oct–Jan of following year |
| Warm temperate / dry (Perth, inland SA, inland NSW) | Autumn (Mar–May) | May–Jun once nights cool | Sep–Dec of following year |
| Subtropical (SE Queensland, northern NSW coast) | Autumn–early winter (Apr–Jun) | May–Jul into cooled soil | Aug–Nov of following year |
| Tropical / monsoonal (Darwin, tropical Qld) | Dry season start (Apr–Jun) | Once humidity and rain ease | Jul–Oct; treat as annual in humid zones |
A quick note on the biennial vs annual question: some cultivars like Summer Carnival Mix are bred to flower in their first year if sown early enough, but most standard Alcea rosea varieties will give you the best, most floriferous display in their second year. Don't be disheartened when your first-year plants stay as a flat rosette. That's exactly what they're supposed to do.
Quick-care reference at a glance
| Parameter | Recommended benchmark |
|---|---|
| Sowing depth | Surface sow or cover very lightly (2–3 mm); seeds need light to germinate |
| Germination time | 10–21 days at moderate temperatures (typically 10–14 days) |
| Seedling spacing in seed tray | Sow individually in deep cells or tubes to protect taproot |
| Final plant spacing | 30–60 cm depending on cultivar height (Yates recommends 30–40 cm minimum) |
| Planting depth | Crown at soil level, same depth as in nursery pot or seed cell |
| Sun requirement | Full sun, minimum 6 hours daily |
| Watering frequency | Deeply once or twice a week; reduce once established; avoid overhead watering |
| Fertiliser | Liquid flower or rose fertiliser every 1–2 weeks during active growth |
| Mulch depth | 5–7 cm organic mulch around (not touching) the crown |
| Stake insertion | At planting time, before roots develop, for all varieties over 100 cm |
Growing hollyhocks from seed: step by step
Seed is the most reliable and cost-effective way to grow hollyhocks, and Australian suppliers like Eden Seeds and The Seed Collection make good quality seed readily available. The key thing to get right from the start is sowing depth: hollyhock seeds need light to germinate, so surface sow or cover them with just 2–3 mm of seed-raising mix. Burying them deeper is one of the most common reasons for poor germination.
Choosing your seedbed
Because hollyhocks develop a taproot quickly, the best containers for starting seeds are deep cells, biodegradable tubes, or tall individual pots (at least 10–12 cm deep). This avoids the root disturbance that causes transplant shock when you eventually move them into the garden. Standard shallow seedling trays work but you'll need to transplant into individual pots sooner. I like using toilet roll tubes lined with newspaper as a cheap, biodegradable option that you can plant directly into the ground.
Step-by-step sowing process
- Fill deep cells or tubes with quality seed-raising mix and firm it gently to within 1 cm of the rim
- Place one or two seeds per cell on the surface of the mix
- Cover with just 2–3 mm of fine seed-raising mix or lightly press seeds into the surface without burying them
- Mist gently with a spray bottle until the surface is evenly moist but not waterlogged
- Place in a warm, bright spot out of direct afternoon sun; a north-facing windowsill or a sheltered outdoor position works well
- Keep the mix consistently moist during germination, checking daily and misting if the surface dries
- Expect germination in 10–14 days under good conditions (up to 21 days in cooler weather)
- Once seedlings emerge, move to a brighter, well-ventilated spot to prevent damping-off
- Thin to the strongest seedling per cell once the first true leaves appear
Common sowing problems and fixes
If your seeds aren't germinating after three weeks, the most likely culprit is either that they were sown too deep, the mix dried out during the critical first week, or temperatures were too cold (below 15°C slows germination considerably). Damping-off, where seedlings collapse at the stem base, is caused by overwatering combined with poor air circulation. If you see it happening, remove affected seedlings immediately, reduce watering frequency, and ensure good air movement around your pots. Don't try to save damped-off seedlings; they won't recover.
Propagating from seedlings and root or crown divisions
If you've been growing hollyhocks from seed in other regions (or have a friend who has established plants), you can also propagate from seedlings or, with more care, from root and crown divisions. Propagating from roots is the subject of detailed guidance elsewhere, but the core principle is worth covering here alongside general transplant technique. For step-by-step instructions on how to grow hollyhocks from roots, see our guide on how to grow hollyhocks from roots.
Transplanting seedlings
Transplant seedlings into the garden when they are 5–7 cm tall and have developed their first set of true leaves. At this stage the taproot is still short enough to move without causing serious disruption. Water seedlings well an hour before transplanting. Dig a hole that accommodates the root ball comfortably, lower the plant in so the crown (the junction between the root and the stem base) sits at soil level, backfill and firm gently, then water in thoroughly. If you've grown seedlings in biodegradable tubes, plant the whole tube to avoid disturbing the root entirely.
Root and crown division
Division of established hollyhocks is possible but I'll be honest: it's not the easiest method, and many growers find it more trouble than sowing fresh seed. The taproot makes clean division difficult, and older plants resent being disturbed. That said, if you have a large, healthy crown, you can attempt division in spring or early autumn when the plant is not actively flowering. Use a sharp spade to separate the crown into sections, ensuring each section has both roots and a growing point, and replant promptly into prepared soil without letting roots dry out. Water well immediately and mulch around the divisions. Expect a period of sulking while they re-establish.
Aftercare for divisions is the same as for transplanted seedlings: keep soil consistently moist for the first 3–4 weeks, hold off on fertilising until you see new growth resuming, and provide shade cloth protection during hot spells in the first fortnight after transplanting.
Planting and spacing: getting it right in beds and pots
Correct spacing isn't just about giving plants room to grow. It directly affects air circulation, which in turn affects how badly rust and other fungal problems hit your plants. Crowded hollyhocks are a recipe for disease problems, especially in humid coastal climates.
Spacing guide by cultivar type
| Cultivar type | Mature height | Recommended spacing | Rows from wall or fence |
|---|---|---|---|
| Compact doubles (Majorette) | 50–120 cm | 30 cm | 20–30 cm from structure |
| Mid-height singles/doubles | 120–180 cm | 40–50 cm | 30 cm from structure |
| Tall classic singles/doubles (Chater's, Summer Carnival) | 180–250+ cm | 50–60 cm | 30–40 cm from structure |
Planting checklist for garden beds
- Mark out planting positions at correct spacing before digging any holes
- Insert stakes at marked positions before planting to avoid damaging roots later
- Dig holes 5–10 cm wider than the root ball and to the same depth as the seedling container
- Mix a small amount of compost or slow-release granular fertiliser into the base of the hole
- Remove seedling from pot carefully, keeping the root ball intact; do not tease apart the taproot
- Lower the plant into the hole so the crown sits exactly at soil level, not deeper or higher
- Backfill with soil, firm gently to remove air pockets, then water in deeply
- Apply 5–7 cm of organic mulch (straw, lucerne, or wood chip) around the plant keeping mulch 5 cm clear of the crown
- Tie the stem loosely to the stake with soft garden twine once the plant is 30–40 cm tall
Growing hollyhocks in pots
Compact varieties like Majorette doubles are your best option for pots. Choose a container at least 40 cm deep and 30 cm wide to accommodate the taproot. Use a premium potting mix with added slow-release fertiliser and ensure the pot has excellent drainage holes. Pot-grown hollyhocks dry out faster than in-ground plants, so check moisture every 1–2 days in summer and water deeply when the top 2–3 cm of mix feels dry. Place the pot in full sun and be prepared to supplement with liquid fertiliser every 1–2 weeks during flowering since nutrients flush out of pots more quickly.
Ongoing care: watering, feeding, mulching and staking
Once your hollyhocks are planted and established, the care routine is straightforward. Water deeply once or twice a week depending on rainfall and temperature, always at the base of the plant rather than overhead. Overhead watering wets the foliage and dramatically increases the risk of rust infection. During prolonged dry spells in summer, increase watering frequency; during cool, wet periods, ease back and check that drainage is working properly.
Feed with a liquid flower or rose fertiliser every 1–2 weeks from when you first see flower buds forming until after the main flush of bloom. Avoid high-nitrogen fertilisers during flowering: they push leafy growth at the expense of flowers. A balanced formula or one slightly higher in potassium and phosphorus is what you want. I'm fairly skeptical of the idea that one product will transform your hollyhocks overnight, but consistent liquid feeding through the flowering period genuinely does produce bigger, more sustained blooms.
Mulch is important for moisture retention, weed suppression, and keeping the soil cool around the crown during hot Australian summers. Apply 5–7 cm of lucerne hay, straw, or aged wood chip, keeping the mulch pulled back 5 cm from the base of the stem to prevent crown rot and slug damage.
Stake plants before they need it, not after. By the time a tall hollyhock is swaying in the wind, the roots have spread and you'll damage them pushing stakes in. A single sturdy bamboo stake per plant is usually sufficient; tie the main stem loosely with soft twine at two or three points as it grows, allowing some natural movement to strengthen the stem.
Seasonal care calendar for Australian gardeners
| Season | Temperate/cool-temperate tasks | Subtropical/tropical tasks |
|---|---|---|
| Late summer (Feb–Mar) | Sow seeds in deep cells indoors or in a sheltered seedbed | Prepare beds; wait for temperatures to ease before sowing |
| Autumn (Apr–May) | Transplant seedlings outdoors; mulch crowns; water in well | Sow seeds; transplant seedlings as weather cools |
| Winter (Jun–Aug) | First-year plants form rosettes; water sparingly; check for slug damage | Plants growing actively in subtropical areas; water regularly; feed lightly |
| Spring (Sep–Oct) | Flower spikes emerge on second-year plants; begin liquid feeding; check for rust | First flowers appear; begin liquid feeding; watch humidity and rust closely |
| Early summer (Nov–Dec) | Peak flowering; deadhead spent blooms; stake and tie as needed | Manage heat and humidity; increase watering; rust vigilance high |
| Midsummer (Jan–Feb) | Cut back flowered stems; leave a few for seed if desired; collect seed | Cut back; consider whether to rest plants or sow fresh for next season |
| After flowering | Cut stems to 30 cm; apply compost mulch; leave crowns to overwinter | Remove spent plants; improve soil and plan next sowing cycle |
Deadheading and pruning
Remove spent flowers regularly by snapping or cutting off individual blooms as they fade. This encourages the plant to keep producing new flowers up the spike rather than putting energy into seed production. If you want to collect seed for next season's planting, leave a few flower spikes to fully mature and dry on the plant before harvesting. Once the main flush is over, cut the entire flowering stem back to about 30 cm. In temperate climates with mild winters, the crown will often re-sprout and give a second (smaller) flower flush the following spring.
Climate-specific tips for Australian conditions
Hot, dry inland areas like western NSW, inland SA and parts of WA present the challenge of intense summer heat rather than humidity. For gardeners in hot desert climates like Phoenix, see our specific guide on how to grow hollyhocks in Phoenix for tailored timing, shade and watering advice. In these gardens, afternoon shade from a building or deciduous tree is genuinely helpful in midsummer, and deep, consistent watering is critical. Apply extra-thick mulch and prioritise rust-resistant single-flowered varieties.
Subtropical gardens in southeast Queensland and northern coastal NSW deal with the opposite problem: warmth and humidity promote fast, lush growth but also turbocharge rust and fungal problems. In these regions, focus on air circulation above everything else. Wide spacing, avoiding overhead irrigation, and prompt removal of any infected leaves are your best defences. You may find hollyhocks behave more as short-lived annuals than true biennials in warm subtropical conditions.
Cool-temperate growers in Tasmania, the ACT, and elevated parts of Victoria and NSW have the most forgiving conditions for hollyhocks in many ways: lower fungal pressure, natural cold stratification, and summer temperatures that suit the plants beautifully. The main challenge here is frost timing: protect young transplants from late frosts in spring with a layer of frost cloth if needed, and ensure planting-out happens after the last frost date for your specific area.
Dealing with hollyhock rust and other pests
Hollyhock rust, caused by the fungus Puccinia malvacearum, is the single biggest disease problem for Australian hollyhock growers, particularly in warm and humid climates. You'll recognise it by yellow or pale spots on the upper surface of leaves and orange-brown, raised powdery pustules on the undersides. It spreads by wind and water splash and can overwinter on infected leaf debris, re-infecting the next season's plants.
Rust management: what actually works
- Remove and destroy (bin or burn, don't compost) any infected leaves as soon as you notice rust spots
- Water at the base of the plant only, never from overhead, to prevent spore splash
- Space plants at the wider end of the recommended range to maximise air flow between stems
- Pull out and destroy any mallow weeds (Malva, Althaea, Lavatera species) growing near hollyhocks, as these host the same rust fungus
- Apply a preventative fungicide spray (copper-based or a registered mancozeb product) early in the season when you first see new growth if rust was a problem the previous year
- Alternate fungicide active ingredients each spray to reduce the risk of resistance developing
- At the end of the season, remove all plant debris from around the crowns and dispose of it
- Rotate planting positions if rust pressure is severe, as the fungus can persist in soil and on debris
Here's the honest truth about rust: if you grow hollyhocks long enough in a warm or humid Australian climate, you will deal with rust eventually. The goal is not to eliminate it completely but to slow it down enough that your plants still produce a great flowering display before defoliation sets in. Starting sprays early, practising good hygiene, and choosing reasonably resistant single-flowered varieties gives you the best chance of achieving that. Removing Hollyhock Rust, Iowa State University Extension recommends starting sprays early on new growth when rust pressure is present, alternating fungicide active ingredients to reduce resistance risk, removing and destroying infected material (do not compost), and rotating planting sites if rust is persistent Removing Hollyhock Rust — Iowa State University Extension (disease control article).
Other common pests
| Pest / Problem | Signs | Management |
|---|---|---|
| Slugs and snails | Irregular holes in leaves and stems, slime trails, crown damage on young transplants | Iron-based snail bait around plants; remove mulch from direct crown contact; night patrols |
| Caterpillars (looper moth, etc.) | Ragged holes in leaves; visible larvae on undersides | Hand pick; Bacillus thuringiensis (Bt) spray; encourage birds |
| Aphids | Clusters of small insects on new growth; sticky residue; distorted buds | Strong water jet to dislodge; encourage ladybirds; insecticidal soap spray if heavy |
| Spider mites | Fine webbing on leaves; stippled, pale foliage; worse in hot dry weather | Increase humidity; miticide or neem oil spray; remove heavily affected foliage |
| Poor germination / no flowers | Seeds not sprouting; or plants stay as rosette for two seasons | Check sowing depth (too deep = no germination); most biennials flower in year 2 only; ensure full sun |
Collecting seed and keeping the cycle going
One of the great pleasures of growing hollyhocks is that once you have them established, they tend to look after themselves through self-seeding. Leave a few seed pods to mature fully on the plant until they are papery and brown, then collect the flat, disc-shaped seeds and store them in a labelled paper envelope in a cool, dry spot. Sow fresh seed the following late summer to autumn for your next round of plants. Hollyhocks are reasonably true to type from seed, though there will be some natural variation in colour within a mix, which is often a lovely surprise rather than a problem.
Growing hollyhocks in Australia is genuinely achievable for gardeners at any experience level. Nail the sowing timing for your climate zone, give them sun and drainage, stay on top of rust from the start, and you'll be rewarded with one of the most visually impressive flowering plants you can put in a home garden.
FAQ
What hollyhock (Alcea) varieties suit Australian gardens and how do I choose one?
Choose by height, flower form and climate: - Tall classic Alcea rosea (150–250 cm) for cottage borders and background planting. - Double/compact series (e.g., Majorette, Chater’s Double) for smaller gardens (50–120 cm). - Single-flowered mixes or Summer Carnival for bees and casual borders. Select disease-resistant or open-centred varieties if rust is a known problem. For hot, dry sites choose compact, drought-tolerant cultivars and provide afternoon shade if temperatures are extreme. Buy reputable Australian suppliers (e.g., Eden Seeds, The Seed Collection, Diggers) to ensure locally suitable lines.
When should I sow hollyhock seed or transplant seedlings in different Australian regions?
General rule: sow so plants establish a rosette before flowering season—usually late summer to autumn in most mainland climates. Regional windows: - Temperate (Melbourne, Adelaide): sow late summer–autumn (Feb–May) for spring/summer flowering next year. - Cool temperate/highland (Hobart, alpine): sow autumn or early spring; consider sowing in pots for a longer season. - Subtropical (Brisbane, northern NSW): sow in late autumn–winter (Apr–Jul) or treat as annuals and sow in cooler months to avoid humid, wet summer seedling losses. - Tropical/monsoonal: best sown in the cooler, drier months or grown as short-lived annuals; avoid sowing during wet, humid season. Transplant seedlings when 5–7 cm tall or with 2–3 true leaves; do this in a cool, cloudy period or late afternoon and keep well watered while establishing.
How do I prepare soil and choose the right site for hollyhocks?
Site: full sun (minimum 6 hours), sheltered from strong winds; good air circulation reduces rust. Soil: deep, well‑drained, humus-rich soil with pH ~6.0–7.5. Preparation: - Dig in plenty of compost or well-rotted manure (5–10 cm layer worked into top 20–30 cm). - Improve heavy clay with coarse sand and organic matter for drainage. - If beds are shallow, use deep raised beds or large containers to accommodate long taproots. Avoid waterlogged sites.
Exactly how should I sow hollyhock seeds (depth, spacing, substrate, germination)?
Sowing: - Use a fine seed-raising mix or well-draining loam. - Surface sow or cover only very thinly (0–3 mm); seeds need light to germinate. - Keep the medium consistently moist (not waterlogged). - Germination: typically 10–21 days (often ~10–14 days) at moderate temperatures. - Thin or transplant so final spacing is 30–60 cm depending on cultivar: 30–40 cm for doubles/compact types, 45–60+ cm for tall classic varieties. For direct sowing, sow in blocks rather than rows and thin to strongest plants.
How and when should I transplant seedlings or divide roots?
Transplanting: - Start seeds in tall tubes/punnets to protect the taproot. - Transplant when seedlings reach 5–7 cm or have 2–3 true leaves. - Plant at the same depth as the pot, avoid disturbing the taproot; insert stakes at planting for tall varieties. - Water in thoroughly and mulch. Root/crown division: - Not commonly recommended because of long taproot. - If you must divide, do it in autumn or spring when plant is not in flower, use a sharp tool, keep minimal root disturbance, replant immediately and water well. Expect higher loss rate than seed-grown plants.
What are practical watering, feeding and mulching guidelines for hollyhocks in Australia?
Watering: - Keep soil evenly moist while establishing; deep watering once a week in moderate climates. - In hot, dry areas increase to 2× weekly deep soakings; in humid/wet regions reduce frequency and avoid overhead watering. - Avoid waterlogged conditions. Feeding: - Incorporate balanced slow-release organic fertiliser at planting. - Feed with a liquid bloom/flower fertiliser every 2–4 weeks during active growth (e.g., early spring through flowering). Mulch: - Apply 5–8 cm organic mulch (lucerne, bark, compost) keeping mulch away from crown to prevent rot. Mulch conserves moisture and reduces weeds but maintain airflow to lower rust risk.