You can absolutely grow hollyhocks from roots, and it's one of the most reliable ways to get established plants that bloom faster than starting from seed. What you're working with is called a bare root or crown, not a true bulb, and the process is pretty straightforward: plant the crown just at soil level in a sunny, well-drained spot after your last frost, water it in well, and let it settle. Do that right, and you'll have a blooming hollyhock the following season.
How to Grow Hollyhocks From Roots Step by Step

Marcus Holloway
30 Apr 2026
Roots, crowns, and the 'bulb' confusion
If you searched for 'hollyhock bulbs' and landed here, you're not alone, and you're not wrong to be confused. A lot of mail-order garden suppliers list hollyhock roots under bulb categories because it's a convenient catch-all for any dormant planting material. But hollyhocks don't actually produce bulbs. What you have, or what you're about to plant, is a bare root or crown: a chunky, fibrous root structure with one or more dormant growth buds sitting right at the top. Those buds are what will push out leaves and eventually that tall flowering spike. True bulbs (like tulips or alliums) store energy in layered scales. Hollyhock crowns store it differently, in the root tissue itself, which is why how you handle and plant them is a bit different. The main thing to keep in mind: the crown bud is the most important part of the plant, and protecting it from rot or damage is the whole game.
Hollyhocks are typically biennial or short-lived perennials depending on the variety and your climate. Starting from a root or crown rather than seed gives you a head start of roughly a full growing season. Seed-started hollyhocks often spend their first year building roots and foliage, then flower in year two. A crown start can compress that timeline so you see flowers in the first season after planting, especially if you plant in spring with good conditions.
When and where to plant
Timing matters more than most people realize. Spring planting, once your last frost has passed and the soil can actually be worked, is the most reliable window for bare root hollyhocks. Knowing when to grow hollyhock seeds is different, but the timing principles for healthy growth still help you plan the season well. The soil should be loose and starting to warm, not cold, compacted, or soggy from snowmelt. In most temperate climates that means somewhere between late March and early May. If you're in a mild-winter region, autumn planting also works well because the crowns can put down roots before winter without the risk of frost heaving or prolonged wet cold. Hollyhocks are fully hardy, so the plant itself can handle cold, but a freshly planted crown sitting in saturated soil through a freezing winter is asking for rot trouble.
For location, you want full sun, and that means a genuine 8 hours of direct sunlight per day. Hollyhocks will survive in partial shade, but they'll stretch, flop, and produce noticeably fewer flowers. They're tall plants by nature (some varieties hit 6 to 8 feet), so a south-facing wall or fence is a classic choice that also gives them some wind protection. Keep in mind that hollyhocks grown in very hot climates like Phoenix or other desert regions need slightly different management around watering and afternoon shade, but that's a topic that deserves its own treatment.
Getting the soil and your tools ready
Hollyhocks are not fussy about soil chemistry. A pH anywhere from 6.0 to 8.0 works fine, which covers most garden soils without any amendment. What they absolutely will not tolerate is poor drainage. If your soil stays wet after rain, or has a heavy clay layer that holds water, you need to fix that before planting a single root. Crown rot from Phytophthora and related pathogens is the number one killer of hollyhocks at the planting stage, and it's almost always linked to waterlogged soil around the crown. If your bed drains slowly, either raise it or work in plenty of coarse grit or composted bark to open up the structure.
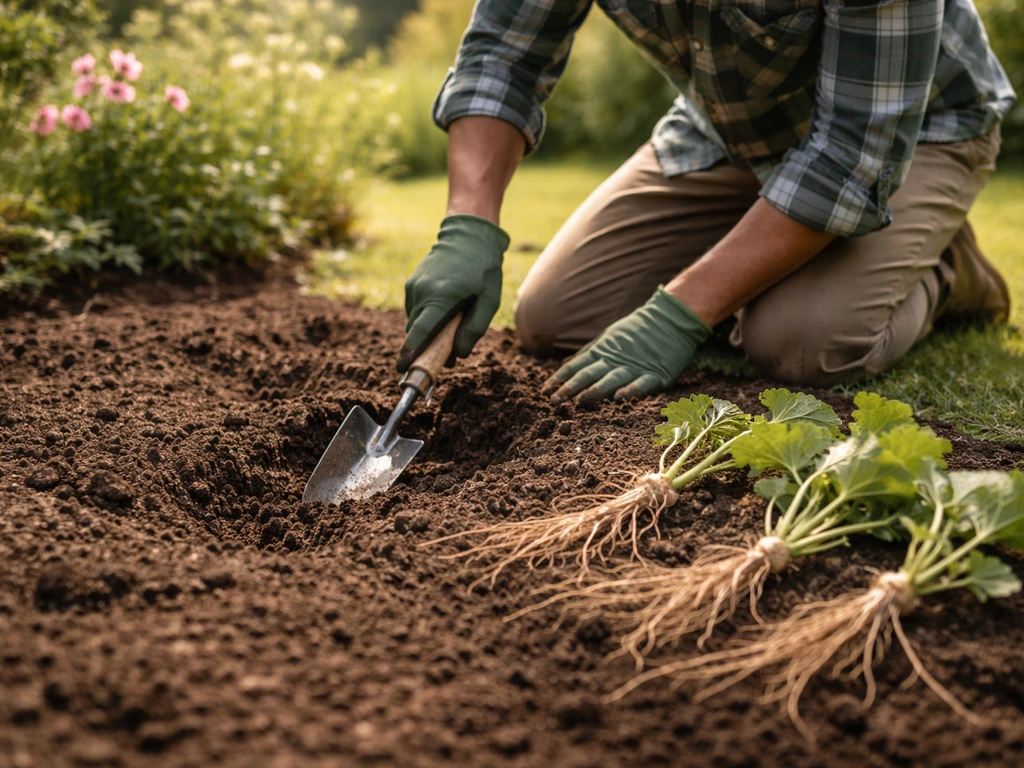
For tools, you'll need a garden fork or spade, and ideally a garden fork for the loosening work rather than a spade, because it breaks compaction without slicing through root zones. A trowel is handy for final hole shaping. If you're amending with compost, have a bag of well-rotted compost ready to mix into the top layer. You don't need fertilizer at planting time. Hollyhocks are tough plants and overfed crowns can actually produce a lot of leafy growth at the expense of flowers.
Loosen the soil to a depth of 12 to 18 inches in the planting area. This sounds like a lot, but hollyhocks develop deep, anchoring root systems and they'll reward you for the prep work. Mix compost into the top 6 to 8 inches if your soil is lean or sandy. Level the bed and let it settle slightly before planting.
Dividing, handling, and planting the roots correctly

If you're working with a bare root from a mail-order supplier, it's likely a single crown and you can plant it as-is. If you're dividing an existing hollyhock (a great way to propagate established plants), do it in early spring just as the first growth buds are showing, or in autumn after the plant has died back. Use a sharp, clean spade or knife to separate the crown into sections, making sure each division has at least one healthy bud and a decent chunk of root attached. Divisions without a visible bud almost never establish.
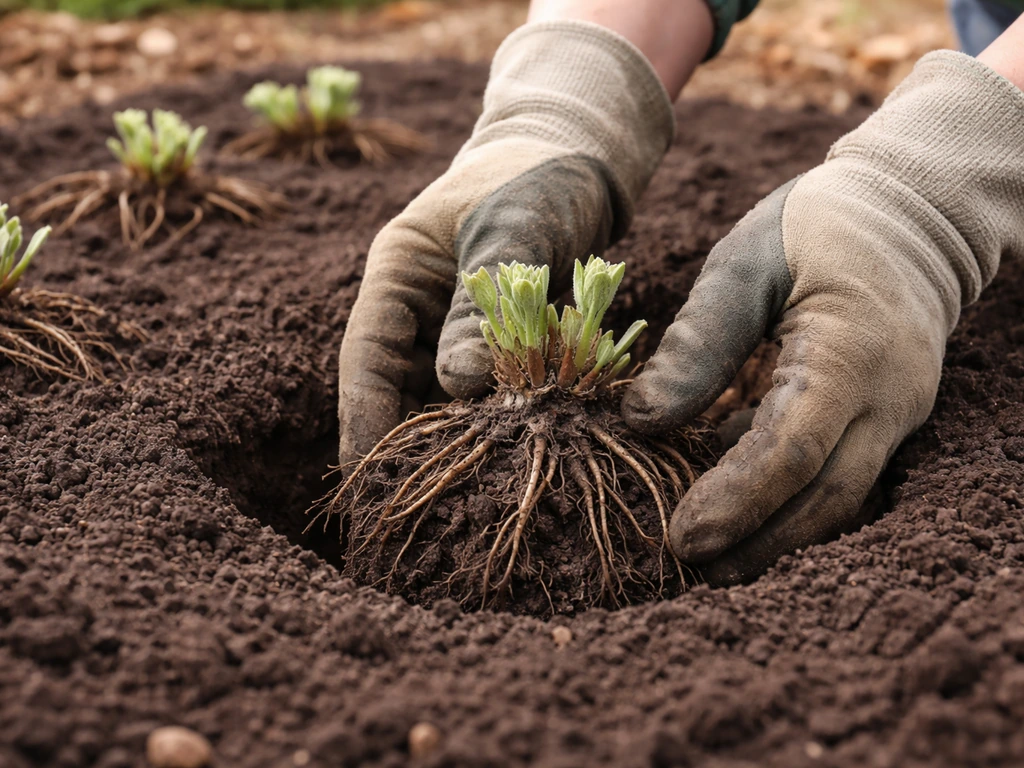
Before planting, inspect the roots. Trim off any sections that are mushy, black, or smell off. Healthy hollyhock root tissue is firm and pale to cream-colored. If you're storing roots briefly before planting, wrap them loosely in slightly damp newspaper and keep them somewhere cool and dark, but don't let them sit more than a few days.
Now here's the part that most people get wrong: planting depth. The crown bud must point upward and sit right at the soil surface, or at most a half-inch below it. That's it. Don't bury it deeply thinking it needs more protection. Burying the crown is the single fastest way to kill a hollyhock root. Set the root system horizontally in the hole, spread the roots out naturally, and bring the crown up so it's level with the surrounding soil. Backfill gently, firm the soil, and water in well.
| Factor | Recommended specification |
|---|---|
| Planting depth (crown) | At or just below soil surface (no more than 0.5 inch deep) |
| Crown bud orientation | Pointing upward |
| Root spread | Horizontal, spread naturally in the hole |
| Soil loosening depth | 12 to 18 inches |
| Spacing between plants | 18 to 24 inches apart |
| Soil pH range | 6.0 to 8.0 |
Space plants 18 to 24 inches apart. The RHS recommends 24 inches as a minimum, and I'd lean toward that if you're in a humid climate where air circulation really matters for disease prevention. The RHS growing guide also recommends planting hollyhocks 60 cm (24 inches) apart. Crowded hollyhocks are rust magnets.
Watering, sunlight, and those first few weeks
After planting, water the crowns in slowly and thoroughly so the soil makes good contact with the root tissue. Then ease off. Your goal during the establishment phase is moist but never soggy. If you're in spring with regular rainfall, you may barely need to water at all. Check the soil an inch down: if it's still damp, leave it alone. Overwatering a newly planted crown in cool spring soil is probably the most common beginner mistake.
Once the plants are actively growing and the weather has warmed up, shift to a deep-watering approach: water thoroughly but infrequently, letting the top inch or two dry out between sessions. This encourages the roots to push down rather than staying near the surface. Established hollyhocks are genuinely drought-tolerant, especially in temperate climates. In fact, UC Master Gardeners in California have noted that established hollyhocks can go without supplemental water even in summer heat, once their root system is properly anchored.
Keep the planting area weed-free in those first weeks. Young hollyhock crowns don't compete well with aggressive weeds, and hoeing around them too aggressively risks damaging the crown. Hand-pull anything close to the base.
Seasonal aftercare and what to do when things go wrong
Once your hollyhocks are growing well, they're pretty low-maintenance. Cut the flower spikes back when flowering finishes to tidy the plant and reduce the chance of leaving infected material in the garden. In autumn, cut the whole plant down and remove the old stalks and leaves. Don't compost them if there's any sign of disease.
Rust: the big one to watch for

Hollyhock rust is essentially unavoidable if you grow these plants long enough. You'll see it as orange-yellow pustules on the undersides of leaves, often starting on the lower foliage first. There's no cure once a leaf is infected. The practical approach is to remove and destroy infected leaves as soon as you see them, keep spacing wide enough for airflow, and do a thorough cleanup at the end of each season. Missouri Botanical Garden and Iowa State Extension both point to end-of-season sanitation as the most effective control. Iowa State University Extension recommends end-of-season sanitation by cutting back the plant stalks and thoroughly removing infected plant parts, because the rust fungus survives from season to season on those infected tissues. Don't leave old plant material lying around the base.
Crown rot: here's what fails and why
If your crown doesn't sprout at all, or the base of the plant turns black and collapses, crown rot is almost always the cause. The culprits are either poor drainage, planting too deep, or planting into cold, wet soil too early in spring. There's no recovery from a fully rotted crown. If you catch it early and there's still firm root tissue remaining, you can dig the plant, cut away all the affected tissue, let the cut surfaces air dry for a day or two, and replant in a better-draining spot. The fix for next time is to address drainage before planting and to hold off until the soil has actually warmed and dried out enough to work properly.
Weak growth or no flowering
If your plant is growing but looks spindly or hasn't flowered, the most common causes are insufficient sun, too much nitrogen, or the plant simply being in its first establishment year. Check your sunlight hours honestly. If the spot is only getting 4 to 5 hours, that's the problem. On the nitrogen side, if you fed heavily with a general fertilizer, you may have pushed leafy growth at the expense of flowers. Back off the feeding and let the plant find its rhythm. And remember that hollyhocks grown from crowns still sometimes take a full season to settle in before putting up a proper flower spike. If you're patient through the first growing season, year two is almost always rewarding.
Winter care
Hollyhocks are fully hardy and their crowns will survive cold winters without any special protection in most climates. The main thing to avoid is leaving the crown buried under wet mulch all winter in poorly draining soil. A light, airy mulch over the crown once the ground has cooled is fine, but don't smother it. In spring, pull the mulch back once you see the first buds pushing through so the crown gets light and air circulation from the start.
If you're gardening in a challenging climate, the general principles here still apply, though timing and watering needs will differ. Growing hollyhocks well in Colorado's short seasons or in Australia's reversed calendar both come down to the same fundamentals: good drainage, correct planting depth, full sun, and patience through the establishment phase. If you follow these steps, you’ll be well on your way to learning how to grow hollyhocks in Colorado good drainage, correct planting depth, full sun, and patience. For a practical Australia-focused checklist, follow these steps on how to grow hollyhocks in Australia.
FAQ
If my hollyhock crown arrives looking damaged, can I save it?
Trim or discard mushy, black, or foul-smelling root sections, but do not try to “heal” a crown that is mostly rotted. If the crown bud area is firm and cream-colored, you can salvage it by air-drying cut surfaces for a day or two before replanting in a drier spot.
Is it safe to cover hollyhock crowns with mulch over winter?
If the crown is buried under wet mulch or soil, the bud stays too damp and has a high risk of rot. A light, airy layer is acceptable only after the ground cools, and you should pull it back as soon as buds appear so the crown gets light and airflow.
Can I plant hollyhock roots in fall instead of spring?
Yes, but timing is crucial. In spring, plant only after the soil can be worked and is no longer cold and waterlogged. In autumn planting, aim to give crowns time to root before deep freezes, but avoid planting late when the ground stays soggy.
How much should I water newly planted hollyhock crowns?
Right after planting, water slowly until the soil is fully settled around the root tissue, then stop short of keeping the crown constantly wet. Check at 1 inch down, if it is still damp you can wait, if it is dry you can water again.
What spacing should I use to reduce rust and flop?
Hollyhocks are tall and rust-prone, so airflow matters. If you want fewer disease issues, use the wider spacing option (closer to 24 inches) and avoid crowding with other tall plants right next to the crown.
My planted crown is growing leaves but no flowers yet, is something wrong?
Don’t assume “spindly but green” means it is failing. New crown starts often need a full settling season for a proper flower spike. If you have full sun, no excess nitrogen, and the crown is planted at the correct depth, wait until year two before changing your whole plan.
What should I do if my garden soil stays wet after rain?
If your soil drains poorly, fix drainage before planting, not after the crown fails. Options include raising the bed, mixing coarse grit or bark into the top layers, and ensuring water does not pool near the crown after rain.
Should I fertilize when I plant hollyhock roots or crowns?
Yes, but avoid routine feeding at planting time. If you do fertilize later, use a light hand and prioritize reducing nitrogen-heavy products, because extra nitrogen often leads to lush foliage with fewer blooms and weaker flowering performance.
Can I transplant a hollyhock crown after it starts growing?
Usually not. Once a crown is planted correctly at soil level, it should not need relocation, and repeatedly disturbing roots can delay establishment. Only move it if drainage is clearly wrong or the crown was planted too deep, and then replant immediately at the correct depth in better soil.
How do I know I planted my hollyhock at the right depth?
Plant the crown bud pointing upward and keep it at the soil surface, or at most about half an inch below. If it is too deep, it stays wet and rot risk climbs quickly, even if the roots look healthy.
What does it mean if the base turns black and the plant collapses?
If the base turns black and collapses, treat it as crown rot. There is rarely a recovery if the rot has reached the crown, but you can salvage a nearby healthy division only if it has its own firm bud and healthy root tissue.
How should I store bare-root hollyhocks if I cannot plant them right away?
Very briefly, yes. Wrap roots loosely in slightly damp newspaper and keep them cool and dark, but avoid holding them for more than a few days. If you see drying or darkening at the crown area, inspect closely before planting.
How do I divide an existing hollyhock so each piece grows?
You can, and it is one of the best propagation methods for established plants. However, each division must include at least one visible bud and some healthy root, divisions without a bud usually will not establish even if roots look alive.