The best time to sow hollyhock seeds indoors is about 6 weeks before your last frost date, keeping soil at 70°F (21°C) for germination in 14–21 days. If you prefer direct sowing outdoors, you have two windows: late spring after your last frost, or late summer (August to September) so seeds overwinter and push growth in early spring. Either way, hollyhocks sown from seed almost always bloom in their second year, so timing your sow correctly is what determines whether you get flowers next summer or have to wait an extra season.
When to Grow Hollyhock Seeds: Timing From Seed to Plant

Marcus Holloway
10 Jun 2026

How hollyhocks actually grow (and why timing matters so much)
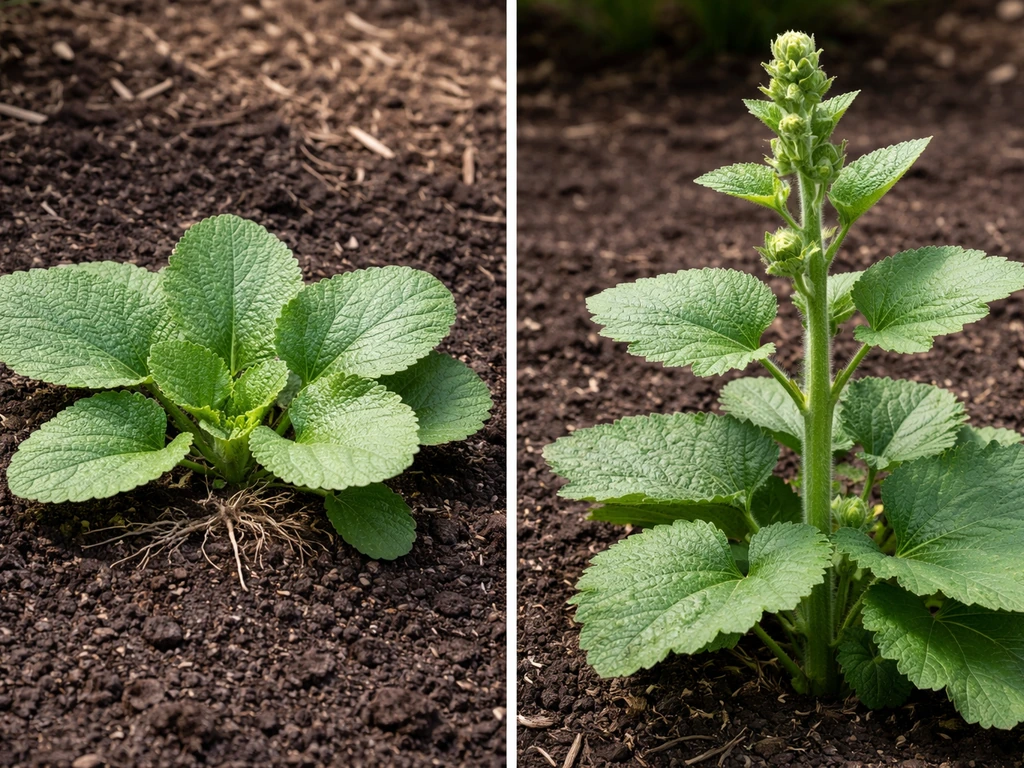
Hollyhocks (Alcea rosea) are biennials by nature, which trips up a lot of beginners. In their first year they put all their energy into roots and a low leafy rosette. In year two, they send up those dramatic 6-foot spires covered in blooms. If you sow seeds in spring, expect flowers the following summer. Sow in late summer or fall, and the seedlings overwinter as a small rosette, then bloom the next summer as well. Either route gets you to the same destination; the difference is just which calendar year you're working with.
Germination itself is pretty reliable once conditions are right. Under ideal warmth (around 70°F), you'll typically see sprouts in 14–21 days. That said, the RHS lists the germination window for Alcea as 'up to 90 days,' and that's worth knowing before you panic at day 25. Slow germination is almost always a temperature or moisture issue, not dead seed.
Sowing windows by method: indoors vs direct outdoors
Your method changes your calendar, so it's worth getting clear on which approach fits your situation before you do anything else.
Starting hollyhocks indoors
Sow indoors approximately 6 weeks before your last expected frost date. If your last frost falls around mid-May, that puts you starting seeds in early April. If you're in a colder zone like Minnesota where last frost runs late May, mid-March is your target (which aligns with what UMN Extension recommends for their region). Indoors, you control temperature and moisture, which means you have a real advantage in getting consistent germination compared to the unpredictability of early spring soil outdoors.
Direct sowing outdoors
You have two reliable outdoor sowing windows. The first is spring, after your last frost has passed and soil temperatures are warming. The second, and honestly the one I find more effective for producing strong blooms, is late summer: sow in August or September so seeds germinate in fall warmth, establish a small rosette, and overwinter right in the ground. Come spring they're already ahead of the game. If you're in a milder UK-style climate, outdoor sowing from June through August also works well.
| Method | When to Sow | Expected Germination | First Bloom |
|---|---|---|---|
| Indoors | 6 weeks before last frost | 14–21 days at 70°F | Following summer (year 2) |
| Direct sow (spring) | After last frost, when soil warms | 14–21 days (soil-temp dependent) | Following summer (year 2) |
| Direct sow (late summer) | August–September | 14–21 days before first frost | Next summer (year 2) |
| Mid-winter indoor sow (mild areas) | January–February in gentle heat | Up to 90 days in cooler conditions | Following summer (year 2) |
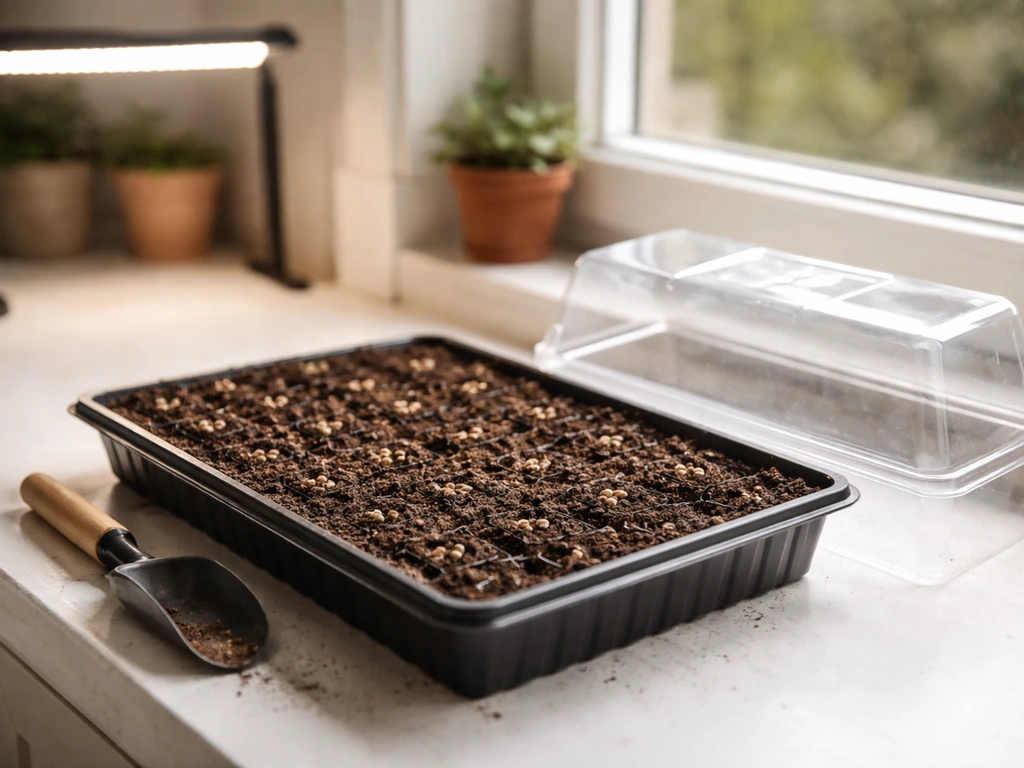
Seed starting details: temperature, light, depth, and what to watch for
Planting depth
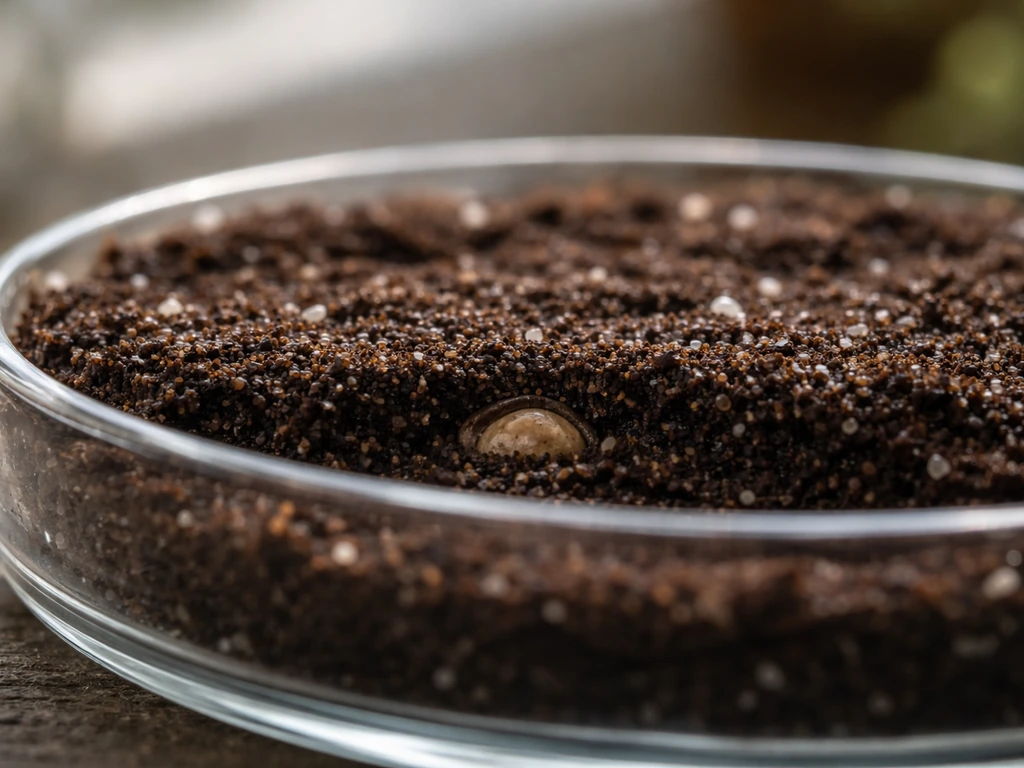
Hollyhock seeds need light to germinate well, so bury them shallowly. The standard recommendation is no more than 1/4 inch deep. Many sources, including Burpee and Outside Pride, recommend barely covering the seed or simply pressing it gently into the surface of moist sowing mix. If you cover too deeply, you reduce the light reaching the seed and slow or prevent germination. Use finely sifted mix or seed-raising mix if you do add a thin cover layer.
Temperature
Keep your seed tray at around 70°F (21°C). A heat mat under the tray works well if your home runs cool. Don't let it drop much below 65°F or germination slows noticeably. The sweet spot is 65–70°F (18–21°C), which matches both Gardening Know How's guidance and Everwilde Farms' recommendations.
Light
Once seedlings emerge, light becomes your most important variable. If you're growing on a windowsill, a south-facing window helps, but most indoor situations don't deliver enough intensity. Fluorescent or LED grow lights running about 16 hours a day give seedlings the light they need to develop stocky, strong stems. Leggy, stretched seedlings almost always mean not enough light, not too little fertilizer.
Moisture during germination
Keep the soil surface consistently moist from the moment you sow until germination. Don't let it dry out, even briefly, because hollyhock seeds sitting in dry soil at this stage can fail to complete germination even if they've already started to sprout. That said, 'moist' does not mean soggy. Bottom-watering or misting the surface works much better than pouring water in from above and drowning the seeds.
Transplanting schedule and hardening off
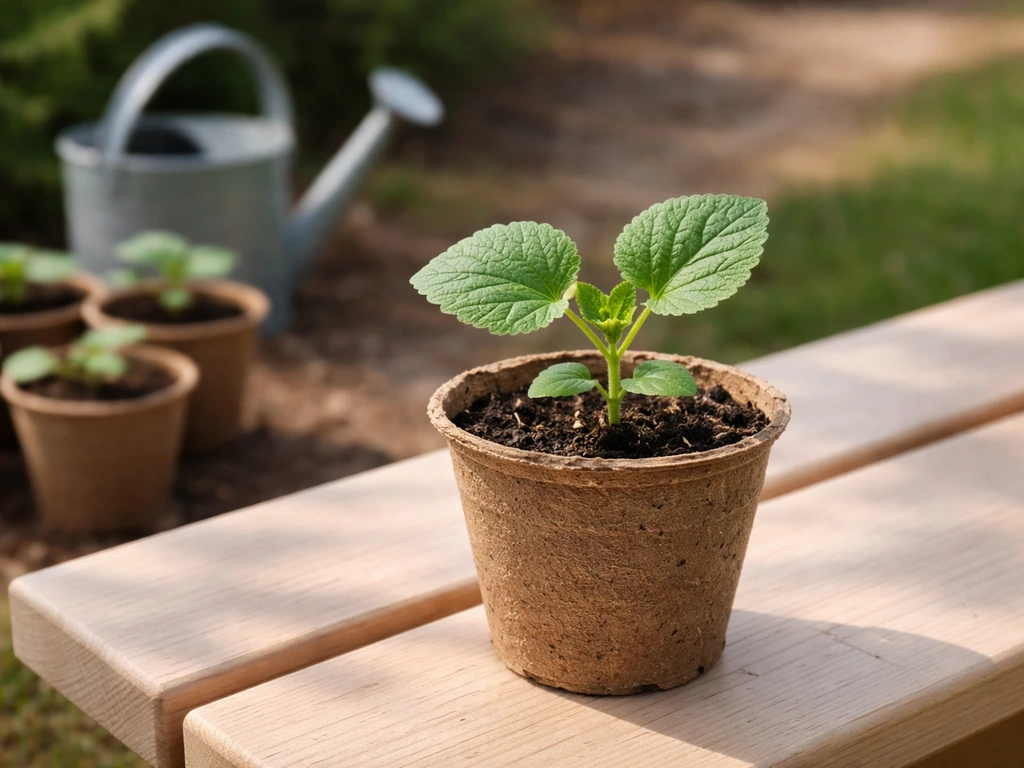
Hollyhocks are ready to transplant when they've developed at least two sets of true leaves (the real leaves that appear after the initial seed leaves, or cotyledons). For most indoor-started seedlings, that's roughly 4–6 weeks after germination. Don't rush this stage. A seedling with only cotyledons visible isn't ready for outdoor conditions.
Before moving seedlings outside permanently, harden them off over about 10 days. UNH Extension recommends hardening off for 1, 2 weeks before planting outdoors harden them off over about 10 days. Start by setting them outside in a sheltered, partly shaded spot for 1–2 hours on day one, then gradually increase outdoor exposure each day. By the end of 10 days they should be able to handle full outdoor conditions including wind and direct sun. Skipping this step is one of the most common reasons transplants fail in the first week outdoors.
One important note: hollyhocks don't love having their roots disturbed. If you want to grow hollyhocks from roots, focus on dividing and planting established clumps carefully and at the right time of year. If you're starting indoors, use peat pots or individual modules rather than a communal tray so you can transplant the whole thing without disturbing the root system. This makes a real difference in transplant success.
What to expect outdoors: planting, growth, and seasonal care
Once your hollyhocks are in the ground (after hardening off, past the last frost), their first season is almost entirely about root and foliage development. To learn the full process, see our guide on how to grow hollyhock plants from seed to bloom. You'll see a spreading rosette of leaves close to the ground. That's exactly what's supposed to happen. Don't mistake this for failure. The plant is building the root system it needs to push those tall flower spikes the following year.
In their second year, flower stalks emerge in late spring and blooms appear from early to midsummer, typically June through August depending on your climate. Once established, hollyhocks are self-seeding machines. Many gardeners find they never need to sow again after the first planting because volunteer seedlings come back reliably each year.
Keep the soil consistently moist during the first season's establishment, but avoid waterlogging. Hollyhocks prefer well-drained soil and can handle some drought once established. Watch for rust (orange-brown spots on leaves), which is the most common hollyhock problem. It doesn't kill plants but removing affected leaves and improving air circulation helps manage it.
Matching timing to your climate and location
Your frost dates are the anchor for every timing decision. If you don't know your last spring frost date, look it up for your zip code before you plan anything. Once you have that date, count back 6 weeks for indoor sowing and count forward to 'after last frost' for outdoor transplanting.
| USDA Zone | Last Spring Frost (approx.) | Indoor Sow Window | Transplant / Direct Sow Outdoors |
|---|---|---|---|
| Zone 3–4 | Late May – early June | Mid-March to mid-April | Early June onward |
| Zone 5–6 | Late April – mid-May | Mid-March to early April | Mid-May onward |
| Zone 7–8 | Late March – mid-April | February to early March | April onward |
| Zone 9–10 | January – February (or frost-free) | December – January (or direct sow in fall) | February onward, or direct sow Sept–Oct |
Hollyhocks are fully hardy in USDA zones 3–9, which gives them a wide range. In hotter climates like Phoenix or the low desert Southwest, timing shifts significantly because summer heat rather than frost becomes the main limiting factor. In those regions, a fall or early winter sowing followed by winter and spring growth is often more productive than a spring sow that gets baked in summer before the plant matures.
Growing hollyhocks in Colorado or other high-altitude areas means a shorter season but the plants handle cold well; just make sure the last frost has genuinely passed before transplanting. Australian gardeners work on a reversed calendar, with the Southern Hemisphere equivalent of a late summer sow falling in February and March.
Growveg Australia similarly notes that hollyhocks follow a late-summer sprouting pattern, forming a winter-hardy rosette before blooming the following summer, which helps translate that timing to Southern Hemisphere conditions late summer sow falling in February and March.
Australian gardeners can use these late-summer sowing timings in their climate to plan when to start seeds and when to transplant late summer sow.
Why your seeds aren't sprouting (and what to do now)
Here's the honest troubleshooting section, because hollyhock germination fails for predictable reasons and most of them are fixable.
- Soil too cold: If your tray is sitting on a cold surface or in a cool room below 65°F, germination slows dramatically. Add a heat mat or move the tray somewhere consistently warmer. This is the single most common reason for slow germination.
- Seeds buried too deep: If you planted deeper than 1/4 inch, seeds may not get the light signal they need. Next sowing, press seeds into the surface and cover with just a fine dusting of mix.
- Soil dried out during germination: Hollyhock seeds that start to germinate and then dry out may fail to emerge. Check moisture levels twice daily and mist the surface if needed. Never let it get powdery dry.
- Damping-off: This is a fungal problem where seedlings that have already sprouted suddenly collapse at the soil line. It looks like the stem pinches off near the surface. It's caused by overly wet conditions, poor drainage, or soggy soil. It is not reversible once a seedling collapses, but you can prevent it in remaining seedlings by improving drainage, watering from the bottom, and allowing the surface to dry slightly between waterings. Use trays with drainage holes and well-draining seed-raising mix.
- Just slow germination: The RHS notes Alcea can take up to 90 days in cooler or less-than-ideal conditions. If it's been less than three weeks and conditions are warm and moist, give it more time before concluding failure.
If you're at day 30 or beyond with no signs of life, your best move is to resow in fresh mix with a confirmed soil temperature of 70°F, seeds pressed to 1/4 inch depth, and consistent surface moisture. Fresh, good-quality seed has strong germination rates when conditions are right.
What to do this week based on today's date
Today is June 10, 2026. Most of the continental US has already passed its last frost date, which means direct outdoor sowing right now is a valid option in zones 5 through 9. Seeds sown directly in the ground this week will germinate through June, establish a rosette through summer and fall, overwinter, and bloom next summer. That's a perfectly normal and productive timeline.
If you started seeds indoors earlier this spring and have seedlings with two or more sets of true leaves, you're right in the transplant window. Harden them off now over 7–10 days and get them in the ground before summer heat peaks. If you're in zone 9 or 10 where summer is already getting intense, wait until late August or September to direct sow outdoors when temperatures drop back into a range that favors germination.
- Check your last frost date and confirm it has passed for your location.
- Choose your method: direct sow outdoors now (zones 5–9) or start indoors now for transplanting in 6 weeks.
- If direct sowing, prepare a well-drained bed, press seeds no deeper than 1/4 inch into moist soil, and keep the surface moist until germination (14–21 days).
- If starting indoors, fill peat pots with seed-raising mix, maintain 70°F soil temperature, and set up grow lights for 16 hours a day once sprouts appear.
- Mark your calendar for transplant timing (after 2 sets of true leaves) and begin hardening off 10 days before planting out.
- Expect a rosette of leaves this season, and plan for blooms in summer 2027.
FAQ
If hollyhocks usually bloom in the second year, should I still transplant them as early as possible?
For first-year seedlings, the goal is to keep them alive and growing a strong rosette, not to rush them into flowering. If you transplant after the weather warms too much, heat can weaken rosette growth even though flowers do not appear until the second year. In hot climates, prioritize a late-summer sow so roots establish during cooler fall weather before winter and spring growth.
My hollyhock seeds are taking a long time to sprout. Can I just wait longer or should I restart?
Yes, but do not sow deeper to “compensate” for slow warmth. Instead, keep seeds no deeper than about 1/4 inch, maintain steady surface moisture, and verify your medium is warm enough. If germination has not started by around day 30, resow rather than keep waiting in questionable conditions.
What causes leggy hollyhock seedlings, and how do I fix it quickly indoors?
If seedlings look healthy but are stretching, the fix is to move them closer to the light or increase intensity and keep lights on a consistent schedule. Temperature can also contribute, if your indoor setup runs much warmer than the mid 60s to low 70s. Avoid adding nitrogen-heavy fertilizer, because that encourages tall, weak growth.
Can I start hollyhocks in a communal seed tray and still transplant successfully?
Use containers that you can plant without disturbing roots, such as individual modules or peat pots, because hollyhocks resent root disturbance. When transplanting, handle by the leaf area, keep the root ball intact, and water in thoroughly. If you must use a communal tray, plan to transplant at the first true-leaf stage or pot up promptly to reduce shock.
What if my hardening-off schedule overlaps with a hot, sunny week?
Harden-off is meant to transition plants gradually to wind and full sun, but if you live in an area with sudden heat waves, extend the hardening period rather than shortening it. Start with more shade and shorter sessions, then increase time only when daytime temperatures and light are stable. Skipping hardening can cause leaf burn and transplant shock even when the seedlings are otherwise ready.
Can I start hollyhock seeds outdoors in a cold frame instead of indoors or direct in the garden?
Yes, you can sow in a cold frame, greenhouse, or protected outdoor spot after you know germination temperatures will be available. Just keep seed depth shallow and ensure light reaches the seed. The advantage is better control than open ground, while still allowing overwinter establishment if you keep plants protected from extreme wind and heaving frost.
How do I know whether poor germination is due to my technique or old seed?
Alcea seeds are not very reliable for reusing old storage if the seed is old or has been kept warm and dry for years. If your germination failures happen repeatedly, switch to fresh seed and check depth and surface moisture consistency first. Storage conditions matter, cool and dry is best to maintain viability.
After the last frost, what else should I watch for before transplanting hollyhocks outside?
Once seedlings have true leaves, you can transplant, but make sure the soil is not still cold and wet. Even if the transplant is “after last frost,” cold soil slows growth and increases stress. If nights are still chilly, wait for a stretch of milder weather or use row cover briefly after transplanting.
If my hollyhocks self-seed, will the next generation look the same as the original plants?
Yes, hollyhocks can self-seed, but not every volunteer will match the parent if you grew named cultivars. Volunteers are usually fine to keep, especially if you do not care about exact flower color or height. If you want consistent results, prevent seeding by removing spent flower stalks before pods mature.