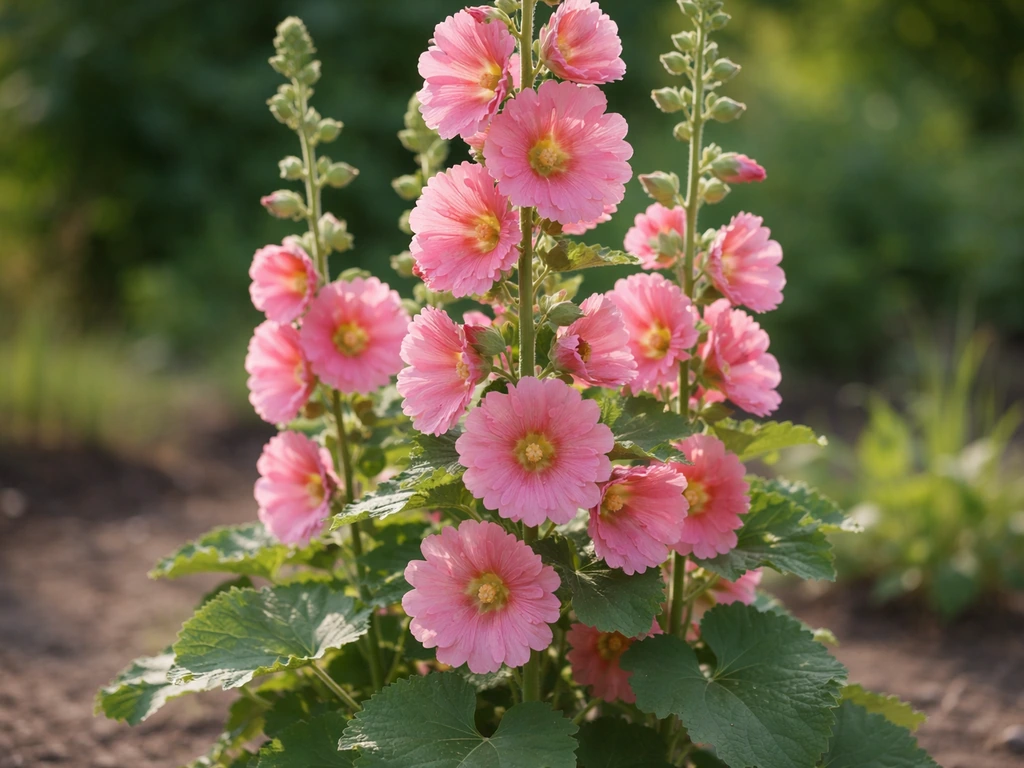
Hollyhocks are one of those plants that look like they belong on a cottage garden postcard, but they're actually pretty forgiving once you understand how they grow. The short answer: sow seeds shallowly, give them full sun, plant in well-drained soil, and keep the leaves dry. Do those four things right and you'll have tall, blooming stalks you can brag about. Get any of them wrong and you'll spend the summer wondering why your hollyhocks look terrible. This guide walks through every stage, from picking a variety to diagnosing why a stubborn plant won't bloom. In Colorado’s variable spring temperatures, you’ll get the best results by timing sowing around your frost dates and choosing a sunny, well-drained spot how to grow hollyhocks in colorado.
How to Grow Hollyhock Plants: Step-by-Step Guide

Picking your variety and nailing the timing
Hollyhocks (Alcea rosea) are technically biennials, meaning most varieties spend their first year building foliage and roots, then bloom in their second year. Some modern cultivars have been bred to bloom in year one when started early, but the classic, towering cottage garden types follow that two-year pattern. Before you buy seeds, decide whether you want single-flowered or double-flowered types, because that choice affects what you can expect from saved seed later. Double-flowered varieties like Chater's Double or Double White need to come from a reliable seed strain to actually produce those lush, pom-pom blooms. More on doubles in a moment.
Timing comes down to two windows. The most common approach is direct sowing outdoors in early spring, right after your last frost date. That gives seedlings a full season to establish before they bloom the following year. The second option is a late-summer/fall sow, starting in August and finishing up roughly two months before your first fall frost. Fall-sown seeds overwinter as small rosettes and often bloom the very next summer, which can feel like a shortcut to flowers. If you'd rather start indoors, get seeds going about 6 to 8 weeks before your last frost date and transplant outside once the weather cooperates. If your growing region has specific frost quirks, the timing logic is the same but the calendar dates shift accordingly. If you are wondering when to grow hollyhock seeds for the best chance of blooms, aim to sow in early spring or late summer based on your first and last frost dates.
Starting seeds: indoors or direct sow
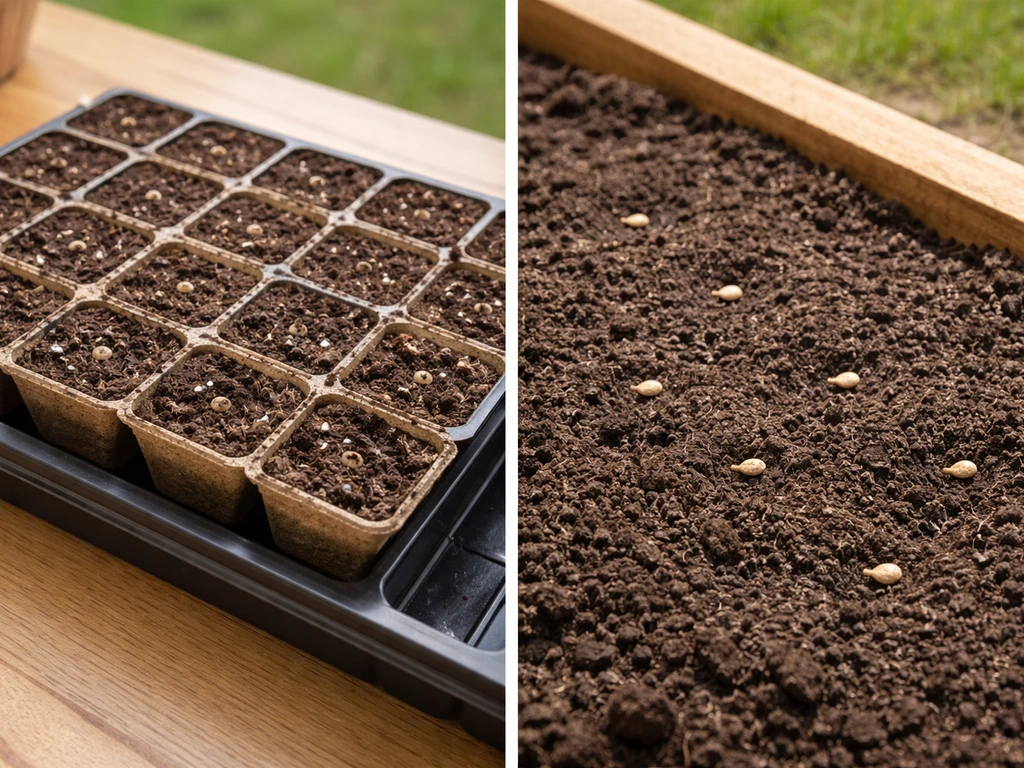
Here's the one rule that trips up more people than any other: hollyhock seeds need light to germinate. Don't bury them. The correct seeding depth is about 1/8 inch. Press seeds into moist seed-starting mix, barely dust them over with a thin layer of mix, and that's it. Cover the tray with a humidity dome or plastic wrap until you see sprouts, which typically happens in 8 to 10 days at temperatures between 65 and 75°F. If you've sown hollyhocks before and got nothing, too-deep planting is often the reason.
For indoor starts, use individual cells or small pots rather than a flat you'll need to divide later. Hollyhocks develop a taproot early, and any significant disturbance to that taproot during transplanting can set the plant back badly or kill it outright. Starting in biodegradable pots you can plant whole is a smart move. Keep seedlings under bright light, near a sunny south-facing window or under grow lights for 14 to 16 hours a day, to avoid the leggy, weak-stemmed seedlings that struggle once they hit the garden.
About 10 days before your planned transplant date, start hardening off. On day one, set the seedlings outside in dappled shade for about an hour. Add an hour or so of outdoor time each day, gradually moving them into more sun. By the end of 10 days, they should be spending a full day outside without any wilting drama. Skipping this step is a classic beginner mistake that leads to transplant shock and stalled growth.
For direct sowing, prepare your bed, scatter seeds across the surface, press them lightly into contact with the soil, and barely cover with a fine layer of soil or vermiculite. Water gently so you don't blast the seeds sideways, then keep the area consistently moist until germination. If birds or cats are a nuisance, loosely drape row cover fabric over the area until sprouts appear.
Finding the right spot: sun, soil, and spacing
Hollyhocks want full sun, and that means a genuine 6 or more hours of direct sunlight per day. Plants grown in partial shade get weak stems, produce fewer flowers, and are far more vulnerable to disease. If you're deciding between two spots in your garden and one is slightly shadier, always go with the sunnier one.
Soil drainage matters enormously. Hollyhocks grown in soggy, compacted, or overly enriched soil tend to develop soft, weak stems and become magnets for hollyhock rust, the fungal disease that turns leaves orange-brown and can defoliate a plant by midsummer. Well-drained, moderately fertile soil is the sweet spot. Resist the urge to amend the bed heavily with compost or load it up with high-nitrogen fertilizer. Lush, fast growth fed by too much nitrogen produces exactly the kind of succulent foliage that rust loves. A neutral to slightly alkaline soil pH around 6.0 to 8.0 suits hollyhocks well.
Spacing is not optional. Give plants at least 18 to 24 inches between them. Hollyhocks should be spaced about 60 cm (24 in) apart, according to the RHS growing guide 18 to 24 inches. Cramped hollyhocks don't get the airflow they need, and when air can't circulate between the leaves, moisture lingers. That moisture is what spreads rust spores. If you're planting against a fence or wall, leave at least a foot of space between the plant and the structure so air can move behind the stalks as well.
How to plant and transplant hollyhocks
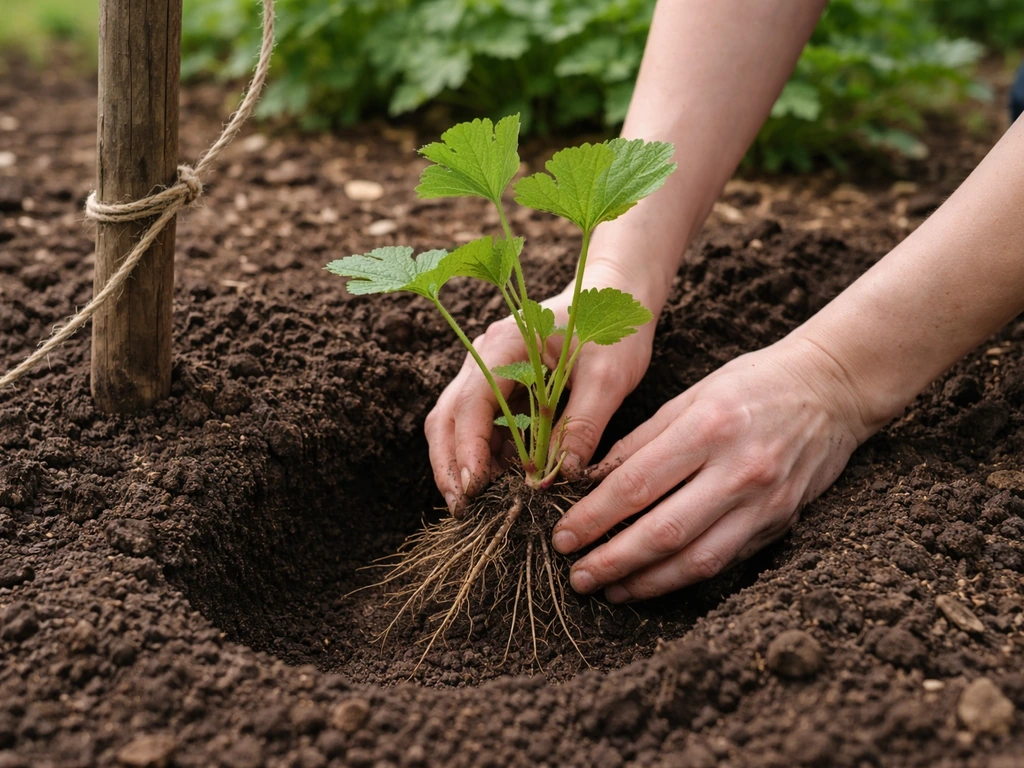
Transplant on a cloudy day or in the late afternoon. This is practical advice, not optional: transplanting into harsh midday sun stresses plants that are already dealing with root disturbance. Dig a hole slightly larger than the root ball, set the plant in at the same depth it was growing in its container, backfill gently, and water in immediately. If you're handling bare roots, plant them 2 to 3 inches deep and at the recommended spacing.
Because hollyhocks can grow quite tall (some varieties reach 6 to 8 feet), install supports at planting time rather than trying to stake them later once they're already leaning. A bamboo cane or metal stake set at the back of the plant works well. Tie the stem to the support loosely with soft twine or fabric ties. Anything too tight will girdle the stem as the plant grows.
One more thing on transplanting: keep granular fertilizers away from the crown and foliage. If fertilizer touches the leaves or sits against the stem, it can cause chemical burn. Apply it to the surrounding soil and water it in.
Watering and fertilizing without making things worse
Water at the base of the plant, not over the top. Overhead watering wets the foliage and is one of the main ways rust spreads through a planting. Use a soaker hose, drip irrigation, or simply direct a hose nozzle to the soil level. Hollyhocks are reasonably drought-tolerant once established, but they'll perform best with consistent moisture during their first season and during dry spells. Let the top inch of soil dry out slightly between waterings rather than keeping the ground constantly saturated.
For fertilizing, apply a balanced fertilizer at planting time to give roots an early boost. After that, feed every 4 to 5 weeks throughout the growing season using a balanced or slightly lower-nitrogen formula. Heavy nitrogen feeding encourages leafy growth over flowers and weakens stems. Think of fertilizer as support, not a magic wand. A plant in poor sun with great fertilizer will still disappoint you.
Getting your hollyhocks to actually flower
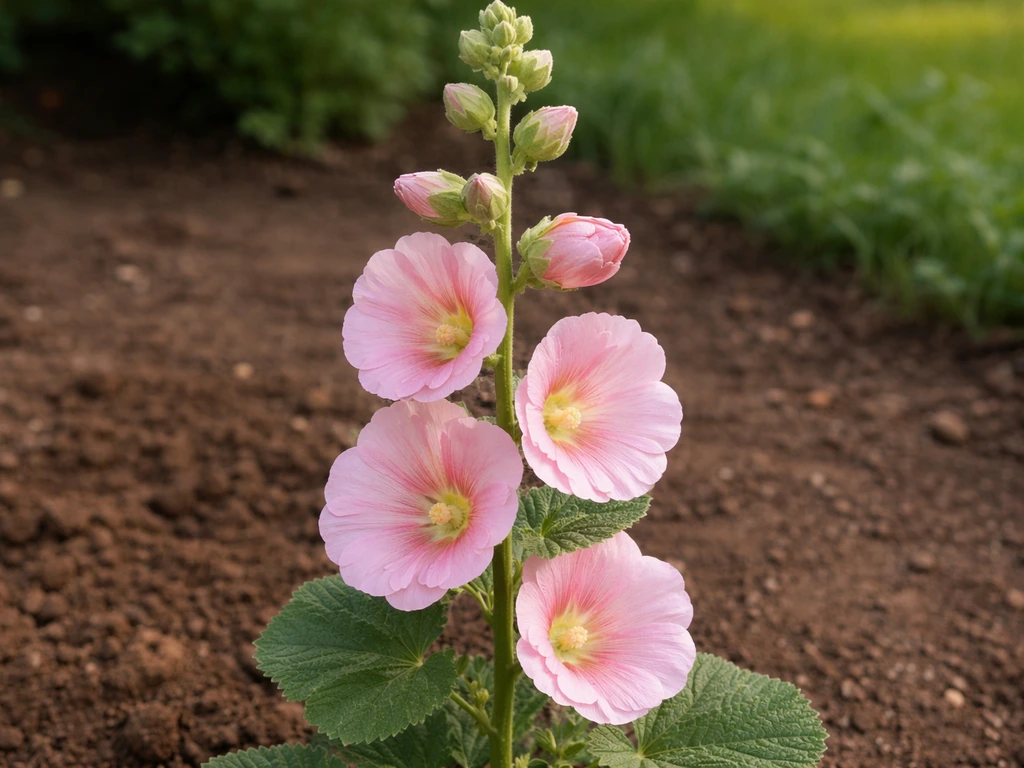
If you started from seed in spring, your plants will likely spend the first season building a leafy rosette. That's normal. Flowers come in year two. If you want blooms faster, sow in late summer/fall so plants can overwinter, or choose a first-year-blooming cultivar and start seeds indoors early.
Once blooming begins, flowers open progressively up the stalk from the bottom. Deadheading (removing spent blooms) redirects energy away from seed production and keeps more blooms coming. For the biggest impact on flowering, snip off spent flowers as they fade. If you want to collect seeds for next year, leave a few spent blooms on one or two plants to develop seed pods. Cut the remaining stalks back after they finish flowering to encourage lateral growth and occasionally a second flush of blooms later in the season.
Sunlight really is the single biggest lever you can pull for flower production. Plants that struggle to bloom in your garden are often in more shade than you think, especially in summer when nearby trees and shrubs are in full leaf. Walk your garden in the afternoon and actually watch where the shadows fall before you decide a spot is "sunny enough."
Growing double hollyhocks: what's different
Double hollyhocks are showstoppers, with those fluffy, multi-petaled blooms that look almost like fabric flowers on a stick. But they do come with a few specific considerations. The most important one is seed sourcing. You must buy seed from a reputable cultivar strain (like Chater's Double or similar named doubles) if you want reliably double flowers. Seeds saved from a mixed planting or from unknown plants will often revert toward single or semi-double blooms because the double trait doesn't breed true under uncontrolled conditions. Don't bother saving seed from doubles unless you know what you're doing.
Care for double hollyhocks follows the same principles as singles, with a few things worth emphasizing. Spacing at 18 to 24 inches (or a bit more if your climate is humid) is particularly important because the denser flowers and fuller foliage of double types restrict airflow even more. Rust can move through a crowded planting of doubles surprisingly fast. Full sun is non-negotiable for doubles: shade produces weak stems that cannot support the heavier flower heads. Staking is more important for doubles than for singles because those big blooms catch the wind.
| Feature | Single Hollyhocks | Double Hollyhocks |
|---|---|---|
| Bloom appearance | Classic open, single-layer petals | Lush, multi-petaled pom-pom blooms |
| Seed trueness | Generally breeds true from saved seed | Requires named cultivar seed for reliable doubles |
| Stem strength needed | Moderate | Higher (heavy flowers catch wind) |
| Staking requirement | Recommended for tall varieties | Strongly recommended |
| Spacing | 18–24 inches | 18–24 inches minimum; more in humid climates |
| Airflow sensitivity | Moderate | Higher due to denser foliage and blooms |
| Sunlight requirement | Full sun (6+ hours) | Full sun (6+ hours), non-negotiable |
When hollyhocks won't cooperate: honest troubleshooting
Most hollyhock failures fall into a handful of predictable categories. Here's what to look for and what to do about it.
Seeds won't germinate
The usual culprits are planting too deep or soil that's too cold. Remember, 1/8 inch is all the covering these seeds want. If you buried them at half an inch or more, they may not have enough light reaching them to trigger germination. Start over with a fresh sowing, barely covering the seeds. Also check your soil temperature: below 60°F slows germination significantly. Indoors, aim for 65 to 75°F consistently.
Seedlings are leggy and weak
Leggy seedlings are almost always a light problem. Indoors, that means not enough light hours or intensity. Move them directly under grow lights (2 to 3 inches below the fixture) and run the lights 14 to 16 hours a day. Outdoors, weak seedlings in a supposedly sunny bed often mean the spot gets more shade than you realized. Leggy plants don't outgrow this problem on their own.
Plants decline after transplanting
Taproot damage is the most common reason a healthy-looking seedling collapses or stalls after transplanting. Once that taproot is torn or severed, the plant has a hard time recovering. To prevent it, start seeds in biodegradable pots and transplant the whole thing. If you're using plastic cells, handle the root ball very gently. Transplanting on a cool, overcast afternoon also reduces the immediate moisture stress on a plant with a compromised root system.
Rust: the big leaf problem
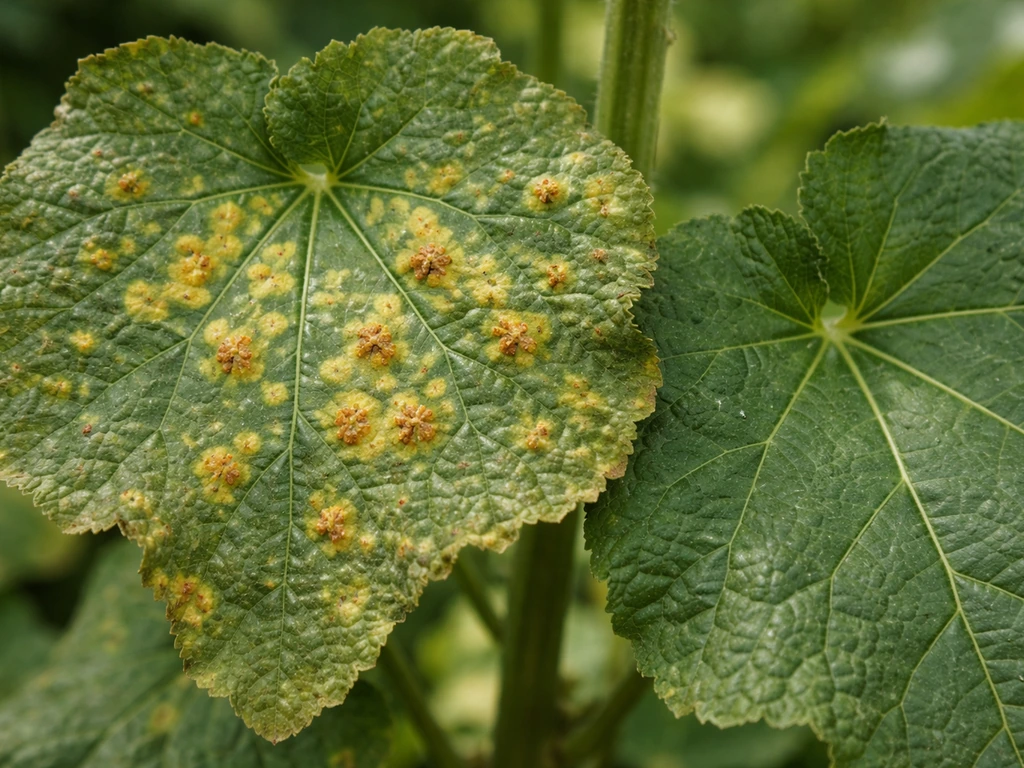
Hollyhock rust (Puccinia malvacearum) is probably the most common complaint from hollyhock growers. You'll see yellow spots on the upper side of leaves and raised, orange-brown powdery pustules on the undersides. In bad cases, the entire lower portion of the plant defoliates by midsummer. Rust spreads through splashing water and wind, so wet foliage and crowded plants are the perfect setup. Iowa State University Extension also recommends watering at the soil level to avoid wetting foliage, along with cutting back infected plants and removing debris at season’s end to reduce rust carryover Rust spreads through splashing water and wind.
- Switch to drip or base watering immediately: stop all overhead irrigation.
- Increase spacing if you're replanting or starting fresh. Eighteen to 24 inches minimum.
- Remove and bag (don't compost) any leaves showing orange pustules to slow spread.
- Choose a sunnier, airier location if your current spot is shaded or enclosed.
- In severe cases, a fungicide labeled for rust can slow the disease but won't cure infected leaves.
- Some hollyhock varieties have better rust resistance than others: check descriptions when buying seed.
Established plants that won't bloom
If your hollyhocks are growing lush and green but not flowering, look at two things first: light and nitrogen. Insufficient sun is the most common cause of non-blooming hollyhocks. Too much nitrogen fertilizer is the second, pushing all that energy into leaves. Dial back the feeding, make sure the plant is genuinely in full sun, and give it time. If you're in year one from seed, patience is the only real answer because most hollyhocks simply don't bloom until year two.
Growing hollyhocks successfully really does come down to a short list of non-negotiables: full sun, well-drained soil, shallow seed placement, base watering, and enough space for air to move. Get those right and you'll have those iconic, tall spires of bloom that made hollyhocks a cottage garden staple for centuries. If you're growing in a challenging climate, similar principles apply but the timing and specific heat or cold considerations shift, and the same is true whether you're starting from roots rather than seed.
FAQ
What should I do if my hollyhocks get rust and the leaves keep spreading disease?
Hollyhocks are prone to rust, so it is usually better to remove fallen leaves and avoid composting diseased foliage. If you see orange-brown pustules on the underside, collect and discard the leaves (trash or sealed bag) and do not water overhead while the plant is active.
Can I divide or transplant established hollyhocks to make more plants?
Yes, but only as a short-term fix. Because hollyhocks have a taproot, dividing is unreliable and can stall plants for an entire season or more. If you must move one, do it very early in spring and keep as much of the taproot intact as possible, ideally transplanting with a larger root mass than you think you need.
Will cutting spent stalks always trigger a second round of blooms?
When you cut the flowering stalks after the first bloom, leave the rest of the rosette and any healthy leaves intact. A second flush is more likely when the plant is in strong sun and not overfed with nitrogen, and some cultivars bloom only once even with good care.
My hollyhock seeds are taking a long time to sprout, what should I check first?
Warm, sunny weather matters, but the germination trigger is mainly light plus soil temperature. If you are starting indoors, you can speed things up by keeping seeds on the surface of moist mix, using grow lights from day one, and avoiding heat mats that dry the top layer.
Can I save seeds from double hollyhocks and still get double flowers next year?
You can collect seed pods from single-flowered plants and expect viable seed, but double-flowered genetics do not breed true from saved seed. If you save seed from doubles anyway, plan for mostly single or semi-double offspring and label the batch so you can assess what you got next season.
How do I troubleshoot hollyhocks that are healthy but never bloom?
If plants bloom poorly despite good care, check for nitrogen excess and shade at peak summer. A practical test is to reduce feeding and ensure the spot gets at least 6 hours of direct sun, then reassess after one growing cycle, especially if your plants are in their first year.
How often should I water hollyhocks once they are established?
Watering frequency depends on drainage, not the calendar. Aim to wet deeply at the soil level, then let the top inch dry slightly before watering again, particularly after the first summer heat wave, when shallow roots and evaporation can fool you into overwatering.
What materials can I use to lightly cover hollyhock seeds instead of burying them?
Common substitutes include vermiculite for the final dusting, or very fine potting mix that still stays light and airy. Avoid thick compost layers on top of seeds, because even if seeds are present, restricted light can prevent germination.
My first-year hollyhocks look stuck in growth, is that normal?
It is normal for year-one plants to stay leafy as a rosette, but if you see no rosette either, it usually points to seed depth, cold soil, or seed not receiving light. If germination happened but growth stalled after transplanting, suspect taproot disruption and adjust your next start method (biodegradable pots, minimal handling).
How do I stake hollyhocks so they do not get damaged as they grow?
Support should be installed early for tall varieties, but tie loosely and check after storms or every couple of weeks. If a stem shows rubbing or girdling marks, loosen ties immediately, and if possible use a second support or additional twine points to spread the load.