You can grow a new hibiscus plant from a cutting, but here's the honest truth: a bare leaf alone won't do it. Hibiscus needs at least a short section of stem with a node to form roots reliably. What most people mean when they search 'grow hibiscus from leaves' is actually a leaf-tip stem cutting, and once you understand that distinction, the whole process becomes straightforward.
How to Grow Hibiscus From Leaves: Propagation Guide

Marcus Holloway
4 Jun 2026
Tropical hibiscus (Hibiscus rosa-sinensis) roots the easiest this way, typically showing roots in 4 to 6 weeks with the right setup. Hardy hibiscus (Hibiscus moscheutos) is trickier but possible. If you are wondering how to grow hardy hibiscus from a cutting, the same node and rooting setup is key, but you should expect a slower, more variable timeline than tropical types hardy hibiscus (Hibiscus moscheutos). Here's exactly how to do it.
Which hibiscus types actually root from a leaf cutting
Before you grab scissors and start snipping, it helps to know what you're working with. Tropical hibiscus (Hibiscus rosa-sinensis) is your best bet for propagation by cuttings. It roots reliably, responds well to rooting hormone, and is generally forgiving enough for beginners. Hardy hibiscus (Hibiscus moscheutos) can be propagated from stem cuttings too, but it's less predictable and more commonly grown from seed. If you're working with a hardy variety, expect a slower, more inconsistent process.
Now, about that 'leaf cutting' idea. A petiole cutting, meaning just the leaf blade and its stalk snapped off the plant, almost never produces roots in hibiscus. Virginia Tech's extension PDF explains that a petiole-only cutting that includes only the leaf blade and stalk typically does not root, highlighting the need for the proper stem-and-node structure [Propagation by Cuttings, Layering and Division](https://www. pubs.
ext. vt. edu/content/dam/pubsextvt_edu/426/426-002/SPES-683. pdf).
The adventitious roots that form on cuttings need a stem node, that little bump or joint where a leaf attaches to the stem. What actually works is a leaf-bud stem cutting: a short section of stem with one or two leaves still attached, cut just below a node. This is what the rest of this guide is about.
Think of it as a 'leaf cutting' in the casual sense because you're keeping leaves on, but structurally it's a stem cutting with leaves included.
How to take the right cutting
Timing matters here. The best window for tropical hibiscus cuttings is late summer, when the plant has put on a full season of growth and the stems are semi-mature but not woody. That said, softwood tip cuttings taken in spring through early summer, from the current season's new growth, also root well. The key is to avoid fully woody, old growth on one end and completely soft, floppy new growth on the other. You want something in between: a stem that's starting to firm up but still has some flex to it.
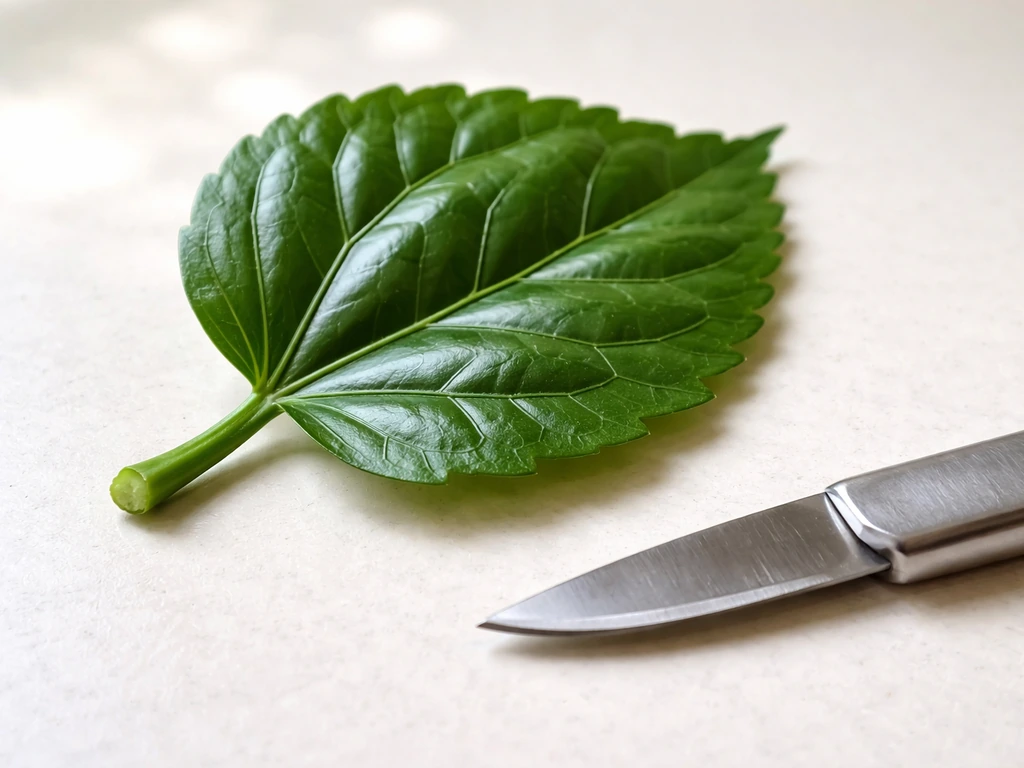
For tools, use clean, sharp pruners or scissors. Wipe the blades with rubbing alcohol before you start. A dull or dirty blade crushes the stem end rather than cutting it cleanly, which slows rooting and invites rot.
Here's exactly what to cut. Find a healthy shoot tip with a few sets of leaves. Make your first cut just above a node on the parent plant (so you're not leaving a dead stub), and make your second cut just below a node on the cutting itself, at a slight angle. Your finished cutting should be about the length of a pencil, roughly 4 to 6 inches. That angled bottom cut increases the surface area for root formation and helps you quickly identify which end goes into the medium.
Now prep the cutting before it goes anywhere near rooting medium. Strip off all leaves from the lower half of the stem, leaving only one or two leaves at the top. Then reduce those remaining leaves by snipping off about two-thirds of each leaf blade. This sounds dramatic, but it's essential. Leaves lose water through transpiration, and a cutting with no roots can't replace that water fast enough. Smaller leaf area means less stress and a much better survival rate.
Setting up your rooting environment
The right rooting medium
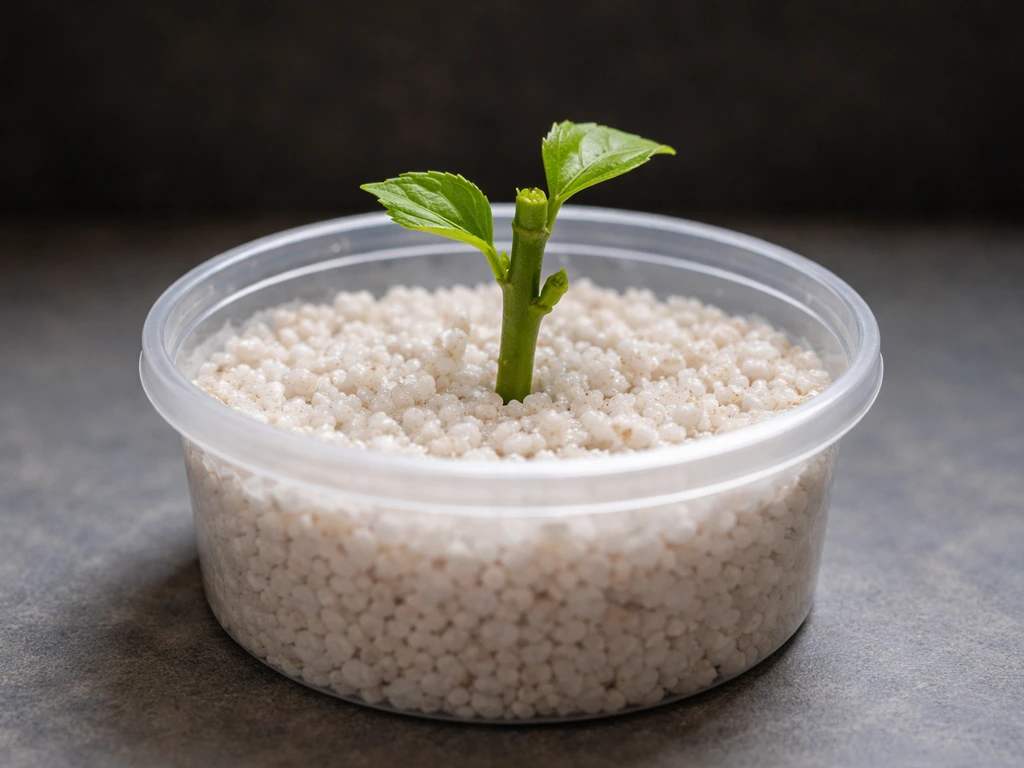
Skip regular potting soil for this stage. It holds too much moisture and not enough air, which is a recipe for rot before roots even form. Pure moist perlite is the classic choice for hibiscus cuttings, and it works well. If you want a bit more moisture retention, a mix of about 60% perlite and 40% vermiculite is a solid option. Either way, the medium should feel damp but not soggy. Squeeze a handful: it should hold its shape loosely without water dripping out.
Rooting hormone: use it
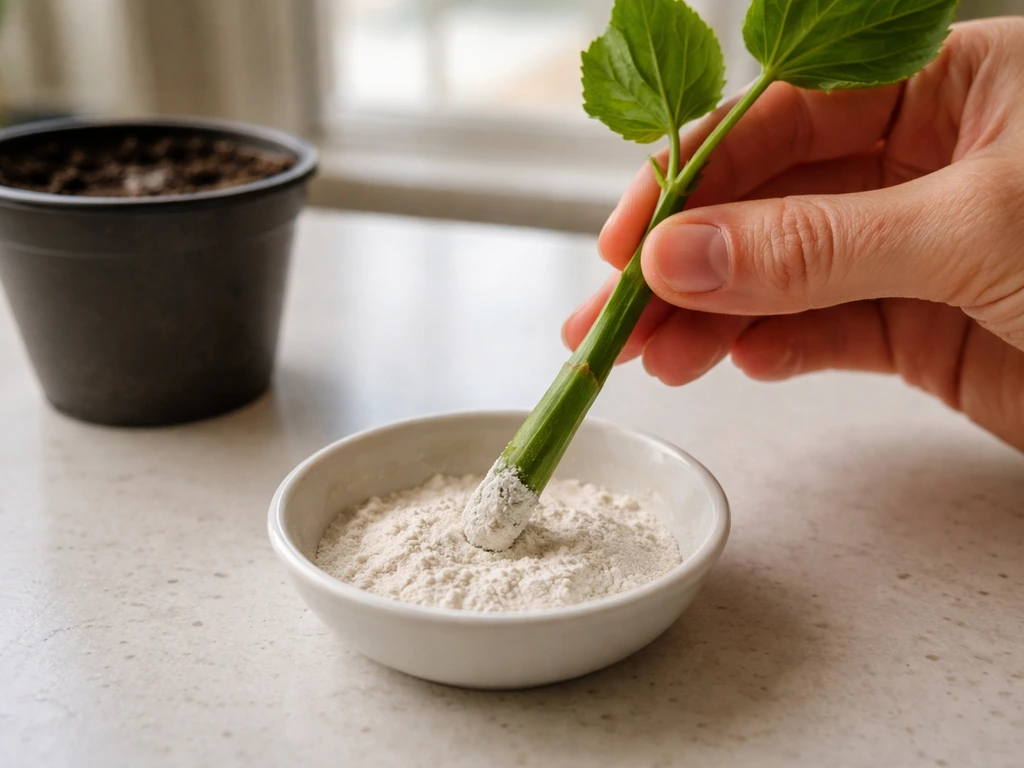
Rooting hormone genuinely helps with hibiscus. Products like Rootone or Dip 'N Grow (IBA-based) improve rooting speed and success rates. Dip the cut end of your stem into powdered rooting hormone, tap off the excess, and move quickly to the next step. Then poke a hole in your prepared rooting medium with a pencil or chopstick before inserting the cutting. This is important: if you push the cutting directly into the medium, you'll wipe the hormone off the stem. Insert the cutting into the pre-made hole and gently firm the medium around it.
Container, humidity, light, and temperature
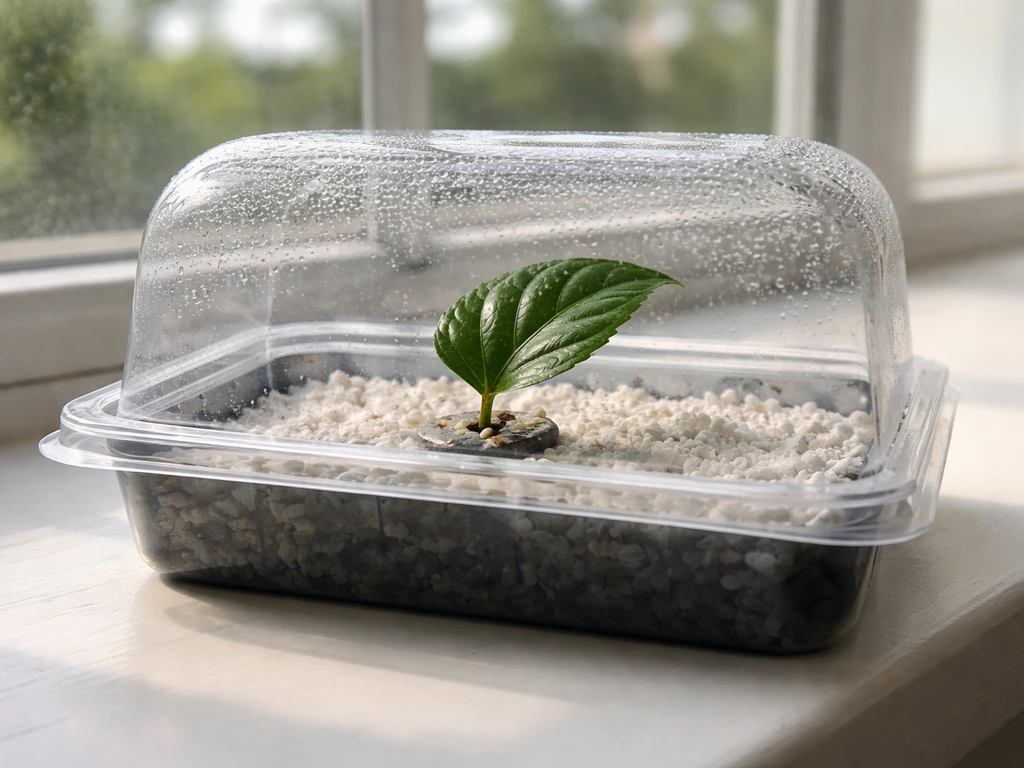
Use a small container with drainage holes, 3 to 4 inches is plenty for a single cutting. To keep humidity high around the cutting while roots form, cover the whole setup with a clear plastic bag or a plastic dome. This mini-greenhouse effect reduces water loss dramatically. Leave a small gap for some airflow so you're not creating a completely sealed, stagnant environment.
Place your cutting in bright indirect light. Direct sun through a window will overheat the cutting and stress it before roots form. Outdoors, dappled shade works well. Aim for air temperatures around 70 to 80°F (21 to 27°C). The rooting medium itself does best slightly warmer, around 72 to 75°F (22 to 24°C). If you're propagating in a cool season, a seedling heat mat under the container makes a real difference.
Caring for cuttings until roots form
For the first few days, your main job is keeping the medium barely moist and the humidity high. Check the medium every day or two by poking a finger an inch into the perlite. If it feels dry, mist it lightly or add a small amount of water. Never let it get bone dry, but also don't let it stay waterlogged. Err slightly on the drier side if you're uncertain, since rot is a bigger risk than dehydration once the plastic cover is on.
Once or twice a day, briefly lift the plastic cover to let fresh air in and check on the cutting. After about a week, start giving it slightly longer airings. This gradual introduction to lower humidity helps harden off the cutting and reduces the risk of fungal problems. If you notice condensation pooling heavily inside the bag, your humidity may be too high and airflow too low.
Watch the leaves. Some minor drooping in the first day or two is normal as the cutting adjusts, but it should stabilize. If you see the cutting perk back up after a few days, that's a great sign. Yellow leaves can mean a few things (more on that in the troubleshooting section), but a single yellowing lower leaf isn't cause for panic.
The cutting should otherwise look alive and green. Roots typically start forming somewhere between 2 and 6 weeks, with most tropical hibiscus cuttings showing good root development around the 4 to 6 week mark. Biology Insights reports that hibiscus cuttings typically develop roots within 2 to 3 weeks under suitable conditions, with fastest rooting around 70 to 75°F (21 to 24°C) roots typically start forming somewhere between 2 and 6 weeks.
To check for roots without disturbing the cutting too much, gently tug the stem after 3 to 4 weeks. If you feel resistance, roots have anchored. You can also check the drainage holes of a clear or translucent container for root tips starting to poke through.
Transplanting your rooted hibiscus cutting
Once you have a solid root system, probably at least an inch or two of root growth, it's time to pot up. Be extremely careful at this stage. New hibiscus roots are tender and snap easily. Don't yank or shake the cutting out of the perlite. Instead, gently squeeze the sides of a flexible container, or if using a rigid pot, carefully run a knife around the edge to loosen the medium before tipping it out. Handle the roots as little as possible.
Move the rooted cutting into a 4-inch pot filled with a good quality, well-draining potting mix. If you later want to plant hibiscus in soil outdoors or in-ground, switch to instructions for how to grow hibiscus in soil. A mix designed for tropical plants or one amended with extra perlite works well. Don't jump to a large pot right away. A smaller pot prevents the excess medium from staying wet between waterings, which can cause root rot in a young plant that isn't yet drinking much water.
After transplanting, keep the new plant out of direct sun for a week or two while it adjusts. Water it in well, then let the top inch of soil dry slightly before watering again. This is an acclimation period: the plant is transitioning from a humid, low-light propagation setup to the real world, and doing it gradually prevents transplant shock.
Getting your hibiscus to actually flower
Rooting a cutting is just the beginning. Getting a hibiscus to flower well takes some targeted care, and this is where a lot of people go wrong by under-feeding or placing the plant in too much shade.
Sunlight is non-negotiable for blooms. Once your red hibiscus is rooted and established, you can follow the same care and flowering steps to help it produce vibrant blooms. Tropical hibiscus needs a minimum of 6 hours of direct sun per day, and it will do even better with 8. If you're growing indoors, a south- or west-facing window is your best option, but be honest with yourself: if the light isn't strong enough, you'll get lots of leaves and few or no flowers. Outdoors is almost always better for tropical hibiscus in summer. Hardy hibiscus is similarly sun-hungry.
Watering for an established hibiscus follows a consistent rhythm. The soil should stay evenly moist during the growing season, never bone dry and never sitting in standing water. If you want to try growing hibiscus in water instead of perlite, use a clean container and keep the node submerged while changing the water regularly grow hibiscus in water. During hot weather you may need to water every day or every other day for a container plant. Always check the soil before watering rather than following a fixed schedule.
Feeding is where hibiscus really responds. Start fertilizing about a month after transplanting, once the plant is actively growing. A balanced fertilizer with moderate potassium works well for tropical hibiscus during the growing season. Apply every two to four weeks. Avoid over-loading with high-phosphorus fertilizers, and be skeptical of the idea that any single product is a flowering miracle: consistent feeding with appropriate light will do more for flower production than any special formula.
Seasonally, tropical hibiscus needs protection from frost. If you're in USDA Zones 9 through 11, it can stay outdoors year-round. In cooler zones, bring it inside before temperatures drop below 50°F (10°C). Hardy hibiscus (Zones 4 to 9) dies back to the ground in winter and re-emerges in spring, so outdoor plants grown from your rooted cutting can be left in place with a layer of mulch over the crown.
What to do when things go wrong
The cutting is rotting
Stem rot at the base is the most common failure, and it almost always comes down to medium that's too wet or a cutting taken from unhealthy plant material. If you catch it early (slight discoloration at the base), trim the rotted section back to clean tissue, dust with fresh rooting hormone, and try again in fresh medium. If the whole base has gone soft and dark, that cutting is lost. Start over with a new one and let your medium dry out slightly more between checks.
No roots after 6 weeks
If you're past 6 weeks with no sign of rooting, check the temperature first. Cold medium (below 65°F) significantly slows or prevents root formation. Also consider whether you used rooting hormone: it's not strictly required, but it makes a meaningful difference. Finally, confirm your cutting had a node at the base. A nodeless cutting will callus over but rarely form roots.
Mold on the medium or stem
White or gray fuzzy mold is a sign of too much humidity and not enough airflow. Increase your daily air venting, and if the mold is on the medium surface, scrape it away and let the top dry slightly. A light dusting of cinnamon (a natural antifungal) on the medium surface can help in mild cases. If gray mold is appearing on the cut nodes or leaf attachment points, that's more serious: it's the same botrytis-type pathogen that the Southern California Hibiscus Society links to branch tip dieback, and affected cuttings usually don't recover.
Yellowing leaves
One or two yellowing lower leaves during the rooting period is normal, especially as the cutting redirects its energy. Widespread yellowing, or yellowing combined with a pale, veiny appearance, can signal that rot has started affecting the stem or that the medium is staying too wet. Check the base of the cutting for softness. If everything looks healthy at the base, the yellowing is likely just the cutting shedding excess leaf mass, which is fine.
Pests on cuttings
Aphids and spider mites occasionally show up on hibiscus cuttings, especially if they came from an infested parent plant. Check the underside of those remaining leaf stubs before you set up the rooting container. If you find pests, spray the cutting with a diluted neem oil or insecticidal soap solution, let it dry, then proceed with rooting. Catching it before the cutting goes under a humidity dome is much easier than dealing with a pest outbreak in a closed environment.
A quick reference: rooting stages and what to expect
| Stage | Timeframe | What you'll see | What to do |
|---|---|---|---|
| Just planted | Days 1–3 | Slight wilting possible, cutting mostly upright | Keep humidity high, check medium moisture daily |
| Early callus | Week 1–2 | Cut end seals over, leaves stabilize | Continue misting, brief daily ventilation |
| Root initiation | Week 2–4 | Cutting perks up, resists gentle tug | Start increasing airflow gradually |
| Root establishment | Week 4–6 | Roots visible at drainage holes or through clear pot | Prepare transplant pot, harden off over 1 week |
| Post-transplant | Week 6–8+ | New leaf growth begins | Move to bright light, begin light feeding at 8 weeks |
Growing hibiscus from a cutting is one of the more satisfying propagation projects you can take on because you can start with a single shoot from a plant you already love and end up with a full, flowering specimen in a single growing season. The process rewards patience and careful observation more than anything else. If you're also curious about other ways to establish hibiscus, growing hibiscus in soil from established plants or exploring how to grow more hibiscus flowers from existing specimens are natural next steps once your cutting has rooted and settled in.
FAQ
Can I grow hibiscus from leaves in water?
It’s possible to root hibiscus cuttings in water, but you still need a stem node at the base. Submerge only the node area, keep the container clean, and change the water regularly to prevent bacterial buildup. Once roots are 1 to 2 inches long, transition to perlite or potting mix gradually to avoid shocking the new root hairs.
What’s the best temperature setup if my house is cool?
Yes, using a heat mat is helpful if your home is cool. Place the heat mat under the container so the medium stays about 72 to 75°F (22 to 24°C). Avoid overheating the cutting itself (air around 70 to 80°F is fine), because hot dry air under direct sun can wilt the cutting before roots form.
Should I fertilize the cutting while it’s still rooting in perlite?
Feeding too early is a common mistake. Wait about a month after potting up, or until you see new growth. Before roots are established, any fertilizer in the rooting medium increases the risk of rot and can burn tender new tissues.
What if my “leaf cutting” has no node?
If the cutting is nodeless, it may only callus and then stall. Always include at least one node on the cutting you’re rooting, and cut just below that node so it’s the part that can form adventitious roots.
How long should I keep a rooted hibiscus cutting out of direct sun after transplanting?
After you pot up, giving it direct sun too soon can cause leaf drop and slow recovery. Keep it in bright shade or indirect light for about one to two weeks, then ramp up to outdoor conditions gradually over another week to reduce transplant shock.
How often should I mist the bag or add water to the rooting medium?
Misting is fine for tiny adjustments, but the goal is to keep the medium damp, not wet. If perlite turns into consistently soggy clumps, cut back on water and increase venting, because hibiscus cuttings fail more often from excess moisture than from mild dryness.
My plastic bag has lots of condensation. Is that bad?
Condensation itself isn’t the problem, standing water with little airflow is. If you see heavy pooling or frequent dripping inside the dome, increase daily airing times and make sure the cover is not tightly sealed.
How can I tell the difference between normal yellowing and rot?
A single yellow lower leaf early on is normal. But if multiple leaves yellow, the base turns soft or dark, or you smell sour rot, stop trying to “save” it and start a fresh cutting using drier medium and a healthier shoot.
What should I do if my hibiscus cutting hasn’t rooted after 6 weeks?
If roots are not forming past 6 weeks, troubleshoot in order: check medium temperature (below 65°F slows or stops rooting), verify there is a node at the base, and confirm the medium isn’t staying waterlogged. Rooting hormone helps, but it won’t fix a missing-node cutting or chronic cold wet conditions.
When is it safe to move a newly rooted tropical hibiscus outdoors?
Don’t plant the cutting outdoors immediately after potting. Harden it off by reducing humidity and increasing light exposure over 7 to 14 days, and avoid cold nights. For tropical hibiscus, bring it inside before temperatures drop below about 50°F (10°C).
How do I pick the right type of stem for a hibiscus cutting?
Yes, choose stems that are semi-mature, not fully woody. A good cutting has some firmness but still a bit of flex. Fully woody sections root slowly and may rot before roots form, while extremely soft tip growth often collapses under humidity before it can root.
What’s the safest way to move a rooted hibiscus cutting without breaking roots?
When transferring, don’t pull the cutting out of perlite by the stem. Use a squeeze method on flexible containers or loosen the medium around the edge in rigid pots. Handle roots minimally, then water in once and let the top inch of mix dry slightly before the next watering.