
You can grow a thriving rhododendron plant by giving it acidic, well-drained soil with a pH between 4.5 and 6.0, a sheltered spot with dappled or morning light, and consistent moisture during the first year of establishment. Get those three things right and these shrubs are surprisingly rewarding, even for beginners. Skip even one of them and you'll spend years wondering why your plant looks miserable.
How to Grow Rhododendron Plant: Complete Home Gardener Guide
Marcus Holloway
20 Jul 2026
Why rhododendrons are worth the effort
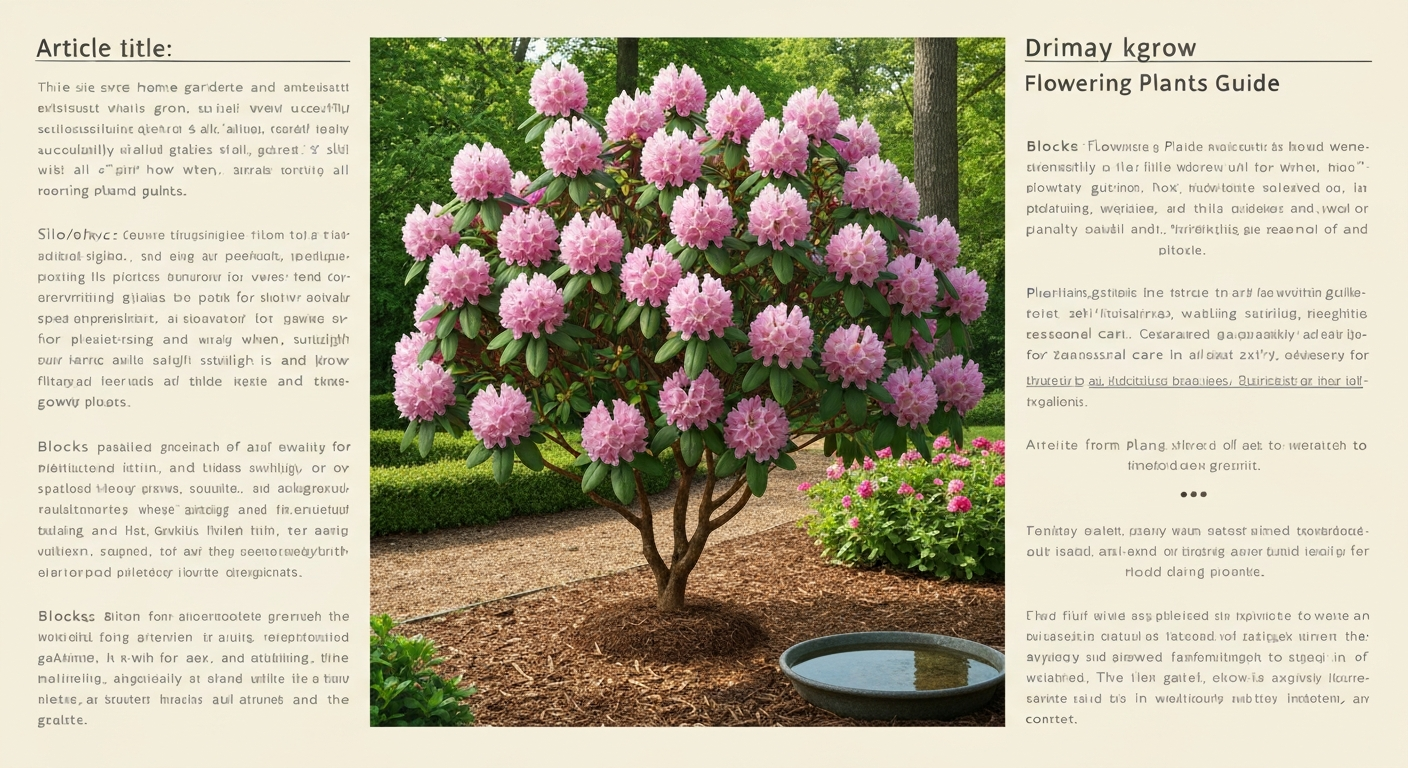
Rhododendrons are one of the showiest flowering shrubs you can plant. A single mature specimen covered in trusses of pink, red, purple, or white blooms in late spring stops people in their tracks. They're also long-lived. A well-sited rhododendron can outlast the gardener who planted it by decades. That said, I want to be straight with you: they are more demanding about soil chemistry than almost any other common garden shrub. If you've tried before and failed, it was almost certainly a pH or drainage problem, not a watering mistake or the wrong fertilizer. This guide fixes that.
Azaleas are part of the same story. Botanically, azaleas are a subgroup within the genus Rhododendron, and nearly everything in this guide applies to both. You'll see me mention azaleas throughout because many gardeners want to grow them together, and the cultural needs overlap almost entirely. If you're specifically interested in growing rhododendrons and azaleas as a mixed planting, that pairing deserves its own detailed look and we cover it elsewhere on this site.
Picking the right variety before you do anything else
Variety selection is where most beginner mistakes happen. Someone falls in love with a photo of a towering 'Loderi King George' and plants it in USDA hardiness zone 5 in Oklahoma, then wonders why it struggles. Before you buy, nail down three things: your hardiness zone, your available space, and your preferred bloom time.
Hardiness zones and size
The rhododendron genus spans everything from 12-inch alpine dwarfs to 20-foot tree-like specimens. Hardy varieties like 'PJM' (zones 4 to 8), 'Nova Zembla' (zones 4 to 8), and 'Roseum Elegans' (zones 4 to 8) survive brutal winters and are your best bet if you're gardening in colder continental climates. For milder UK gardens and the Pacific Northwest, you have far more options, including the spectacular large-leafed species like R. macabeanum and the fragrant Loderi hybrids. In warm, humid climates like Florida, you're looking at a narrower window: focus on heat-tolerant azaleas and a handful of rhododendron species suited to USDA zones 8 to 9, and plant only in north or central Florida where winters offer at least a brief cool spell.
Evergreen vs. deciduous and bloom timing
Most large-leafed rhododendrons are evergreen, keeping their foliage year-round. Deciduous azaleas (like the Exbury and Mollis hybrids) are actually among the showiest options in spring and often have outstanding autumn color too. Evergreen azaleas (like the Kurume and Gable hybrids) hold their leaves and typically flower a little later into spring than deciduous types. If you want to sequence the bloom so your garden has color from early April through June, mixing early large-leafed rhododendrons with mid and late-season deciduous azaleas is a great strategy.
| Variety | Type | Hardiness Zone | Height | Bloom Time | Notes |
|---|---|---|---|---|---|
| PJM | Evergreen rhododendron | 4–8 | 4–6 ft | Early spring | Very cold-hardy, small lilac-pink flowers |
| Nova Zembla | Evergreen rhododendron | 4–8 | 6–8 ft | Mid-spring | Red blooms, tolerates more sun |
| Roseum Elegans | Evergreen rhododendron | 4–8 | 8–10 ft | Late spring | Lavender-pink, extremely tough |
| Exbury Hybrids | Deciduous azalea | 5–7 | 4–8 ft | Mid-spring | Brilliant color range, autumn foliage |
| Kurume Hybrids | Evergreen azalea | 6–9 | 3–5 ft | Mid-spring | Dense growth, suits warmer climates |
| Girard Hybrids | Evergreen azalea | 5–8 | 3–5 ft | Mid to late spring | Good cold hardiness for evergreen azaleas |
| R. yakushimanum hybrids | Evergreen rhododendron | 5–8 | 3–4 ft | Mid-spring | Compact, sun-tolerant, great for small gardens |
How rhododendrons differ from azaleas and from lilac
The clearest botanical distinction between rhododendrons and azaleas is stamen count. Azaleas typically have 5 stamens per flower while most large-leafed rhododendrons have 10 or more. Rhododendrons also tend to have larger, leathery leaves and form bigger, more tree-like shrubs. Azaleas are often smaller, more twiggy, and can be either deciduous or evergreen. In the garden, though, the line blurs completely because they share the same soil requirements, the same pests, and nearly the same care calendar. You can absolutely plant them side by side.
Lilac (Syringa vulgaris) is a common comparison because it also flowers in late spring and is beloved for fragrance, but it's a fundamentally different plant. For practical planting and care details for lilac, see our guide on how to grow syringa vulgaris (internal ref 56992d6f-e07b-42ed-8fbb-abb9356c454d). Lilac is in the olive family (Oleaceae), tolerates a much wider pH range including slightly alkaline soils, prefers full sun, and actually needs cold winters to flower reliably. Rhododendrons would suffer in the conditions lilac loves most. If your garden suits lilac well, specifically if your soil tends toward neutral or alkaline pH, you'll likely need to do significant soil work before rhododendrons will thrive there. The two shrubs make lovely companions in a large garden, but they are not interchangeable.
Finding the right spot: light, shelter, and microclimates
The classic rhododendron site is the edge of a woodland canopy, and that gives you a useful mental model. You're aiming for dappled light or morning sun with afternoon shade, shelter from drying winds, and a naturally leaf-littered, acidic soil. In practical terms, the north or east side of a house, under the canopy of mature deciduous trees, or behind a windbreak hedge are all excellent options.
Wind is a bigger enemy than many gardeners realize. Rhododendrons lose moisture through their large leaves all winter, and if the roots are frozen or the soil is dry, they can't replace that moisture fast enough. The leaves brown and scorch, a problem called desiccation. A solid windbreak on the prevailing wind side of your planting makes a noticeable difference, especially in zones 4 to 6.
On light intensity: most large rhododendrons genuinely want shade from the hottest afternoon sun. In a cool, wet climate like the UK or Pacific Northwest, you can push closer to full sun and many plants will do fine, especially compact or dwarf forms. In Oklahoma, Texas, or the southern US, afternoon shade is not optional. Some dwarf and R. yakushimanum hybrids tolerate more sun than most, as long as the soil stays cool and consistently moist. Evergreen azaleas are generally more sun-tolerant than large-leafed rhododendrons. In Florida, UF/IFAS research confirms azaleas can grow in moderate sun to full shade, but they need that moisture consistency even more in full sun.
Soil requirements: pH, texture, and drainage
This is the section that makes or breaks rhododendron growing. The target pH is 4.5 to 6.0, with the sweet spot for most species sitting around 5.0 to 5.5. Once your soil pH climbs above 6.0, iron becomes less available to the plant, and you start seeing interveinal chlorosis: young leaves turn yellow while the veins stay green. It looks like the plant is fading. By pH 7.0, your rhododendron will be genuinely struggling regardless of how much you water and feed it.
Before you plant, get a soil test. Not a guess, an actual test. Your local cooperative extension service offers them cheaply, usually for under $20, and the results will tell you the exact current pH plus texture and organic matter levels. I've seen gardeners add sulfur for years based on a guess and end up pushing the pH so low they created a different problem. The test removes the guesswork.
Beyond pH, texture and drainage matter enormously. Rhododendrons have fine, fibrous, shallow root systems. They need soil that holds moisture but never sits waterlogged. Heavy clay is their enemy because it compacts, holds too much water, and suffocates the roots. Sandy soil drains too fast and dries out. The ideal is a humus-rich, open-structured soil that holds moisture like a wrung-out sponge, moist but not wet. If your native soil is heavy clay or very sandy, plan on improving it before planting.
Improving your soil before planting
Lowering pH with sulfur
Elemental sulfur (pelletized sulfur) is the standard amendment to acidify soil, and it works, but slowly. Soil bacteria must convert the sulfur to sulfuric acid, and in most garden soils that process takes 3 to 6 months, sometimes longer in cold weather. This means you should ideally start lowering pH the season before you plan to plant.
The amount of sulfur required depends on your starting pH, your target pH, and your soil's texture and cation exchange capacity (CEC). NC State Extension publishes detailed conversion tables and equations for this exact calculation, and I strongly recommend using them with your soil test results rather than guessing. A practical starting point for many mineral soils: moving pH down by one unit typically requires several pounds of sulfur per 1,000 square feet, but loamy versus clay versus sandy soils behave very differently. Heavy clay soils require significantly more sulfur for the same pH shift than sandy soils do. Do not just dump sulfur without knowing your starting number.
If you're dealing with existing iron chlorosis while you wait for the sulfur to work, iron chelates can give the plant a faster rescue. For soils with pH around 6.5 or below, iron sulfate or iron chelates like Fe-EDTA can restore the green. For higher pH situations approaching 7.0 or above, Colorado State University Extension recommends Fe-EDDHA or EDDHMA chelates because they remain stable and available at higher pH levels where other iron forms don't. The Colorado State University Extension's Iron Chlorosis of Woody Plants, Colorado State Univ. Extension recommends Fe‑EDDHA chelates for soils approaching pH 7.0 because these chelates remain available at higher pH levels Iron Chlorosis of Woody Plants — Colorado State Univ. Extension. These are short-term treatments. Correcting the pH permanently is the only real fix.
Fixing drainage: raised beds and French drains
If you have clay soil or a high water table, the most reliable solution is to plant on a mound or in a raised bed. Build the mound at least 12 to 18 inches above the surrounding soil level and fill it with a free-draining, acidic mix. This keeps the root zone above any standing water and also encourages excellent aeration. Oregon State University extension recommends a wide, shallow planting approach rather than deep narrow holes for shallow-rooted shrubs, and this principle translates directly to rhododendrons.
For chronically wet ground where a mound alone won't solve the problem, a French drain is worth the effort. Dig a sloped trench at a minimum 1% grade, line it with non-woven geotextile fabric, lay 2 to 3 inches of washed gravel, place perforated pipe with holes facing down, surround with more gravel, fold the fabric over the top, and backfill. Route the pipe to daylight or a dry well. In clay soil especially, use coarse gravel and robust fabric to prevent siltation over time. It's a genuine project, but if your planting area holds water for days after rain, it's the right solution.
Building a peat-free container or raised bed mix
With peat increasingly restricted or discouraged (particularly in the UK), a good peat-free ericaceous mix for containers or raised beds is built around aged bark and coconut coir. Oregon State University recommendations for ericaceous container growing suggest mixes in the range of 50 to 80 percent fine aged bark, 10 to 40 percent coir or peat, and around 10 percent perlite or pumice. The bark provides structure and acidity, the coir retains moisture, and the perlite ensures air reaches the roots. Avoid multi-purpose composts not specifically formulated for ericaceous plants because they're typically too alkaline and too moisture-retentive.
For container-grown rhododendrons specifically, the RHS advises repotting every few years as the growing medium breaks down. Old, compacted potting mix loses its structure and drainage, which is one of the main reasons container specimens suddenly decline after several years of looking healthy.
When and how to plant
Planting windows by region
Timing matters more than most gardeners expect. The goal is to give roots a chance to establish before the plant faces its first major stress, whether that's summer heat or winter cold.
| Region | Best Planting Window | Avoid | Key Reason |
|---|---|---|---|
| UK | Autumn (Sept–Nov) or spring (Mar–Apr) | Midsummer heat or hard frost | Cool, moist conditions speed root establishment |
| Oklahoma / continental US | Spring (Mar–Apr) or autumn (Sept–Oct) | Midsummer heat and drought | Avoid heat stress before roots establish |
| Florida (north/central) | Late autumn to early spring (Oct–Feb) | Summer (June–Sept) | Heat and humidity stress newly planted roots |
| Pacific Northwest | Autumn or early spring | Frozen ground or drought in summer | Mild, wet winters support fast establishment |
| Northeast / Midwest US | Spring after last frost or early autumn | Late autumn before hard freeze | Needs 4–6 weeks to root in before freeze |
Step-by-step planting technique
The planting method is the same whether you're working with a container-grown specimen, a balled-and-burlapped shrub, or a bare-root plant. The most common planting mistake I see is planting too deep. Rhododendrons planted even an inch or two too deep will slowly decline. The root flare, where the stem flares out at the base, must sit at or slightly above finished soil level.
- Dig a hole two to three times as wide as the root ball but no deeper than the root ball height. Wide and shallow is the rule.
- Loosen the sides of the hole with a fork if your soil is compacted, so roots can expand outward easily.
- For container plants: slide the plant out and tease apart any circling roots at the base with your fingers. For balled-and-burlapped plants: set in the hole, then cut and remove as much of the wire basket and burlap as you can safely reach without disturbing the ball. For bare-root plants: soak roots in water for one to two hours before planting and spread them out naturally in the hole.
- Check planting depth before backfilling. Set the root ball in the hole and confirm the root flare is at or just above ground level. Add or remove soil from the base of the hole to adjust.
- Backfill using the original soil mixed with no more than one-third compost or amendment. Avoid backfilling with pure compost as it can create a moisture barrier between the amended hole and the surrounding native soil.
- Firm the soil gently with your hands to remove large air pockets. Do not compact it with your feet.
- Create a shallow watering basin around the plant by mounding the backfill in a ring at the edge of the root zone.
- Apply a 2 to 3 inch layer of organic mulch (shredded bark, pine needles, or leaf mold) over the root zone. Keep mulch 2 to 3 inches away from the stem to prevent rot.
- Water thoroughly immediately after planting until water pools in the basin, then allow it to soak in completely.
Watering during the first year: getting establishment right
The first growing season is when most rhododendrons fail, and the cause is almost always inconsistent watering. The fibrous root system is entirely contained within the original root ball for the first several months. That ball can dry out shockingly fast even when the surrounding soil feels moist. You need to keep that root ball consistently moist but never waterlogged.
A practical first-year schedule in most temperate climates: water deeply two to three times per week during the first month, then taper to once or twice per week through the rest of the growing season. As a general benchmark from extension guidance, aim to supply roughly one inch of water per week through rain and irrigation combined, adjusting for your climate. Oregon State Univ. Extension advises keeping the root zone consistently moist during establishment and cites roughly 1 inch per week (rain plus irrigation) as a common guideline for newly planted trees (Selecting, planting and caring for a new tree, Oregon State Univ. Extension) Selecting, planting and caring for a new tree — Oregon State Univ. Extension (watering/establishment guidance). In hot, dry Oklahoma summers, that might mean deep watering every three to four days during heat spells. In cool, wet UK autumns, rainfall will often do the work for you, but you still need to check rather than assume.
Watering methods and equipment
Soaker hoses and drip irrigation are ideal for rhododendrons because they deliver water slowly and directly to the root zone without wetting the foliage. Wet foliage sitting overnight increases disease risk, particularly petal blight and botrytis. If you hand-water, direct the stream at the base of the plant, not the leaves, and water slowly enough that the soil absorbs it rather than running off. In a container, water until it flows freely from the drainage holes, then stop and let the medium partially dry before the next watering.
Signs of overwatering and drought stress to watch for
Both problems look surprisingly similar at first, which catches gardeners off guard. Here's how to tell them apart and what to do.
| Symptom | Likely Cause | What to Do |
|---|---|---|
| Leaves wilting, drooping, rolling inward in midday heat | Drought stress or newly planted roots drying out | Water deeply; check the root ball is moist, not just the surrounding soil |
| Leaves wilting but soil feels wet or soggy | Overwatering or poor drainage causing root suffocation | Allow soil to dry; improve drainage; reduce watering frequency |
| Yellowing leaves (general, including older leaves) | Overwatering or waterlogged roots limiting nutrient uptake | Check drainage; reduce watering; confirm soil pH is correct |
| Interveinal chlorosis (young leaves yellow, veins stay green) | Iron deficiency, often caused by high pH | Test and correct soil pH; apply iron chelate as a short-term fix |
| Brown leaf edges and tips, crispy texture | Wind desiccation or drought in winter | Add windbreak; mulch heavily; water before ground freezes in autumn |
| Soft, brown, rotting at the base of the stem | Phytophthora root rot from waterlogged soil | Improve drainage immediately; remove and dispose of infected plant; do not replant in same spot without amending drainage |
Regional watering adjustments
In Florida, heat and humidity accelerate both moisture loss from leaves and root stress. Azaleas and the small number of rhododendron species suited to north Florida need more consistent irrigation than in cooler climates. UF/IFAS research on azaleas in Florida confirms that drought stress is one of the main causes of poor flowering and dieback. In Oklahoma, summer drought is the primary threat. Water deeply but infrequently during dry spells rather than light surface watering daily, which encourages shallow rooting. In the UK, the main winter concern is waterlogging rather than drought. If your soil holds water, raised mounds or improved beds are essential before you worry about irrigation.
Feeding, mulching, and long-term soil care
Rhododendrons are not heavy feeders. One of the most common mistakes is over-fertilizing, especially with high-nitrogen quick-release products, which push soft sappy growth that's vulnerable to cold and disease. Use a fertilizer specifically labeled for azaleas, camellias, and rhododendrons. These are acid-forming formulas, often around a 10-5-4 or similar ratio, that feed the plant while nudging pH downward. Apply in spring after buds begin to swell. A second light application immediately after flowering can support the plant as it sets next year's flower buds. That's generally all that's needed.
Run a soil test before adding any fertilizer. If your soil is already well-balanced and your plants are growing well, you may not need to fertilize at all. I have mature rhododendrons that receive nothing but a fresh mulch of leaf mold each autumn and perform beautifully. Which brings me to mulch: it's arguably more important than fertilizer for these plants. A 2 to 3 inch layer of shredded bark, pine needles, or composted leaf mold insulates the shallow roots, retains moisture, suppresses weeds, and breaks down slowly to maintain soil organic matter and gentle acidity. Refresh the mulch layer every year. This is the one annual maintenance task I'd never skip.
Pruning: less is more
Most rhododendrons need very little pruning. The main task is deadheading: removing the spent flower trusses immediately after blooming. This redirects the plant's energy from seed production into next year's flower bud development. Snap off the spent trusses carefully by hand, holding the base of the truss rather than the new growth buds forming just below it. You can see the small leaf buds clearly at that point. Break the old truss, not the new shoots.
If you need to shape or reduce a rhododendron, do it right after flowering, before the new growth hardens. Most large-leafed rhododendrons can be hard-pruned back to older wood if needed, and they will regenerate, though it takes a couple of seasons for flowering to resume fully. Avoid any major pruning in late summer or autumn because you'll remove next spring's flower buds that are already set.
Propagating your own plants
The easiest home propagation method for rhododendrons is layering. In late spring or early summer, bend a low flexible stem to the ground, wound the underside of the stem lightly with a knife (a notch or partial cut about one inch long), dust with rooting powder, then bury that wounded section 3 to 4 inches deep while leaving the growing tip exposed. Pin it with a wire staple and keep it moist. Roots typically form within 12 to 18 months. Once rooted, sever the new plant from the parent and pot it up into an ericaceous mix.
Semi-ripe cuttings in mid to late summer are the faster method but less reliable for beginners. Take 3 to 4 inch cuttings of new growth that has just started to firm up, strip the lower leaves, wound the base lightly, dip in rooting hormone, and insert into a free-draining, acidic cutting compost (a 50/50 mix of perlite and coir works well). Keep humid and shaded. Expect 8 to 12 weeks before roots form, and not all cuttings will take.
Seasonal care calendar
| Season | Key Tasks |
|---|---|
| Early spring (Feb–Mar) | Check mulch levels and top up if needed; begin monitoring for aphids and vine weevil; do not fertilize before buds swell |
| Mid-spring (Apr–May) | Apply acid rhododendron fertilizer after bud swell; enjoy flowering; prepare for deadheading |
| Late spring (May–Jun) | Deadhead spent flower trusses immediately; apply second light feed if needed; complete any shaping or pruning |
| Summer (Jun–Aug) | Monitor soil moisture closely; water deeply in dry spells; watch for drought stress; check for lace bug (especially in sunny sites) |
| Autumn (Sept–Nov) | Plant new specimens; apply fresh mulch; water well before ground freezes; take semi-ripe cuttings if propagating |
| Winter (Dec–Feb) | Protect marginally hardy varieties with fleece in hard frosts; check for wind desiccation; plan soil testing and amendments for spring |
Winter protection and cold hardiness
Established, zone-appropriate rhododendrons don't need much winter protection. Newly planted specimens in their first one or two winters are the most vulnerable, particularly in zones 4 to 6. The key threats are desiccating wind, freeze-thaw cycles that heave shallow roots, and sudden deep cold snapping through marginal varieties. Mulching heavily in autumn insulates roots against heaving. A temporary burlap windbreak on the exposed side of a plant does more for winter survival than wrapping the whole shrub in plastic, which traps moisture and can actually cause more harm.
Water deeply in late autumn before the ground freezes. This is a step many gardeners forget, but a well-hydrated plant going into winter handles cold far better than a stressed, dry one. The leaves will curl and droop in very cold temperatures (below about 25°F), which looks alarming but is actually a normal self-protective response. They uncurl when temperatures rise again. If leaves stay curled and brown after a warm spell, you have desiccation damage.
Common pests, diseases, and how to actually fix them
Pests
- Vine weevil: The adult notch-cuts leaf edges in a distinctive scalloped pattern, but it's the larvae in the soil that kill plants by eating roots. Check potted plants by looking for creamy white grubs in the root zone. Biological control with nematodes (Heterorhabditis bacteriophora, applied in late summer to warm, moist soil) is the most effective non-chemical approach.
- Rhododendron lace bug: This sap-sucker stipples the upper leaf surface with tiny pale dots and leaves dark, varnish-like excrement on the undersides. It's most serious on plants grown in full sun. Moving susceptible varieties to shadier positions reduces severity. Insecticidal soap sprays can help but require thorough coverage of the undersides.
- Azalea whitefly: Tiny white insects on the undersides of leaves causing yellowing; more common on plants grown under cover. Yellow sticky traps for monitoring, neem oil or insecticidal soap for treatment.
- Aphids: Most damaging on new spring growth. Blast off with water or use an appropriate insecticidal soap.
Diseases
- Phytophthora root rot: The most serious disease you'll encounter, caused by a water mold that thrives in waterlogged soil. Symptoms include wilting that doesn't respond to watering, dark discoloration at the base of the stem, and rapid decline. There is no cure once it's established. Prevention is everything: improve drainage before you plant, never overwater, and avoid planting in sites with a history of Phytophthora.
- Rhododendron petal blight (Ovulinia azaleae): Causes flowers to turn slimy brown in wet conditions, often at peak bloom. Highly contagious between nearby plants. Remove and bag infected flowers immediately, do not compost them. A fungicide applied at bud break can help in years with wet, cool springs.
- Powdery mildew: White powdery coating on leaves, more common on deciduous azaleas. Usually cosmetic rather than fatal. Improve air circulation and avoid overhead watering.
- Honey fungus (Armillaria): Black boot-lace-like rhizomorphs under bark at soil level, and creamy mushrooms in autumn. There is no chemical cure for home use. Remove and destroy infected stumps and roots. Some rhododendron species show more tolerance than others but none are fully immune.
A quick troubleshooting guide
| Problem | Most Likely Cause | Quick Fix |
|---|---|---|
| No flowers this year | Pruned at the wrong time, or buds frosted off | Deadhead immediately after bloom next year; protect from late frosts |
| Yellow leaves with green veins (young leaves) | Iron deficiency from high pH | Test soil pH; apply iron chelate short-term; amend pH with sulfur long-term |
| All-over yellowing, older leaves first | Overwatering or root rot | Check drainage; reduce watering; inspect roots for rot |
| Brown leaf edges and tips | Wind desiccation or drought | Add windbreak; water deeply before ground freezes; check summer moisture |
| Notched leaf edges on mature leaves | Vine weevil adults | Apply nematode treatment to soil in late summer |
| Stippled, pale upper leaf surface | Rhododendron lace bug | Move to shadier site; treat with insecticidal soap, covering undersides |
| Wilting despite wet soil | Phytophthora root rot | Improve drainage; remove and dispose of plant; do not replant without amending |
| Leggy, sparse growth with few flowers | Too much shade, or over-feeding with nitrogen | Increase light levels gradually; switch to balanced low-N acidic fertilizer |
Growing rhododendrons and azaleas together
Because rhododendrons and azaleas share the same soil pH preferences, the same mulching needs, and broadly the same care calendar, they make natural companions in the garden. A layered planting combining tall evergreen rhododendrons for structure, mid-height deciduous azaleas for spring color and autumn foliage, and low evergreen azaleas as ground-level coverage creates a long season of interest with minimal management effort. The key is making sure all plants in the bed are working with the same soil conditions. If you get the pH, drainage, and mulch right for one, you've got it right for all of them. We go into much more detail on the specifics of planting and managing rhododendrons and azaleas as a combined planting, including variety pairing and layout, elsewhere on this site. For step-by-step advice on planting and managing mixed beds, see our guide on how to grow rhododendrons and azaleas. For UK-specific advice on selecting varieties and site preparation, see our guide on how to grow azaleas UK. For region-specific guidance, see our detailed advice on how to grow azaleas in Oklahoma for variety choices, watering schedules, and heat-stress tips.
If you're in a warmer climate and want to focus specifically on azalea cultivation in your region, there are dedicated guides covering growing azaleas in Florida, growing azaleas in Oklahoma, and growing azaleas in the UK. Each one drills into the local soil conditions, timing, and variety selections that make the most difference in that specific climate.
The one thing that changes everything
If you take one thing from this guide, let it be this: fix the soil before you plant. No amount of watering skill, careful fertilizing, or attentive pruning will compensate for soil pH that's too high or drainage that stays wet. Every other aspect of growing rhododendrons, from light and timing to pest management and winter care, builds on that single foundation. Get a soil test, correct what needs correcting, plant at the right depth, mulch well, and then let the plant do what it does naturally. These are genuinely spectacular garden shrubs when they're happy, and with the right preparation, yours will be.
FAQ
What are the best rhododendron varieties for home gardeners and how do I choose one?
Choose by garden size, hardiness zone, and site (sun/shade). For small gardens or containers pick dwarf hybrids (e.g., 'PJM', 'Ramapo'). For borders and screens choose larger evergreen hybrids (e.g., 'Catawbiense' hybrids). Match flower color and bloom time to your garden plan. Check local extension or nurseries for cultivars proven in your region and choose disease‑resistant selections when available.
How do rhododendrons differ from azaleas and other shrubs like lilac (Syringa vulgaris)?
Azaleas are botanically a subgroup within Rhododendron; horticulturally azaleas tend to be smaller, sometimes deciduous, and often flower differently. Both prefer acidic, well‑drained soil. Lilacs (Syringa) are in a different genus/family: they prefer neutral to slightly alkaline soils, more sun and different pruning/flowering habits; lilacs tolerate drier, sunnier sites where rhododendrons usually struggle.
What soil pH do rhododendrons need and how do I test it?
They prefer acidic soil—generally pH 4.5–6.0 (best about 4.5–5.5 for many species). Get a professional or extension soil test for accurate pH and nutrient info; inexpensive home kits give a rough idea but use extension results to plan amendments.
How can I lower soil pH safely if my soil is too alkaline?
Use elemental (pelletized) sulfur applied based on soil test recommendations and extension tables—required amounts depend on current pH, soil texture and CEC. Expect the change to take months. For faster short‑term correction of iron chlorosis use iron sulfate or appropriate iron chelates (select chelate type for your soil pH).
My garden has heavy clay and poor drainage. How do I make a good site for rhododendrons?
Avoid low, waterlogged spots. Plant in raised beds or wide shallow mounds topped with ericaceous, free‑draining mix (coarse aged bark + peat/coir + perlite/pumice). If subsurface saturation persists, consider installing a sloped French drain (perforated pipe in gravel wrapped in geotextile) to move water away.
When is the best time to plant rhododendrons in different regions?
General: plant in spring or autumn when temperatures are mild. UK: spring or autumn (cool/wet climate suits autumn or spring). Oklahoma (continental): spring or autumn avoiding heat extremes. Florida (hot/humid): cooler, drier months (late fall to early spring) to avoid summer transplant stress.