Hostas grow best when you give them consistent moisture, rich well-draining soil with a pH of 6.5 to 7.5, protection from afternoon sun, and a steady but modest fertilizing routine. Get those four things right and hostas are honestly one of the easiest perennials you can grow. Where most people run into trouble is either too much direct sun, inconsistent watering, or planting the crown too deep. Fix those and you will see a noticeable difference fast.
What Helps Hostas Grow: Light, Soil, Water, and Care

Marcus Holloway
20 May 2026
Sunlight needs and where to put them
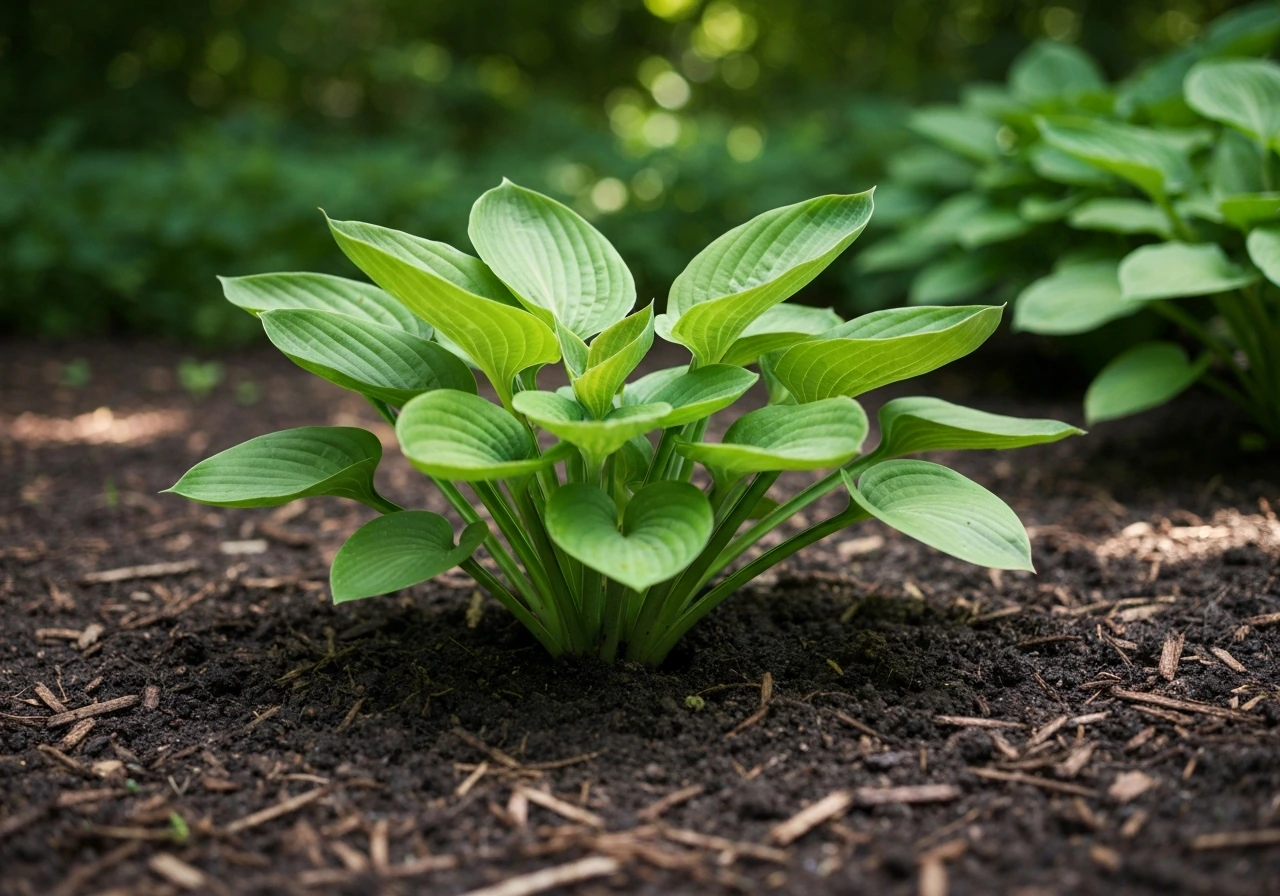
Hostas are shade lovers, but calling them full-shade plants oversimplifies things. Most varieties do best with morning sun and afternoon shade, or dappled light under deciduous trees. That gentle morning light actually feeds growth and brings out leaf color. What kills hostas is afternoon sun in summer, especially in warmer climates. When you see patches of leaves turning bleached yellow or white, that is almost always sun exposure. Push further and those same leaves develop tan, papery dead zones that crumble when you touch them.
Thick-leaved cultivars like Empress Wu handle more light than thin-leaved varieties, which burn at the edges and work toward the center of the leaf surprisingly fast during a heat wave. If you are growing a thin-leaved variety and your spot gets any direct afternoon sun, move it. Even a few feet closer to a fence or under a tree canopy makes a real difference. White Feather and similarly delicate varieties need dappled to full shade to stay healthy and show their best color.
When choosing a permanent spot, think about what that location looks like in July at 3pm. That is your worst-case scenario. If it is getting blasted by direct sun at that hour, it is the wrong spot for most hostas.
Soil prep: get this right before you plant
Hostas are not terribly fussy about soil type, but they absolutely cannot sit in waterlogged ground. They want rich, loamy, well-draining soil that holds moisture without becoming soggy. If your soil is heavy clay, amend it with compost before planting. If it is sandy and drains too fast, compost helps there too. Compost is genuinely the best single thing you can do for hosta soil.
For pH, aim for 6.5 to 7.5, which is slightly acidic to slightly alkaline. Most garden soils in the US fall somewhere in this range naturally, but it is worth doing a simple soil test if your hostas have been underperforming. Soil that is too acidic (below 6.0) can lock up nutrients even if they are present. Lime raises pH if needed; sulfur lowers it. Neither adjustment is dramatic, but skipping the test and guessing costs you a full growing season if you get it wrong.
Dig your planting area about 12 to 18 inches deep and work in a generous layer of compost. Hostas are long-lived perennials that will sit in this spot for years, so front-loading the soil prep pays dividends for a long time.
Planting depth, spacing, and the right time to plant
Depth: this is where most beginners go wrong
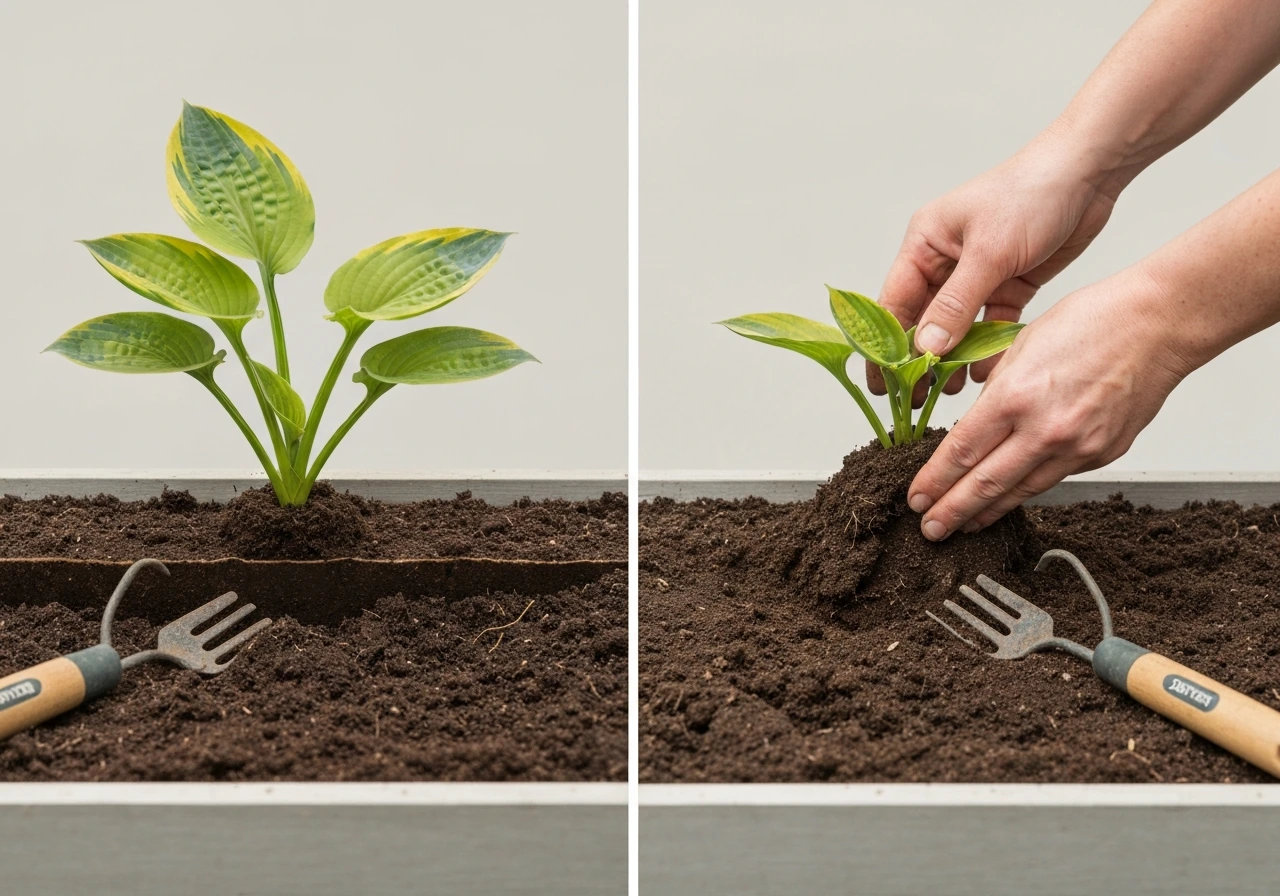
Plant hostas too deep and you will frustrate yourself wondering why they never take off. The crown, which is the point where the roots meet the emerging shoots, should sit at or very slightly above the surrounding soil level. When planting dormant bare-root divisions, the growing tips should be visible right at the soil surface. A hole about 1 to 2 inches deep is typically enough to accommodate the root mass. If the crown is buried even an inch or two down, growth slows significantly and rot risk goes up.
Spacing based on mature size
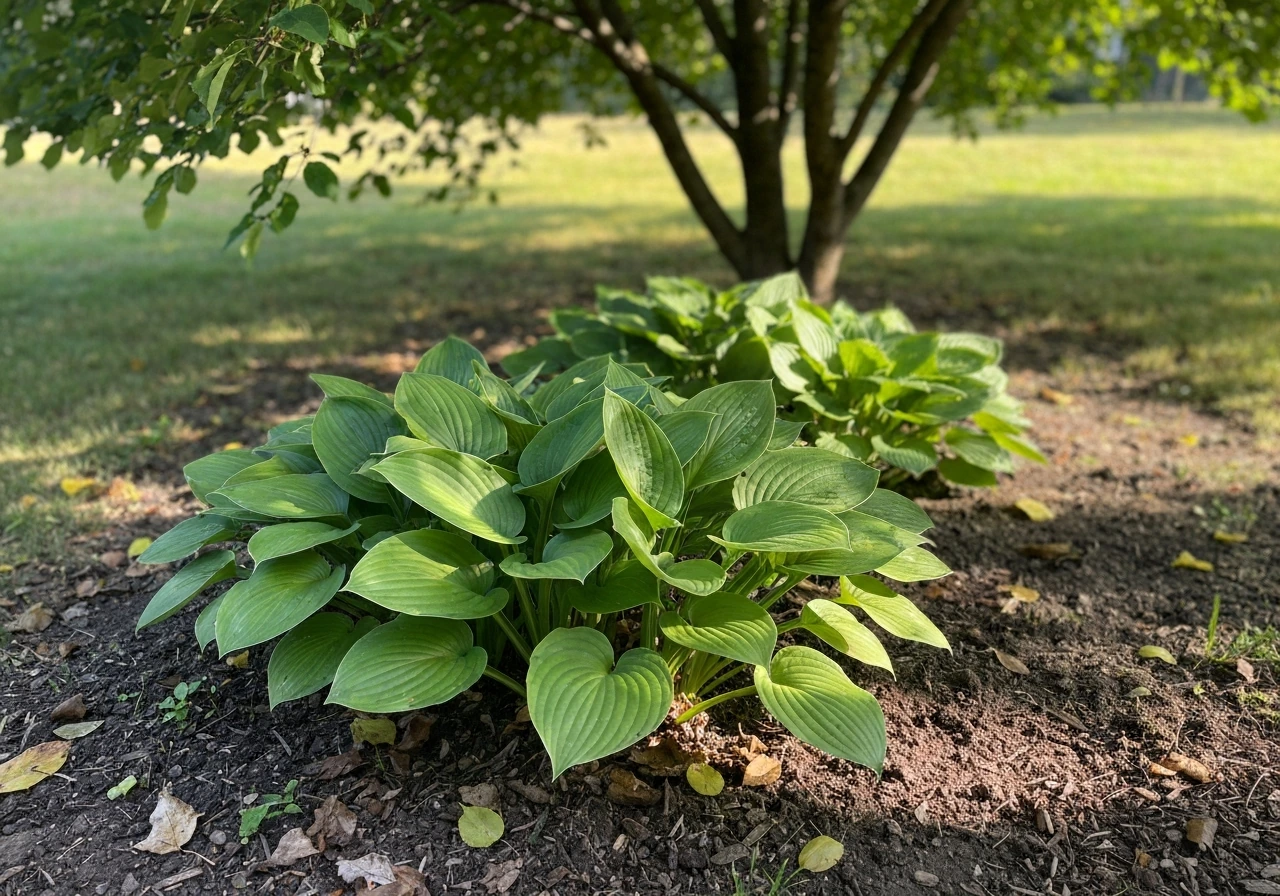
Hosta spacing is all about mature clump size, and hostas vary dramatically. A miniature variety might only spread 6 to 12 inches at maturity, while a giant like Empress Wu can spread 4 to 6 feet across. Space plants based on their eventual footprint, not their size at purchase. Planting too close looks fine for the first season, but by year three you have a crowded mess and plants competing for nutrients and air circulation. Check the label for mature width and use that as your spacing guideline.
Best time to plant
Early spring, when the eyes (growth buds) are just emerging, is the ideal planting window. Late summer into early fall also works well, giving roots time to establish before winter. Avoid planting during hot summer months if you can help it. Summer-planted hostas survive but they demand much more frequent watering to get established, and they are under stress from the moment they go in the ground. If you have no choice but to plant in summer, water more aggressively and give them shade cloth if they are in a sunny spot.
Watering routine and drainage
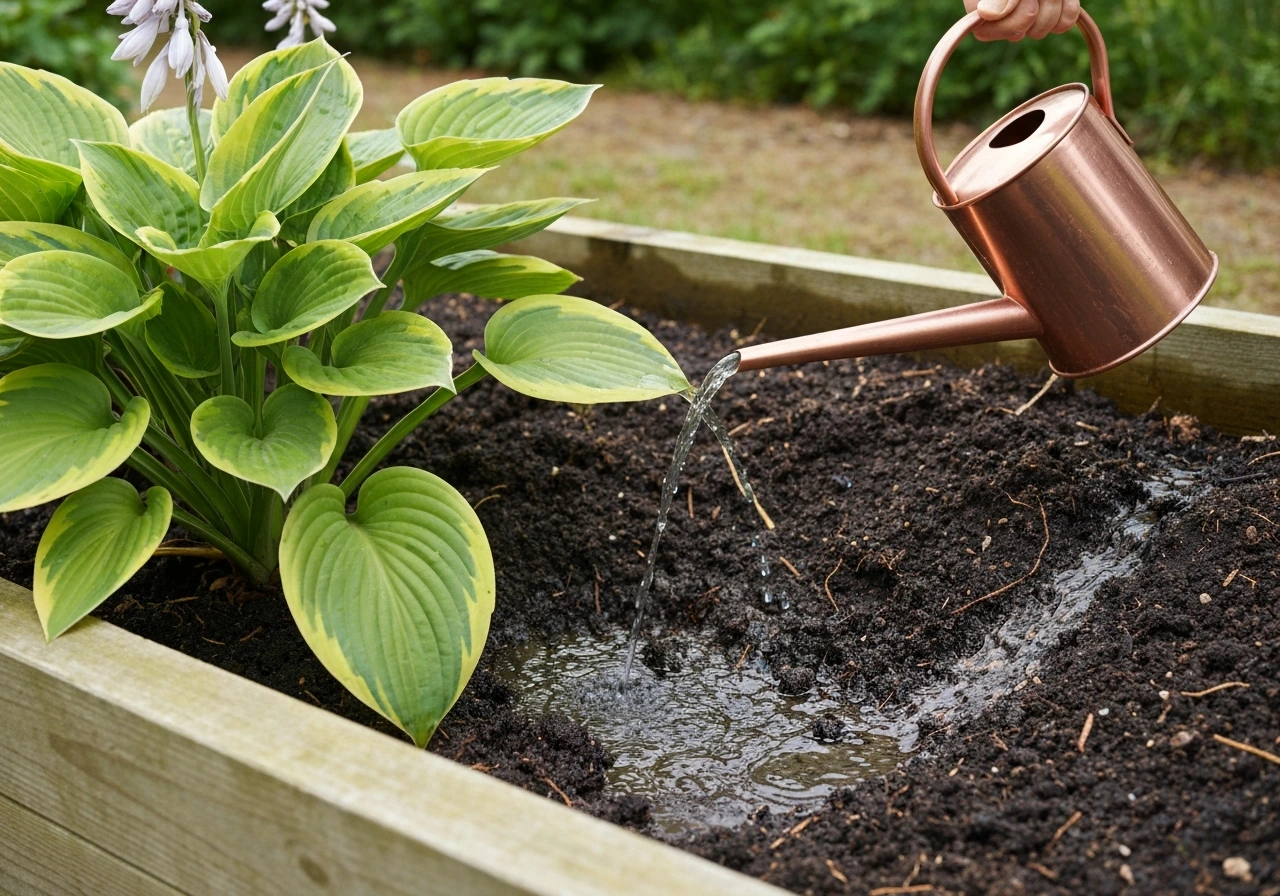
Hostas want about 1 inch of water per week through the growing season. The way you deliver that water matters as much as the amount. Deep, infrequent watering, where you soak the soil thoroughly rather than giving a quick daily sprinkle, encourages roots to grow deep and makes the plant more drought-resilient. Shallow frequent watering does the opposite: roots stay near the surface and the plant becomes dependent on you being on schedule every day.
A good rule of thumb: the soil should stay at least slightly damp to about 6 inches deep. If you are not sure, push a finger or a small trowel into the soil near (not right at) the crown and feel the moisture level. If it is bone dry at 3 inches, water now. In a typical summer without rain, this usually means a thorough watering two to three times per week for established plants, more often for new transplants.
Drainage is equally important. Standing water around hosta crowns is one of the fastest ways to lose a plant to crown rot. If your planting area holds water after rain, either raise the bed slightly or amend the soil heavily. Do not ignore drainage problems hoping they will sort themselves out.
Fertilizing for steady, strong foliage growth
Hostas are not heavy feeders, but they do respond to fertilizer when the soil needs it. The simplest approach: get a soil test first to confirm whether nutrients are actually lacking. If they are, apply a balanced slow-release fertilizer twice during the season, once in spring as growth emerges and again in early to mid summer. Nitrogen drives the lush leafy growth hostas are known for, so choose a fertilizer where nitrogen is the primary ingredient.
Stop all fertilizing after mid-July. This is not optional. Fertilizing late in the season pushes new tender growth that does not have time to harden off before cold weather arrives. That soft new growth is vulnerable to frost damage, and it can weaken the plant going into winter. I have seen gardeners chase bigger leaves into August with fertilizer and end up with plants that struggle the following spring. Do not do it.
A bag of granular balanced fertilizer applied twice before mid-July, worked lightly into the soil surface and watered in, is all most hostas need. If your soil is already rich with compost, you may find they need very little fertilizer at all.
Mulching and weed control
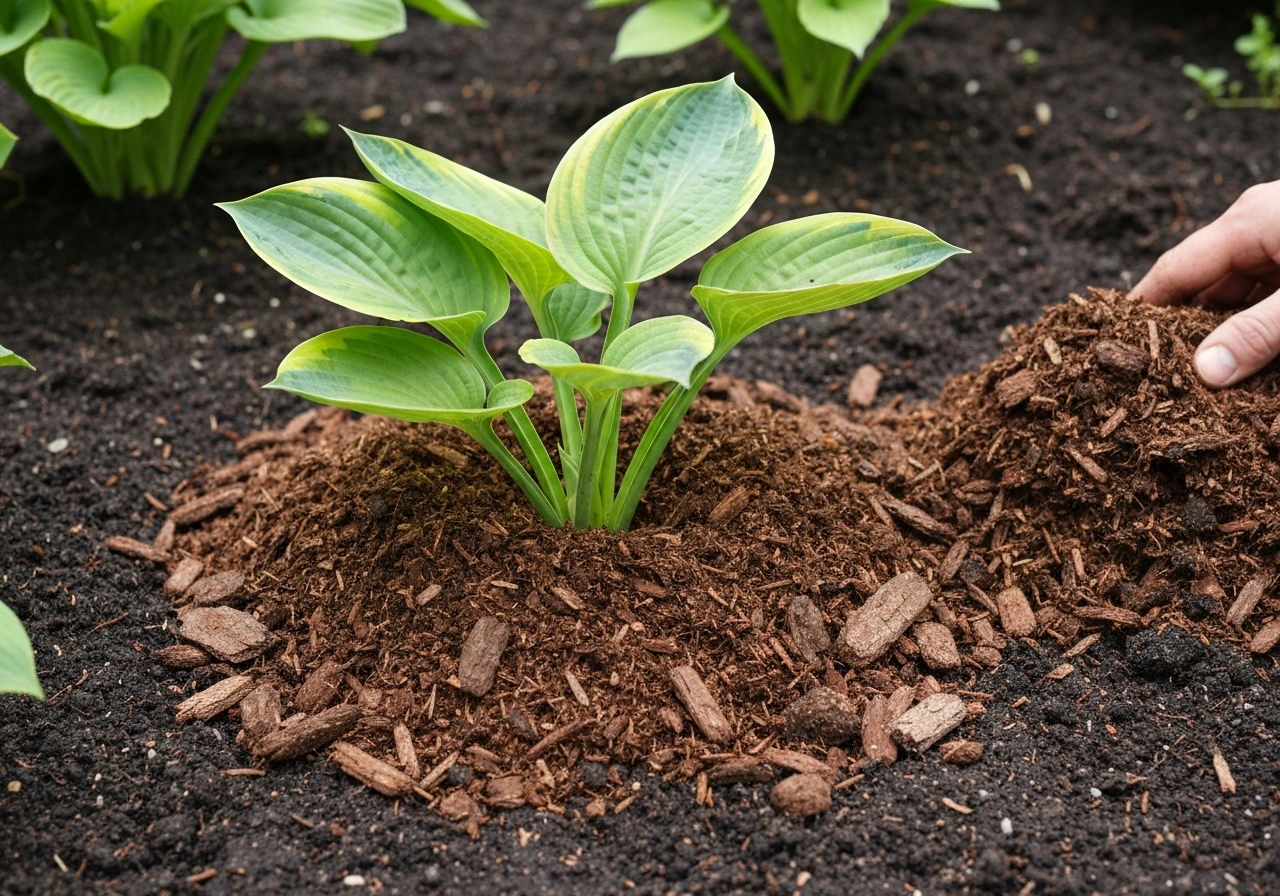
Mulch is one of the highest-value things you can do for hostas. A 2 to 4 inch layer of organic mulch (shredded bark, wood chips, or shredded leaves) does three important jobs at once: it conserves soil moisture, moderates soil temperature, and suppresses weeds. In hot summers, that temperature buffering around the root zone makes a real difference in how well your hostas push through without stress.
Wait until late spring or early summer to mulch, after the soil has warmed up. Mulching too early over cold wet soil can slow warming and invite problems. When you apply it, keep the mulch pulled back 1 to 2 inches from the crown itself. Do not pile it up against the base of the plant. Mulch sitting against the crown traps moisture right where you do not want it, creating ideal conditions for rot and, importantly, for slugs.
Slugs deserve a specific mention here because they are the number one pest problem for hostas. They hide in dark, moist spots during the day, including under mulch, and come out at night to chew jagged holes in leaves. Keeping mulch off the crown and clearing debris from around the base of the plant reduces the hiding spots available to them. If slugs are a persistent issue in your garden, a ring of diatomaceous earth or an iron phosphate bait around the planting area works well without harming other wildlife.
Seasonal care and fixing common growth problems
Spring: the most important window
When the eyes emerge in spring, clear away any winter debris from around the crown and check that mulch has not collapsed onto it over winter. This is the time to apply your first round of fertilizer if the soil test calls for it, and to divide any overcrowded clumps. Dividing hostas in early spring, just as growth is starting, is less stressful for the plant than dividing later in the season.
Summer: maintenance and monitoring
Summer is mostly about consistency: water on schedule, watch for slug damage and sun scorch, and apply your second fertilizer dose before mid-July. If you see flower scapes emerging and you want to redirect the plant's energy to leaf growth, you can cut them off as they appear, though most gardeners simply let them bloom and enjoy them.
Fall: prep for dormancy
After the first frost, hosta leaves will collapse and turn to mush. Cut them back and clean up the debris, which removes overwintering habitat for slugs and diseases. Late summer to early fall is also a good window for planting or transplanting, second only to spring. If you are moving a hosta to a new spot, do it now rather than waiting until spring.
Troubleshooting: what the leaves are telling you
| Symptom | Likely Cause | Fix |
|---|---|---|
| Bleached yellow or white patches | Too much direct sun | Move to a shadier spot or add afternoon shade; thick-leaved varieties tolerate more sun than thin-leaved ones |
| Tan, papery, crispy leaf areas | Severe sun scorch or heat burn | Relocate the plant; damage does not reverse but new growth will be clean |
| Jagged holes in leaves | Slug damage | Remove mulch from the crown, clear debris, use iron phosphate bait |
| Stunted or very slow growth | Crown planted too deep, compacted soil, or nutrient deficiency | Check planting depth; amend soil with compost; do a soil test and fertilize if needed |
| Yellowing all over | Overwatering, poor drainage, or root rot | Improve drainage; let soil dry slightly between waterings; check crown for rot |
| Poor clump expansion year over year | Overcrowding, low nutrients, or root competition | Divide clump in spring; amend soil; check for tree root competition |
The most common theme across all of these problems is that hostas are trying to tell you something through their leaves. They are actually pretty communicative plants once you know what to look for. Sun scorch and slug damage look very different from each other once you see them side by side, and getting the diagnosis right before you act saves a lot of wasted effort.
If you are growing specific cultivars like Autumn Frost, Empress Wu, or White Feather, keep in mind that each has slightly different light tolerance and size at maturity. The same basic care steps apply across all hostas, but matching placement and spacing to the specific variety you are growing makes a bigger difference than most people expect. Giant varieties need room and more water simply because of their size. Smaller and more delicate varieties are less forgiving of strong sun and irregular moisture.
Start with the basics today: check your planting depth, pull mulch back from the crown if it has crept in, and assess your watering consistency. Those three adjustments alone will improve most struggling hostas before the end of the season.
FAQ
Do hostas need fertilizer every year, or can I skip it if I use compost and mulch?
Hostas usually need less fertilizer than you think. If you top-dress with fresh compost in spring and keep mulch on, you may skip granular fertilizer entirely for a season, especially if the leaves look healthy. Fertilize only after a soil test (or clear signs of nutrient deficiency), and avoid feeding again after mid-July.
My hosta looks bad, how can I tell if it is sun scorch, slug damage, or something else?
The quickest way to tell is by the pattern. Bleached yellow or white patches that line up with the sun-exposed side usually indicate sun scorch. Jagged holes with slime trails point to slugs. Browning edges that start on thin-leaved varieties after heat waves can be light stress. Treat based on which pattern you see, not on wilting alone.
Can I transplant hostas in summer, and what should I do differently?
Yes, but only if you manage moisture and crown rot risk. Keep the crown at soil level or slightly above, and water deeply right after transplanting. Expect extra watering for 4 to 8 weeks, then taper as new roots take hold. Avoid mulching against the crown and keep the plant out of harsh afternoon sun during establishment.
What if my yard has heavy clay or water pooling after storms, how do I protect hostas?
If your soil stays wet after rain, you need drainage improvements, not more watering control. Raised beds, adding compost with good structure, and ensuring water does not pool around the crown are the key fixes. In heavy clay, amend deeply before planting, because crown rot can start even when the surface seems dry.
How do I know whether I am watering too much or too little?
A simple test is soil moisture at 6 inches. Water early enough so the top layer does not stay soggy, aim for consistent dampness through the root zone, and reduce watering when rainfall is regular. Finger or trowel checks near (not touching) the crown help, and you should water only when the deeper soil is starting to dry out.
How close should mulch be to the hosta crown, and what goes wrong if it touches?
Mulch should be kept away from the crown, typically 1 to 2 inches. Piling mulch around the base traps moisture and can trigger rot, and it also creates hiding places for slugs. If mulch has shifted over winter, pull it back in early spring before the eyes grow.
If my hostas are burning on the edges, should I move the plant or adjust watering first?
Thin-leaved hostas are less forgiving of direct sun and irregular watering, but even hardy types can burn if the sun hits at the wrong time. If you see scorch, move the plant to morning sun and afternoon shade or dappled light under trees. Also adjust watering schedule so the root zone stays evenly damp, since drought stress worsens leaf burn.
How far apart should I plant hostas, and when do I know it is time to divide them?
Start with the mature size on the label. Spacing too tight usually shows up by year two to three as smaller leaves, poor airflow, and more slug hiding places. For crowded clumps, divide in early spring when growth buds are just emerging, or transplant in late summer before fall settles in.