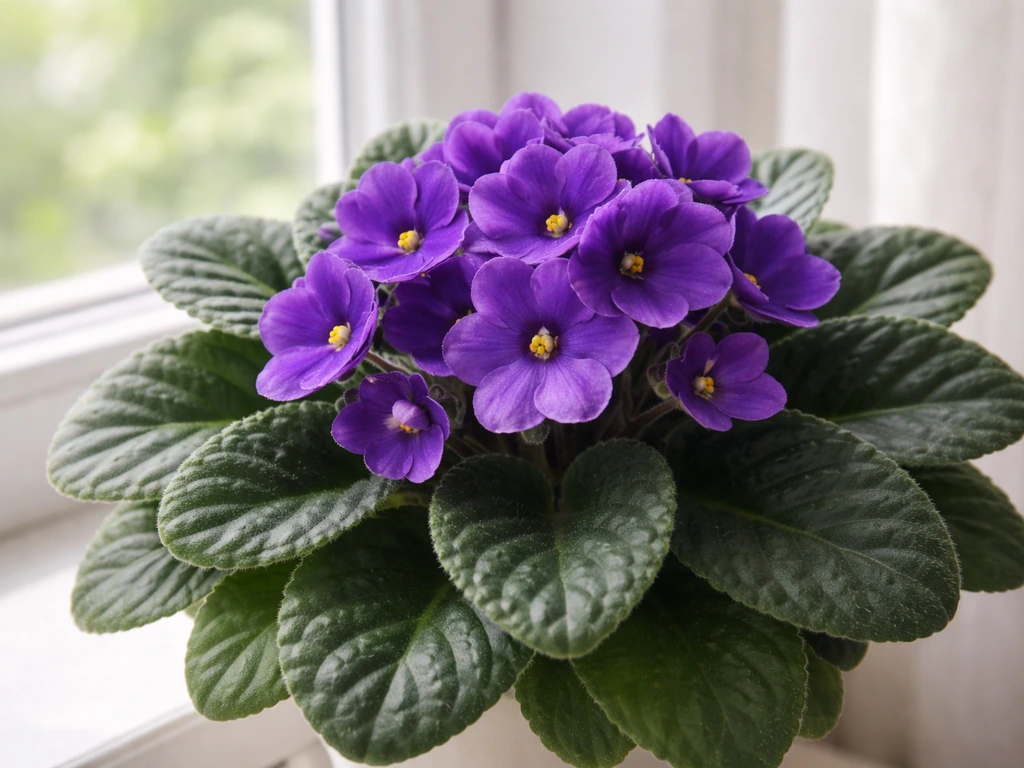
African violets are one of the best flowering houseplants you can grow indoors, and yes, they absolutely thrive inside your home year-round. They don't need a greenhouse, a south-facing window, or any special tricks to bloom repeatedly. What they do need is the right light setup, a loose well-draining mix, careful watering habits, and a simple feeding routine. Get those four things right and you'll have a plant that blooms almost continuously. This guide walks you through exactly how to do that, starting today.
How to Grow African Violets Indoors: Step by Step Care

Marcus Holloway
20 Apr 2026
Quick indoor setup: what you need and where to place them
The first decision that sets up everything else is where you put your African violet. These plants are native to the shaded slopes of Tanzania, so they hate direct harsh sunlight but need plenty of bright, indirect or artificial light to bloom well. A north- or east-facing windowsill is a solid starting point. If you go the window route, make sure the plant gets bright light for several hours a day without direct midday sun hitting the leaves, which causes bleached or scorched patches.
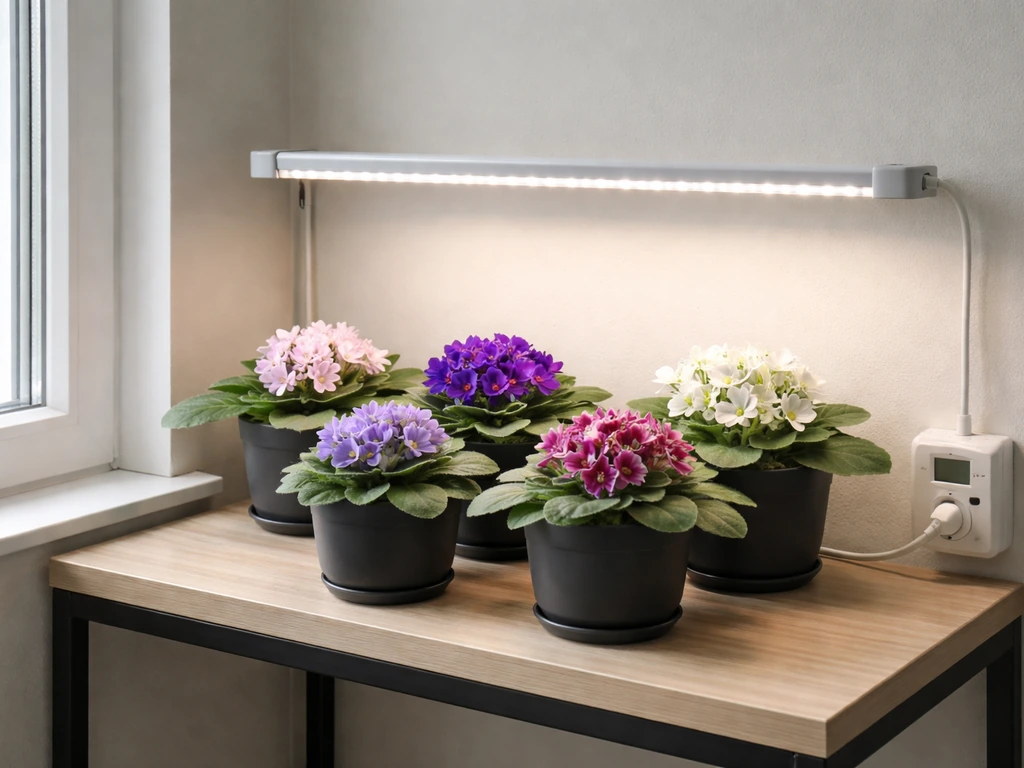
Honestly, fluorescent or LED grow lights are the most reliable option for consistent blooming, especially in winter when natural light drops off. The African Violet Society of America recommends positioning mature plants about 12 inches below fluorescent tube fixtures running for roughly 12 hours a day. Missouri Extension guidance pushes that to 14 hours daily for re-blooming results, with lights positioned 8 to 12 inches above the plant. Either approach works well. A basic shop-light timer costs very little and takes the guesswork out completely.
Keep your plant away from cold drafts, heating vents, and air conditioning units. Temperature swings stress the plant more than most people realize. You want a stable, warm spot. Once you have that, you're already ahead of 90% of first-time growers.
- North or east-facing windowsill for natural light (no direct afternoon sun)
- Fluorescent or LED grow light fixture set 8 to 12 inches above the plant
- Timer set to 12 to 14 hours of light per day
- Location away from heating vents, air conditioning, and cold windowpane drafts
- A stable spot where you'll see the plant daily (this helps you catch watering and pest issues early)
Soil and potting: best containers and growing medium
African violets are fussy about their roots, and the biggest mistake beginners make is planting them in regular potting mix. Standard potting soil holds too much moisture, compacts over time, and smothers the roots. What you want is a light, airy, well-draining mix that never stays soggy.
The simplest and most proven recipe is equal parts sphagnum peat moss, perlite, and vermiculite. That's the formula recommended by multiple African violet societies, including the Albuquerque African Violet Club and the Burbank African Violet Society. It drains fast, holds just enough moisture, and lets the roots breathe. You can buy pre-made African violet mix at most garden centers, which typically contains these same ingredients. If you mix your own, keep the ratios equal and you'll have an excellent medium.
Container choice matters too. African violets bloom better when slightly root-bound, so avoid oversizing the pot. The AVSA's guidance is practical: the roots of a fully mature standard-size plant typically reach about one-third of the leaf span, and you should size the pot to match that root zone, not much larger. For most standard varieties, a 4-inch pot is a good starting point. Self-watering pots with a reservoir work well because they deliver moisture from the bottom, which is exactly the watering method these plants prefer. Plastic pots retain moisture longer than terracotta, which matters in dry indoor environments.
Light, temperature, and humidity basics for blooming

Light is the single biggest driver of whether your African violet blooms or just sits there looking green. Virginia Tech extension notes that light intensity directly affects flowering quality, and the AVSA confirms that a plant getting the right light will grow as a flat horizontal rosette and flower frequently. If your plant is stretching upward toward the light source, or the leaves are dark green and drooping, it isn't getting enough light. If you see pale, washed-out leaves, it's getting too much direct sun.
Temperature is the next piece. African violets in the wild experience temperatures from the low 60s to the 80s Fahrenheit. The African Violet Society of Canada recommends daytime temperatures of 70 to 80°F (21 to 27°C) and nighttime temperatures of 60 to 70°F (16 to 21°C). Most comfortable living spaces fall right in that range, which is one reason these plants thrive indoors. What kills them is cold: anything below 55°F stresses the plant, and leaving a pot touching a cold windowpane in winter can cause real damage.
Humidity is where a lot of indoor growers run into trouble, especially in winter when heating systems dry the air out. African violets prefer 50 to 60% relative humidity, though they'll manage in the 40 to 70% range. In nature, they experience 30 to 60% humidity, so they're not impossible to satisfy. If your home is dry in winter, a warm-mist humidifier near your plant stand makes a big difference. Doctor Optimara specifically recommends warm-mist humidifiers in winter so you raise humidity without dropping air temperature. Grouping several plants together also helps, since plants release moisture as they transpire.
| Condition | Ideal Range | Warning Signs If Off |
|---|---|---|
| Light (artificial) | 12–14 hours/day, 8–12 inches below tubes | Stretching toward light = too little; bleached leaves = too much direct sun |
| Daytime temperature | 70–80°F (21–27°C) | Below 55°F causes stress and stunted growth |
| Nighttime temperature | 60–70°F (16–21°C) | Cold drafts near windows are a common hidden culprit |
| Humidity | 50–60% (40–70% acceptable) | Dry curling leaf edges; poor bloom set in very dry conditions |
Watering and drainage: how to avoid the most common mistakes
Watering is where most African violets die. It's not that they need some complicated schedule, it's that overwatering and poor drainage lead to crown rot and root rot fast, especially in cool indoor conditions. Pythium and Phytophthora fungi thrive in wet, poorly drained soil and can destroy a plant in days once they take hold. The rule is simple: the soil should feel barely moist, not wet, and never sitting in standing water.
Bottom watering is the preferred method for most growers. You set the pot in a shallow tray or basin of room-temperature water and let the plant absorb moisture up through the drainage holes. The AVSA notes this can take a couple of hours, so don't rush it, but don't leave the pot sitting in water overnight either. Once the top of the mix feels just barely moist, take the pot out and let it drain. Bottom watering also prevents water from sitting on the leaves and crown, which causes rot and unsightly spots.
Top watering is fine too, as long as you avoid getting water on the leaves and you water thoroughly enough that it flows out the drainage holes. The AVSA points out that thorough top watering actually does something useful: it pushes accumulated fertilizer salts out through the drainage water, which is good for root health over time. The key word is thorough. A light dribble that barely wets the top inch is worse than not watering at all, because it keeps the surface soggy while the roots below stay dry.
Always use room-temperature water. Cold water on the leaves or roots can cause spots on the foliage and stresses the plant. Connecticut's CAES plant pest handbook specifically ties tepid water to preventing rot issues. Let tap water sit for an hour or two before using it, or use filtered water if your tap water is heavily chlorinated.
- Water when the top quarter of the potting mix feels dry, not on a fixed daily schedule
- Use room-temperature water (never cold straight from the tap)
- Bottom-water by setting the pot in a shallow tray for up to 2 hours, then drain thoroughly
- If top-watering, direct water at the soil, not the crown or leaves
- Never leave the pot sitting in standing water after watering is complete
- Flush the pot with plain water from the top once a month to remove salt buildup
Feeding and care routine for healthy growth
African violets are light feeders, but they do need regular fertilizing to keep blooming consistently. The AVSA recommends fertilizing with every watering, but at a reduced concentration: if the fertilizer label says to use a full dose monthly, cut it to one-quarter strength and use it weekly instead. On the African violet subreddit, multiple growers describe fertilizing with diluted solution, like using quarter strength fertilizer with every watering, as a practical way to manage frequency and strength fertilizing with every watering. This slow-and-steady approach avoids the nutrient spikes and salt buildup that come from occasional heavy doses.
For general growth and health, a balanced fertilizer like a 20-20-20 works well. When you specifically want to push blooming, switch to a phosphorus-forward bloom booster formula, such as a 12-36-14 blend. The higher phosphorus content encourages flower production. You don't need to stay on the bloom booster year-round, but using it for a few weeks when the plant seems reluctant to set new buds can get things moving again.
Over-fertilizing is a real and common problem. The AVSA flags it clearly: if you see yellow spots or yellowing around the edges of older leaves, you're feeding too heavily and should cut back immediately. Salt buildup from fertilizer residue is a related issue. Lyndon Lyon Greenhouses and the African Violet Magazine both recommend running plain water through the pot from the top once a month to flush accumulated salts. That monthly flush is one of the simplest maintenance habits you can build, and it pays off in healthier roots and better blooms.
Beyond watering and feeding, grooming is easy but worthwhile. Remove spent flower stalks and any dead or yellowing leaves as they appear. This keeps the plant looking tidy and redirects energy toward new growth and flowers. You don't need to prune aggressively; just clean up what's dying.
Repotting, propagation, and keeping plants flowering
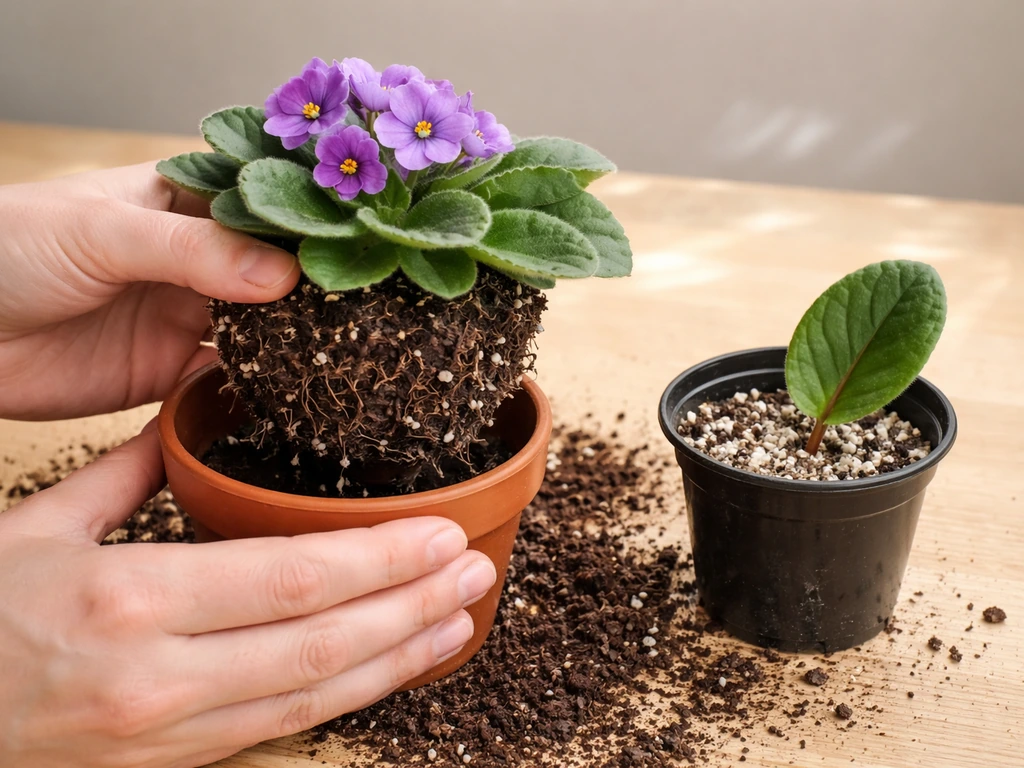
African violets need repotting roughly once a year, even if they haven't outgrown their container. The AVSA recommends it specifically to refresh the potting mix and reduce salt buildup that accumulates over time. When you repot, use fresh mix (your 1:1:1 peat, perlite, vermiculite blend) and position the plant so the lower leaves sit about one-quarter to one-half inch above the soil line. Getting the crown depth right matters: too deep and the crown rots, too shallow and the plant becomes unstable.
Propagation from leaf cuttings is one of the most satisfying things about growing African violets, and it's genuinely easy. For more on getting new plants from leaf propagation, see how to grow violets from leaves for step-by-step tips and timing. The AVSA says cuttings root and grow year-round.
Take a healthy leaf with its stem, and either root it in a small container of water or plant it at a 45-degree angle in a moistened 50:50 mix of vermiculite and coarse sand, as Iowa State Extension recommends. If you go the water route, transfer the cutting to a small pot of loose moist mix once roots reach about one-quarter inch long. Cover the cutting with a clear plastic bag or dome to reduce moisture loss while it roots.
Virginia Tech notes it takes about 6 to 9 months to get a flowering plant from a leaf cutting, so be patient. Once you see small plantlets forming at the base of the leaf, those can be separated and potted individually.
To keep mature plants blooming consistently, light and feeding are your main levers. Make sure the light duration and intensity are on point (those 12 to 14 hours of artificial light really do make a difference), keep the monthly salt flush going, and don't let the plant sit in a pot that's significantly too large for its root system. A slightly root-bound plant blooms better than one swimming in excess soil.
Troubleshooting indoor problems (no blooms, leggy growth, pests)
No blooms
This is the most common complaint, and it's almost always a light problem. If your plant hasn't flowered in several months, check whether it's getting enough hours of adequate light. A plant in a dim corner or near a window that only gets a couple of hours of weak light won't bloom no matter what else you do. Move it closer to a light source or add a grow light. If light isn't the issue, check your fertilizer: a plant that's getting too much nitrogen-heavy fertilizer will grow plenty of lush leaves and no flowers. Switch to a phosphorus-forward bloom booster temporarily and reduce the nitrogen input.
Leggy growth and stretched stems
Leggy growth, where the plant stretches upward with elongated stems instead of forming a compact rosette, is a direct response to insufficient light. The plant is reaching for a light source it can't quite reach. Bring the plant closer to the light or increase your daily light hours. If the leaf stems (petioles) are very elongated, you may also need to repot and reset the crown depth to get the rosette back to a compact shape.
Crown rot and root rot
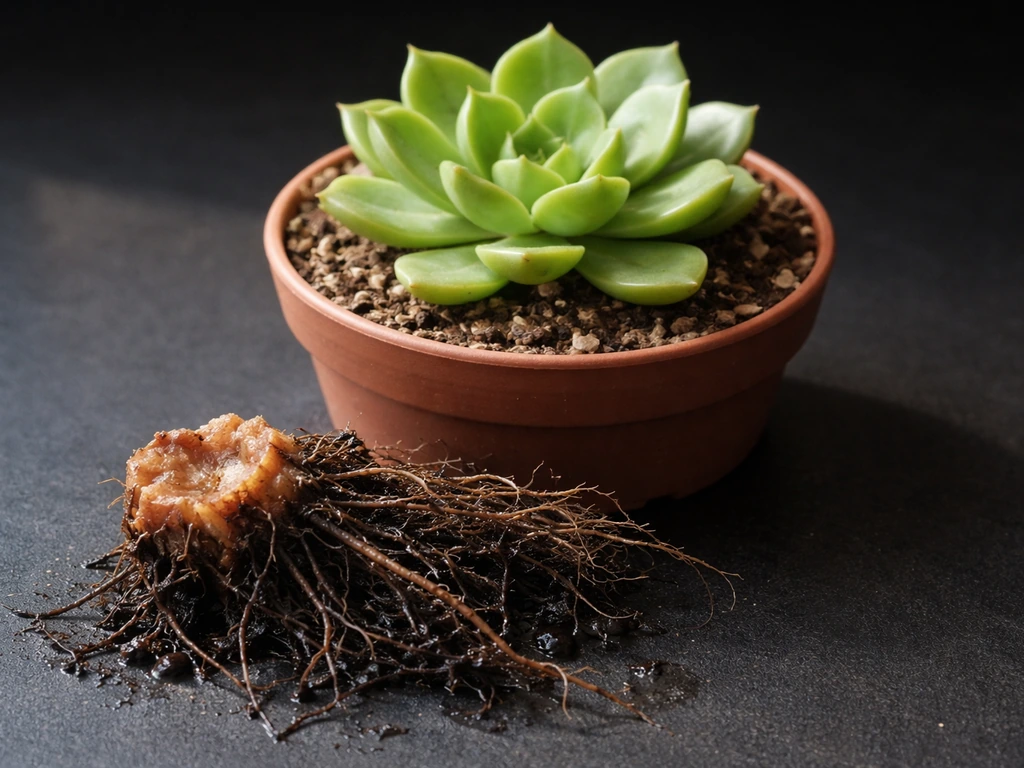
Crown and root rot are the most serious problems you'll face, and they're almost always caused by overwatering, poor drainage, or cool wet conditions. Clemson University extension describes the classic sign: the crown and roots become soft and mushy. Once rot sets in that far, recovery is difficult. Prevention is everything here. Make sure your pot has drainage holes, never leave the plant sitting in water, and let the mix dry slightly between waterings. If you catch rot early (just slight softness at the crown base), you can sometimes save the plant by cutting away the affected tissue with a clean blade, dusting with powdered sulfur or a fungicide, and repotting in fresh dry mix.
Pests: thrips and fungus gnats
Thrips are small, fast-moving insects that the AVSA identifies as a major African violet pest. They feed on flower buds, which can disappear or fail to open properly. If you see distorted or missing buds, check for thrips by looking closely at the blooms and undersides of leaves. Insecticidal soap or spinosad-based sprays are effective treatments.
Fungus gnats are the other common nuisance, and they're tied directly to overly moist soil. Their larvae feed on roots and organic matter in the potting mix. Letting the mix dry out more between waterings disrupts their life cycle, and yellow sticky traps catch the adults. Keeping your collection clean, removing dead leaves promptly, and avoiding waterlogged soil goes a long way toward keeping both pests at bay.
Leaf spots and discoloration
White or yellow rings on leaves are almost always caused by cold water touching the leaf surface. Use room-temperature water and be careful when watering from the top. Yellow edges or spotting on older leaves that isn't water-related usually signals fertilizer overload, so ease off the feeding concentration. Brown, crispy leaf tips often point to low humidity or salt burn at the roots, both of which the monthly plain-water flush helps correct.
Your starting plan for today
If you're just getting started, here's what to do right now. Find a bright spot away from drafts, or pick up an inexpensive fluorescent or LED grow light and a timer. Get a small pot (4 inches for a standard plant) with drainage holes and mix up or buy an African violet-specific potting mix.
Plant your violet so the crown sits just above the soil line, set up your light for 12 to 14 hours a day, and water from the bottom with room-temperature water the first time. Start feeding at quarter-strength balanced fertilizer weekly once the plant settles in, plan a monthly plain-water flush, and check on it every few days.
When you grow violas, the timing matters just as much as the light, so start with the right season and expectations for blooming.
African violets are genuinely one of the most rewarding indoor flowering plants once you understand their needs. They're nothing like outdoor violets or violas, which have completely different growing conditions and seasonal requirements. If you want violets outdoors, check out how to grow violets in your yard next outdoor violets. When to grow violas depends mostly on your climate, but many gardeners start them in cool weather for best results. These plants want a stable, warm, well-lit indoor environment, and when you give them that, they'll reward you with blooms almost year-round. The learning curve is short, and the mistakes are usually fixable. Start simple, get the light and watering right first, and the rest follows.
FAQ
Can I grow African violets without a window if I use a grow light?
Yes. African violets can live under LED or fluorescent grow lights, but they still need a “day length” routine. Use a simple timer and keep lights on 12 to 14 hours daily, then rotate the pot a quarter turn every week so the rosette stays even and doesn’t lean toward one side.
What water should I use for African violets, and does tap water matter?
If you’re using tap water, let it sit 1 to 2 hours before watering to let temperature and some chemicals stabilize. If your leaves develop recurring spotting or the potting mix starts forming a crust, switch to filtered water and increase your monthly plain-water flush to remove fertilizer salts.
My African violet is growing leaves but no flowers, what should I check first?
It’s usually a symptom, not a root issue. First confirm light (pale leaves can mean too much direct sun, dark droopy growth means too little). Then check fertilizer type and rate, too much nitrogen can prevent buds even when the plant looks healthy, switch temporarily to a phosphorus-forward bloom formula and keep the strength at quarter dose.
How do I fix an African violet that won’t bloom even with the right light?
A slightly tight pot is good, but don’t keep them in the same mix forever. If it’s been about a year since repotting, refresh the potting medium and verify crown depth (lower leaves should sit about a quarter to half inch above the mix). Also ensure you’re watering correctly, soggy mix can stop flowering even when light seems adequate.
Why do my leaves get brown tips or crispy edges?
Brown, crispy tips often come from low humidity or salt stress at the roots. To troubleshoot, look at the watering pattern first, let the mix dry slightly between waterings, then do the monthly plain-water flush from the top (enough to run out drainage) to wash out residue.
How long should I bottom water my African violet?
If you’re bottom watering, don’t leave the pot sitting in water after the mix is evenly re-moistened. A common mistake is “topping up” water in the tray repeatedly, which keeps the crown and roots too wet. Use room-temperature water, wait until the top feels barely moist, then drain.
Is top watering ever better than bottom watering for African violets?
Yes, but only if you do it carefully. Thorough top watering that runs out of the drainage holes is fine because it flushes fertilizer salts down and out. Avoid any routine where water only wets the top inch, that can keep the surface damp while roots stay under-watered and prone to pest problems.
Can I keep an African violet on a windowsill year-round?
For most growers, a single bright spot near a window can work, but drafts and uneven intensity cause issues. If your plant is near a cold window, keep the pot a bit away from the glass in winter. In summer, use sheer light or move it back from direct afternoon rays to prevent leaf bleaching.
What should I change in winter to prevent crown rot and stress?
During cool weather, avoid watering right before the plant sits in colder conditions. If your home drops below about 55°F, reduce watering frequency, ensure the pot has good airflow, and keep the plant off cold surfaces like window ledges to prevent crown stress.
How can I tell if my problem is thrips or fungus gnats?
Thrips often hide in buds and flower undersides, and fungus gnats persist when the mix stays wet. Treat both directions: let the mix dry slightly more between waterings, use yellow sticky traps for adults, remove dead leaves, and apply an appropriate treatment like insecticidal soap or spinosad to affected plants.
Should I prune African violets to make them bushier and flower more?
Start by checking light and fertilizer, then use a practical “health rule”: remove only dead or yellowing leaves, don’t bury the crown deeper, and repot only when the mix is old or the crown depth needs resetting. If stems become very elongated, the fix is usually light increase plus correcting crown position at the next repot.
When propagating from leaf cuttings, what mistakes most often stop them from rooting?
African violet leaf cuttings usually root best with steady warmth and high humidity around the cutting. Keep the dome or plastic bag in place until you see new growth, and avoid overwatering the rooting mix since it can rot the cutting. After roots are about a quarter inch, move to loose moist mix in a small pot.