Growing morning glory is one of the most rewarding things you can do in a flower garden, and honestly, it is also one of the easiest. If you are looking for a leaf-propagation project instead, learn how to grow gloxinia from a leaf and what conditions it needs to root and sprout Morning glories. You sow the seeds directly in the ground, point them at a sunny fence or trellis, and within a few weeks you have a fast-climbing vine covered in trumpet-shaped flowers every single morning. That said, there are a few things that trip people up, from planting too early to over-fertilizing and getting all leaves with no blooms. This guide covers everything in the order you actually need it, so you can start today with confidence. If you want a quick checklist for what do morning glories need to grow, this section should line up with the basics: light, soil, watering, and support.
How to Grow Morning Glory Plant: Best Way for Flowers

What kind of plant is a morning glory, really?
Before anything else, a quick note for anyone searching 'how to grow morning glory vegetable': morning glory the flowering vine and morning glory the vegetable (water spinach, Ipomoea aquatica) are different plants in the same genus. The flowering ornamental vines covered here, primarily Ipomoea tricolor and Ipomoea purpurea, are grown for their spectacular blooms, not for eating. If you are after the edible leafy green, the cultivation is quite different. This guide is all about the flowering vine you train up a trellis.
Most morning glories grown in home gardens are fast-growing, twining annual vines. BBC Gardeners World describes morning glory as a frost-tender annual climber, so it needs warmth to grow well. In frost-free climates they can behave more like short-lived perennials, resprouting or self-sowing aggressively, but for the vast majority of gardeners they are treat-them-as-annuals plants. They bloom from early summer right through the first fall frost, which gives you a seriously long display window. The vines themselves grow quickly, reaching 8 to 10 feet tall and spreading 3 to 6 feet wide at maturity, so they are genuinely useful for covering fences, pergolas, mailbox posts, or any vertical structure you want to dress up fast.
Varieties worth knowing

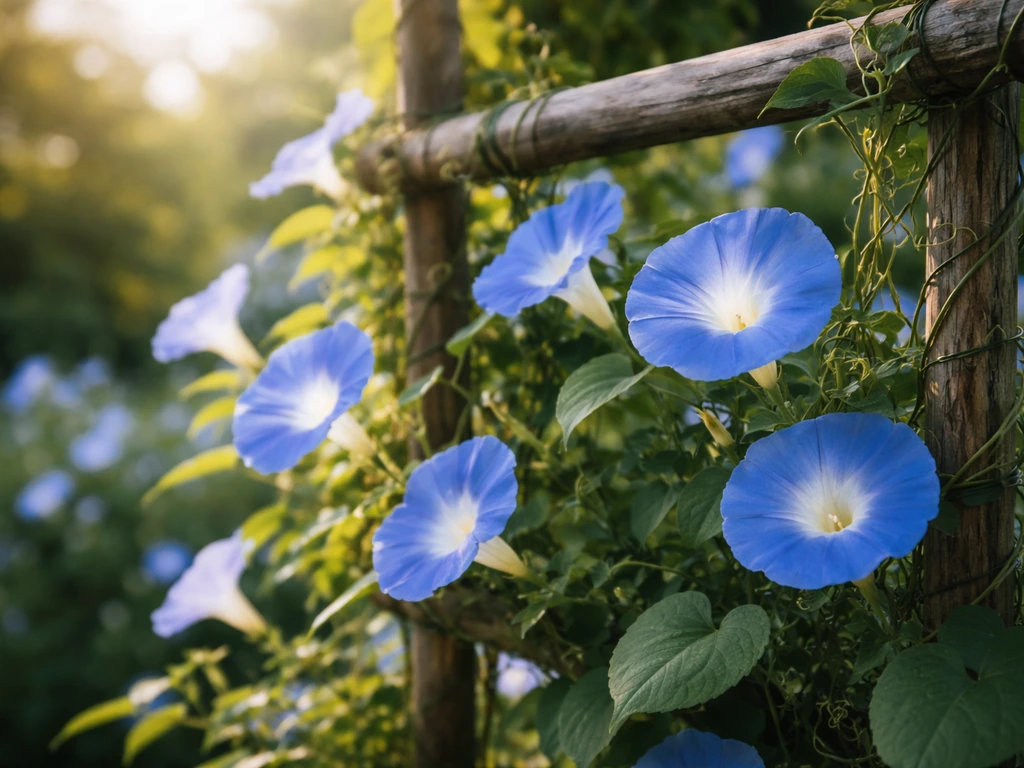
'Heavenly Blue' (Ipomoea tricolor) is the classic for a reason. The flowers are a clear, vivid sky blue with a white throat, they open fresh every morning, and the vine is vigorous without being unmanageable. It is described everywhere from BBC Gardeners World to Park Seed as the benchmark ornamental climbing annual, and that reputation is deserved. If you want something different, 'Grandpa Ott' is a deep purple with a red star, 'Scarlett O'Hara' is crimson, and Ipomoea purpurea mixed types give you a range of pink, purple, and white. For a deep dive into 'Heavenly Blue' specifically, there is a dedicated guide on this site worth checking out. But for most beginners, any good named variety beats an unlabeled seed mix.
Picking the right spot: sun is non-negotiable
Morning glories need full sun, and I mean that in the strictest sense. Cornell's plant science research notes that some morning glory types are literally unable to flower in shade. That is not an exaggeration for emphasis, it is a real physiological constraint. If you plant these vines on the north side of a building or under a tree canopy and wonder why you get nothing but green leaves, that is your answer. Aim for a spot that gets at least 6 hours of direct sun per day, and 8 hours is better. South-facing or west-facing fences and walls are ideal.
Beyond sun, think about air circulation. Morning glories planted in a tight, humid corner are more prone to powdery mildew later in the season. A spot with good airflow gives the vine room to breathe, which matters once it really fills in. Also consider where the vine will climb. You need a structure in place before the seedlings take off, not after, so plan the site around your support as much as around sunlight.
Soil, sowing timing, and getting seeds in the ground
Morning glories are not fussy about soil fertility, and this is actually important to understand. They prefer lean to moderately fertile, well-drained soil. Rich, heavily amended beds push them into producing foliage at the expense of flowers. If your bed already has good drainage and decent organic matter, you do not need to do much before planting. Loosen the top few inches, break up any compaction, and you are ready.
When to sow
Direct sow after your last frost date, once the soil has warmed. Morning glories hate cold, wet soil and will simply rot or sit there doing nothing if you rush them. For most of the US, this means late April through May, though in warmer zones you can sow as early as March or push into early summer if you missed the window. They grow fast enough that a June sowing in zone 6 will still give you a full summer of blooms.
Seed prep: the step most people skip
Morning glory seeds have a hard seed coat that can slow or prevent germination if you just drop them in the ground as-is. Do yourself a favor and either nick the seed coat with a nail file or small knife at the pointed end (not the rounded end), or soak the seeds in warm water for up to 12 hours before sowing. Both methods work, and combining them works even better. I usually do a quick nick and then a 6-hour soak the night before I plan to plant. You will see the seeds swell visibly, and germination is noticeably faster and more even.
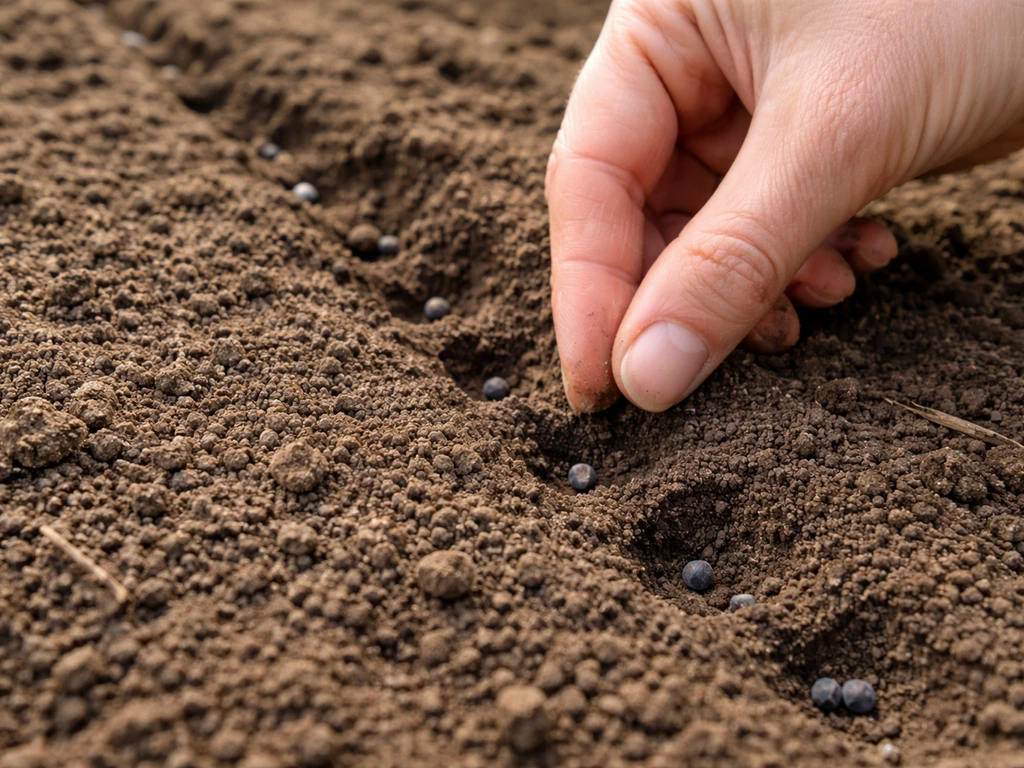
Planting depth and spacing
Sow seeds about 1/4 to 1/2 inch deep. The UC Master Gardeners recommend 1/4 inch, while some suppliers suggest up to 1/2 inch, and both work fine. The key is not to bury them so deep that the seedling can't push through. UC ANR’s UC IPM notes that tall morningglory seeds can germinate at deeper depths, around 4 inches (10 cm) or more, which is influenced by the seed’s hard-seed traits blank" rel="noopener noreferrer">seeds germinate at deeper depths. Space seeds 8 to 12 inches apart for a full, lush coverage of a trellis, though you can tighten to 4 to 6 inches if you want denser lower coverage. After sowing, keep the soil consistently moist until germination, which typically takes 5 to 14 days depending on soil temperature. Once seedlings are up, you can ease off.
Containers vs. in-ground
Morning glories can grow in containers, but they really do best in the ground where roots can run. If you go the container route, use a pot that is at least 12 inches deep and wide, use a well-draining potting mix rather than heavy garden soil, and plan to water more frequently since containers dry out fast. You will also need a trellis or stake in the pot. In-ground plants in a decent garden bed will outperform container plants almost every time, so if you have the option, plant them in the ground.
Watering and fertilizing: less is more, but timing matters
Once morning glories are established, they are genuinely drought tolerant. Overwatering is a more common problem than underwatering for most gardeners, and it tends to produce the same symptom as too much nitrogen: lush, beautiful green vines with very few flowers. Water deeply but infrequently, letting the top inch or two of soil dry out between waterings. During hot, dry stretches water once or twice a week. During cooler or wetter periods, back off. Young seedlings need more consistent moisture until they have a real root system, so for the first few weeks after germination keep things evenly moist without letting the soil get waterlogged.
Fertilizing morning glories is where a lot of people go wrong, and I have made this mistake myself. The temptation is to feed them a balanced fertilizer or something high in nitrogen to encourage growth, but nitrogen is exactly what produces all that leafy vine and suppresses flowering. If you have reasonably fertile soil, you may not need to fertilize at all. If your soil is genuinely poor, a single application of a low-nitrogen, phosphorus-forward fertilizer in mid-season is more than enough. Phosphorus supports root development and flowering, which is exactly what you want. Skip the weekly Miracle-Gro routine entirely. It will give you a jungle of leaves and almost no blooms.
Training, pruning, and keeping things tidy
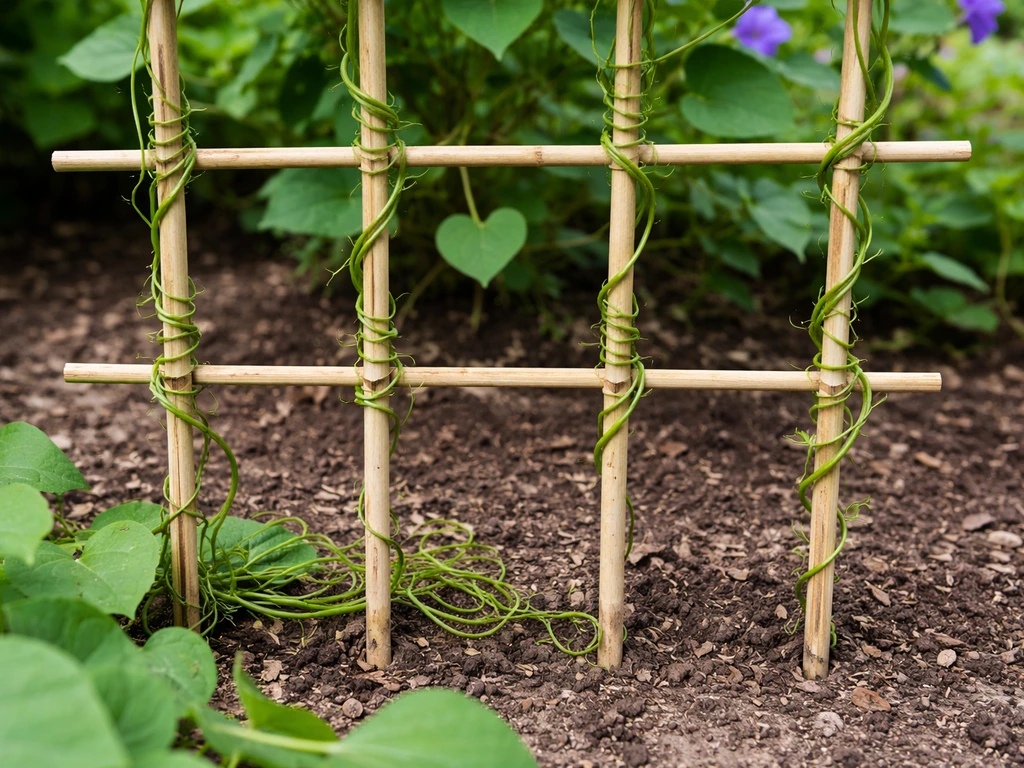
Morning glories are twining vines, meaning they wrap their stems around supports rather than gripping with tendrils or clinging pads. This means the support needs to be something they can actually wrap around: wire, string, thin wooden stakes, bamboo poles, or chain-link fencing all work well. A smooth flat board or wide post is harder for them to grip. Get your trellis or support in place before the seedlings are more than a few inches tall, because once they start searching for something to climb, they should find it immediately.
For a vine that reaches 8 to 10 feet, plan your support accordingly. A standard 4-foot garden stake is not going to cut it. A sturdy trellis, a section of cattle panel, or even a few tall bamboo poles lashed together at the top in a teepee shape will work much better. Once the vine gets going, it will find its own way up. In the early weeks, you may need to gently redirect a few shoots toward the support, but after that they handle themselves.
Pruning morning glories is not really a required task the way it is for some other flowering plants. You can pinch back the growing tips when seedlings are about 6 inches tall to encourage branching and a bushier base, which ultimately gives you more flowering stems. Beyond that, removing spent flowers (deadheading) is optional since morning glories are fairly self-cleaning and the spent blooms drop on their own. If the vine gets out of hand or starts going somewhere you do not want it, cut it back hard, it will recover quickly.
Pests and diseases to watch for
Morning glories are relatively trouble-free, but a couple of issues do come up. Aphids and spider mites are the most common pests, and the good news is that the first line of defense is simply a strong blast of water from your hose. This is called syringing, and it physically knocks the insects off the plant and disrupts their colonies without any chemical intervention. Check the undersides of leaves if you notice distorted new growth or a fine webbing, both of which are classic signs of these pests. Repeat the water spray every few days until the problem clears.
Powdery mildew shows up as a white, powdery coating on the leaves, usually in late summer when days are warm and nights are cooler. It looks alarming but rarely kills a morning glory vine. Improving air circulation around the plant, watering at the base rather than overhead, and removing the worst-affected leaves all help. If the infection is severe, a neem oil spray applied in the evening can slow its spread. The vine will likely finish out its season regardless.
Why won't my morning glory bloom?
This is the most common troubleshooting question, and the answer is almost always one of three things: not enough sun, too much nitrogen, or the plant is simply not old enough yet. Morning glories take several weeks from germination before they set flower buds. If yours are lush and green but flowerless in June after a May sowing, give them another few weeks before worrying. If it is July and still nothing, examine your sunlight and your fertilizer history. Cutting out any nitrogen feeding and making sure the plant gets unobstructed full sun for most of the day usually solves the problem within a couple of weeks.
Through the season and into fall: what to do as summer winds down
Morning glories bloom continuously from early summer through the first frost, and unlike some annual flowers they do not need deadheading to keep performing. Your main job through midsummer is to keep the vine pointed in the right direction, water during dry spells, and enjoy the show. The flowers open in the morning and close by afternoon, which is completely normal and not a sign of stress.
As the season shifts and nights get cooler, flower production may slow slightly, but the vine keeps going right up until frost. Once frost hits, the vine dies back quickly and dramatically. At that point, you have two options: pull it and compost it, or let it dry completely on the trellis and collect seeds for next year.
Saving seeds for next year
Saving morning glory seeds is genuinely easy and worth doing. After flowering, the vine produces small round seed pods. Let these dry completely on the vine until they turn papery and brown. Then collect them into a paper bag, not a plastic bag, since you want moisture to continue escaping. Once you are inside, crack open the pods and separate out the seeds. To store them properly, put them in an envelope or small airtight jar with a small packet of desiccant to absorb any residual moisture, then store in a cool, dark, dry location. A drawer or cabinet away from the stove works well. Seeds stored this way will be viable for the next growing season and often beyond.
One thing to be aware of with seed saving: if you grew multiple morning glory varieties near each other, the seeds may produce crosses that look different from the parent plant. That can be a fun surprise or a disappointment depending on your expectations. If you want true-to-type plants next year, either grow one variety or buy fresh seeds.
Quick reference: morning glory at a glance
| Factor | Recommendation |
|---|---|
| Sun requirement | Full sun, minimum 6 hours (8+ is better) |
| Sowing time | After last frost, soil warmed; late April to early June in most zones |
| Seed prep | Nick seed coat and/or soak in warm water up to 12 hours before sowing |
| Planting depth | 1/4 to 1/2 inch deep |
| Spacing | 8 to 12 inches apart (4 to 6 inches for denser coverage) |
| Mature vine size | 8 to 10 feet tall, 3 to 6 feet wide |
| Watering | Deep but infrequent once established; drought tolerant at maturity |
| Fertilizing | Minimal or none; avoid high-nitrogen feeds; use phosphorus-forward if needed |
| Support | Trellis, wire, string, or stakes at least 6 to 8 feet tall |
| Common pests | Aphids, spider mites; treat with strong water spray |
| Common disease | Powdery mildew; improve airflow, avoid overhead watering |
| Bloom season | Early summer through first fall frost |
| Seed saving | Collect dry pods into paper bag, store seeds with desiccant in cool dark place |
The bottom line is that morning glories reward a light touch. Give them full sun, lean soil, infrequent deep watering, and a sturdy structure to climb, then mostly leave them alone. The gardeners who struggle with morning glories are almost always the ones who fertilize too heavily or plant in too much shade. Get those two things right and you will have vines covered in flowers from summer to frost with very little ongoing effort. If you want to go deeper on specific varieties or get more detail on what these plants need to thrive, the guides on growing 'Heavenly Blue' specifically and on <a data-article-id="F435DE42-A131-4E4E-905F-F80BE7A46FCF">what morning glories need to grow</a> are worth reading alongside this one.
FAQ
Can I start morning glory seeds indoors, or is direct sowing always best?
Yes, but start seeds indoors only if you can keep roots from being disturbed, since morning glories hate transplanting. If you must, sow in biodegradable pots or deep cells, keep them warm and sunny, then plant outdoors after soil warms and frost risk is gone.
Are morning glory plants safe to grow around kids and pets?
Most morning glories are poisonous if eaten, and their milky sap can irritate skin for some people. Keep pets and children away, and avoid using saved seed if you cannot confirm the plant type you intended to grow.
Why did my morning glories stop blooming during a hot, dry spell?
Watering while the vine is setting buds matters. If it is too dry after flowering begins, some blooms may drop early, so aim for deep watering (not frequent splashing) and let the top layer dry slightly between waterings.
My vines are growing fast but I never get flowers. What should I check first?
If seedlings look vigorous but never flower, the most common causes are insufficient direct sun (especially shaded fences) and excess nitrogen from compost-heavy beds or regular feeding. Another check is plant age, since buds usually come several weeks after germination.
How can I tell if my soil is too rich for morning glories?
Dense foliage can also come from growing in very rich soil or using bloom fertilizer that still has a high nitrogen component. If you amend the bed, do it lightly (top dressing rather than mixing in large amounts) and avoid nitrogen boosters like manure or lawn fertilizer.
What fertilizer should I use if my soil is poor, and how much is too much?
Yes. Use a low-nitrogen, phosphorus-forward option, and apply sparingly mid-season only if the bed is truly poor. Avoid follow-up feedings, since repeated fertilizing tends to trade flowers for leaves.
What’s the best way to prevent powdery mildew on morning glories?
For powdery mildew, the quickest improvement usually comes from airflow and watering technique. Water at the base, avoid wetting leaves, thin any crowded growth for ventilation, and remove the worst leaves before the problem spreads.
My morning glory seeds are slow to germinate, what should I do?
Seed coat treatment can help, but you may also need warmth. If nights are still cool, germination can stall, so wait for consistently warmer soil and keep the top inch moist until sprouts appear.
How do I avoid ruining saved morning glory seeds?
Let the seed pods dry fully until they are papery and brown, then store seeds dry. If you use a plastic bag, seeds can retain moisture and mold, especially if your storage area is humid.
Will morning glories spread or take over my garden, and how do I control that?
They can take over quickly, especially in frost-free areas where they behave like short-lived perennials. Plan to remove volunteers early, and if you want to keep them contained, grow on a single trellis plane and monitor self-sown seedlings.
Can I grow morning glories in containers without losing most of the blooms?
You usually can, but choose a container big enough to avoid rapid drying (at least 12 inches deep and wide) and use a trellis in the pot. Expect fewer flowers than in-ground plants because containers dry out and heat up faster.
What kind of support works best if I want them to climb reliably from day one?
If you need a trellis that is easier to grip, choose wire or thin poles that the twining stems can wrap around. Smooth posts can work, but you may need to tie or redirect early shoots until the vine establishes itself.